Nowadays in times of Covid, the number of online meetings is rising compared to presence meetings. This is the fact not only in the professional work, also in private collaboration areas like team oriented work, union/club meetings, etc. online meetings are done more and more.
Well known meeting tools are Skype, MS Teams, Jitsi (free and open source).
In the case of hosting a Nextcloud or ownCloud server, the app “Talk” (Nextcloud Talk resp. ownCloud Talk) are an option to have an own online meeting server so that one do not need to rely on other servers and do not need to use non open source software.
This article shall show how to setup an own meeting server at the example of Nextcloud Talk.
Remark: The article is an extended translation of the original german article “Nextcloud Talk unter DietPi” from Holger Erbe (LOGIN SystemHaus GmbH) which can be found in his LOGIN Techblog.
Additionally he generated a Youtube video about this issue.The basic translation was done with www.DeepL.com/Translator (free version)
Introduction
Using DietPi, it is very easy to install Nextcloud and Nextcloud Talk. The installation of Nextcloud resp. Nextcloud Talk under other Linux distributions requires some “manual work”, but under DietPi this runs fully automated which makes life much easier.
Prerequisites
To set up and use Nextcloud Talk, these prerequisites are required:
- A basic DietPi installation
- An own Domain name
This can be either a dynamic DNS address or a fixed domain name. In this example a dynamic one under No-IP is used. - An SSL certificate
- Port redirections on the router (in this example on a FritzBox)
In this example DietPi was installed under Proxmox. It also works on a Raspberry Pi 4 or on a Native PC resp. other SBCs (see there).
The given example starts from a fresh DietPi installation. Nothing is installed except for the minimal system. Only a fixed IP was assigned in the network settings, which is generally recommended. If necessary, also the hostname can be changed.
Installation steps
Step 1: Nextcloud Talk installation
In this step Nextcloud Talk and – if not already installed – Nextcloud is installed.
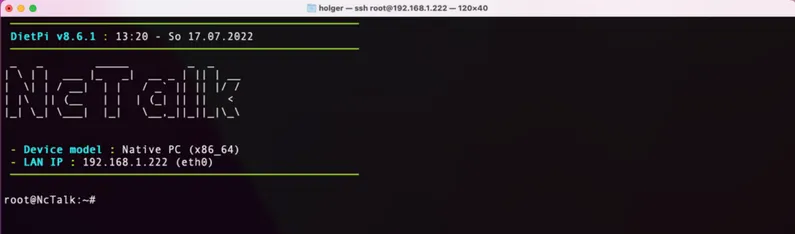
The first step is a login to the DiePi console (locally or via ssh):
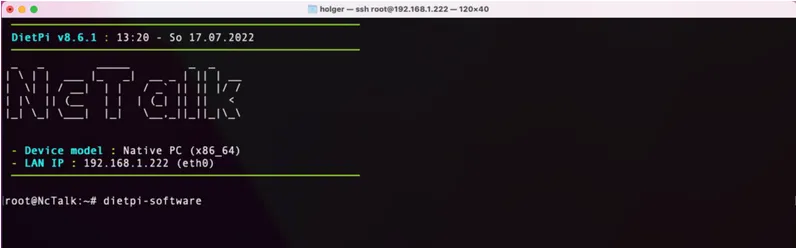
Then dietpi-software is started:
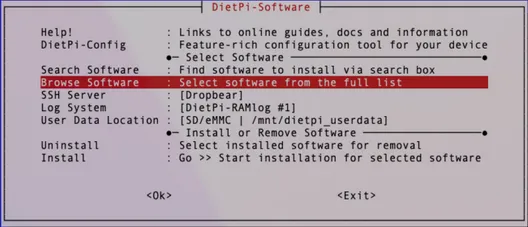
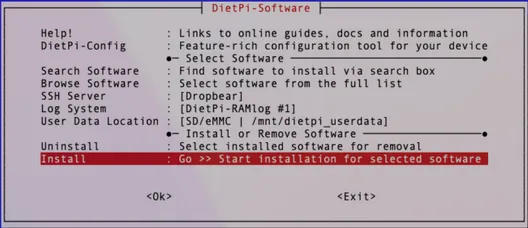
Within dietpi-software Browse Software has to be chosen:
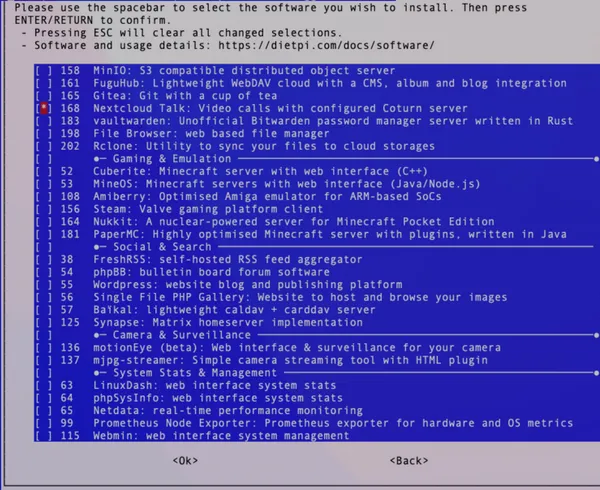
In the package list, package 168 – Nextcloud Talk is selected. This will install Nextcloud Talk and – if not already installed – also Nextcloud.
As next, Install is selected and the installation procedure is started with ENTER :
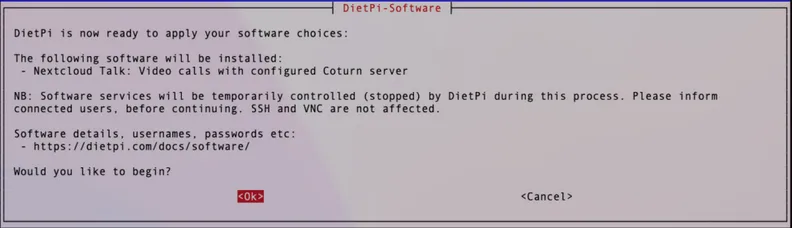
The start of the installation needs to be acknowledged within the following dialog with Ok:
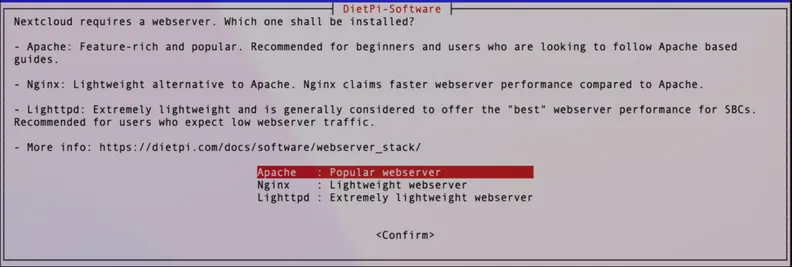
During the installation the used webserver has to be chosen. At this time Apache has to be selected:
Then a domain name is entered. This is needed to be able to access to Nextcloud Talk from outside the local network (in the example it is a NoIP DDNS name):

In the following dialog the port for the TURN server is entered. If this port is not used yet, the default value (3478) can be kept.

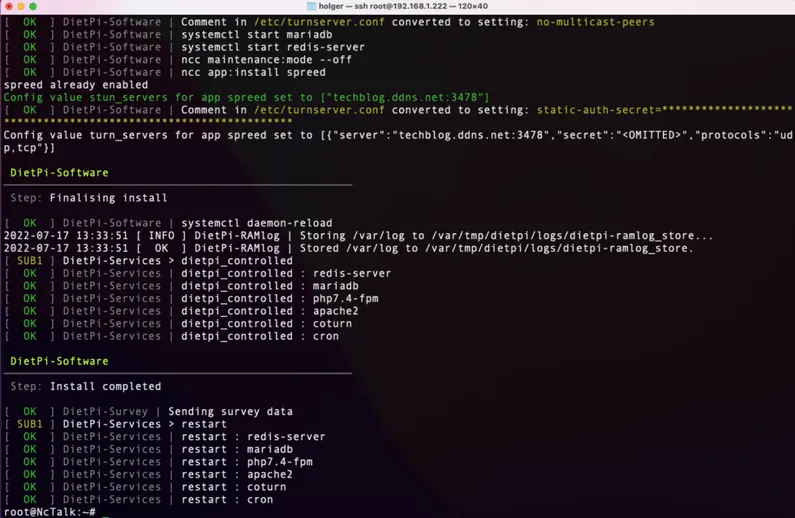
Then the basic installation part starts. If it is finished, DietPi responds like follows:
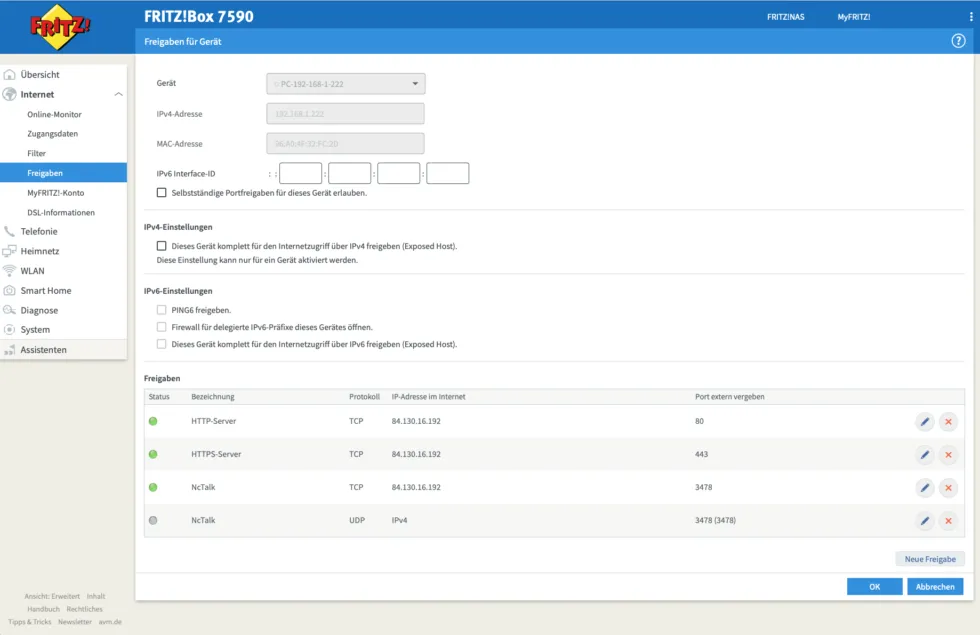
Step 2: Settings in your router resp. firewall
As next the port redirections within the network router are set up. In the example a FritzBox is shown, other routers/firewalls will typically have a different dialog appearance.
The following ports need to be forwarded to the DietPi system running the Nexcloud Talk instance:
- Port 80 / TCP – http
- Port 443 / TCP – https
- Port 3478 / TCP & UDP – TURN Server
In the case that a different port for the TURN server was entered (see above) this different port has to be entered.
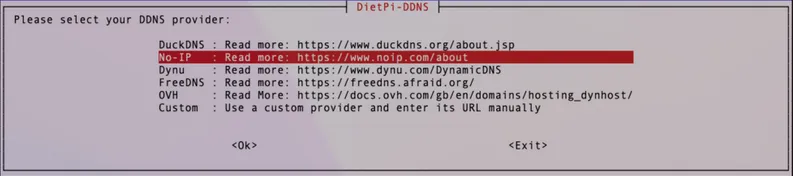
Step 3: Setup of NoIP
In this step the NoIP access is set up so that the IP is updated regularly. If a fixed IP is used with an own domain name or if this update is handled by your provider this step can be skipped.
This is performed via dietpi-ddns:

In dietpi-ddns the DDNS provider is chosen. In the example it is No-IP:
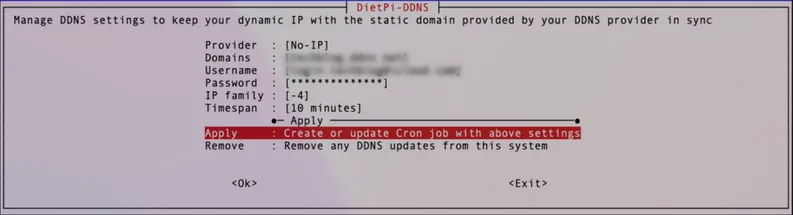
The DDNS name needs to be entered (which was registered at NoIP):

As next the credentials which were registered at NoIP are entered. These are the login name (email address) and the password:


Finally Apply is selected: This installs a cron job and the connection to the DDNS provider is established.
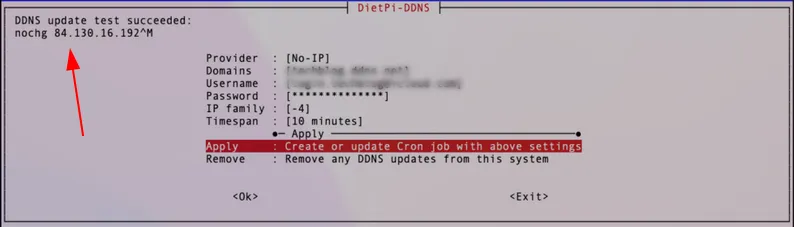
If all worked well, the dialog will show a successful DDNS update:
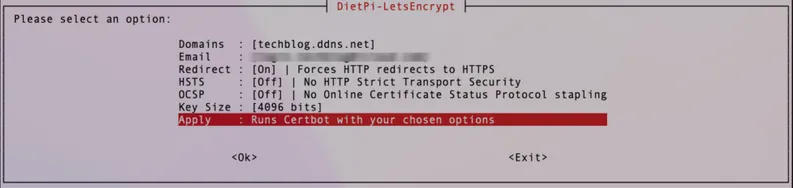
Step 4: SSL certificate set up
This step needs to be executed because Nextcloud Talk basically only permits encrypted connections. The SSL certificate is set up via dietpi-letsencrypt:

The SSL certificate generation is started with Ok:

In the following dialog the DDNS domain and email address is entered. Additionally Redirect On is set that every access is redirected to https. Finally Apply is selected.
Then Certbot is set up with these inputs.
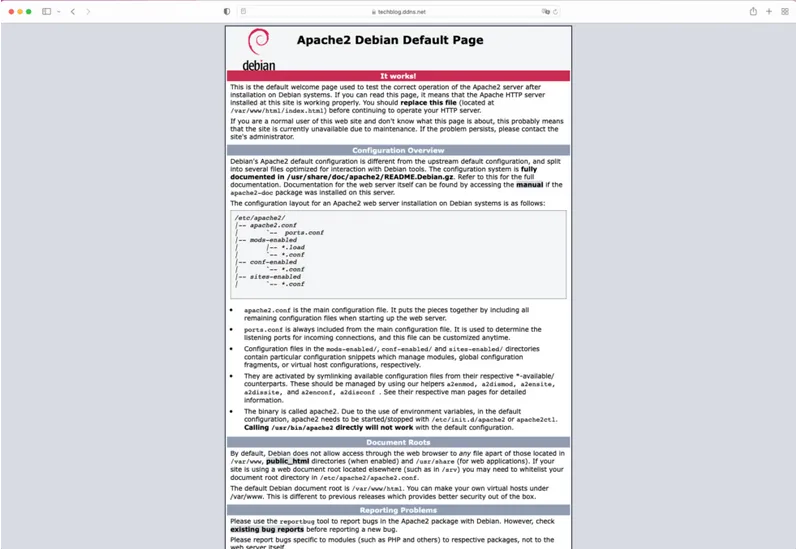
The correct DDNS and LetsEncrypt operation can be checked by accessing the Domain in a web browser. In case of all setup steps worked correctly, the Apache default web page is displayed and a lock shown in the browsers address field signals the encrypted operation.
Step 5: First time login to Nextcloud
The Nextcloud instance is accessed with the domain name followed by /nextcloud (in the example techbog.ddns.net/nextcloud):
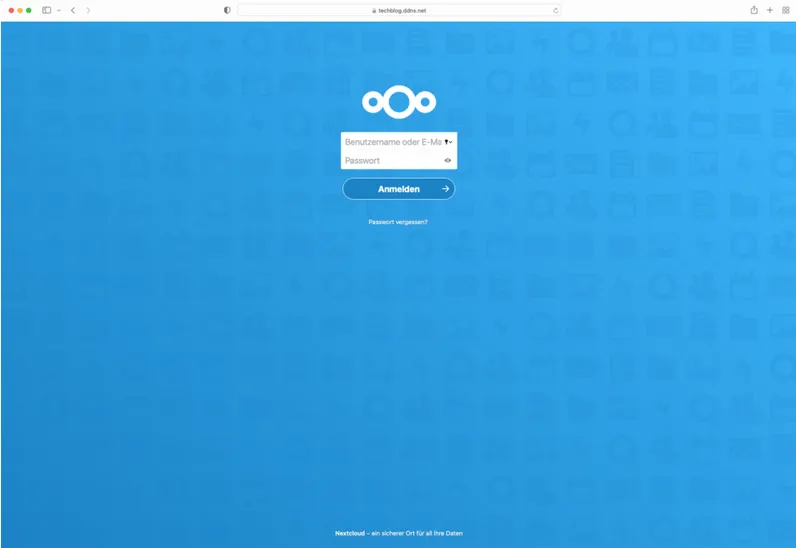
In this step, the login to Nextcloud is tested. The first time login is done via:
- user: admin
- password: <the software password set up during the DietPi base installation>
Remark: If the DietPi software password was not changed, it is dietpi.
If the login works, the Nextcloud installation is finished successfully.
Step 6: Redirect webroot to Nextcloud (optional)
If no any other services (web services under DietPi) shall be installed, a redirect to the Apache server can be set up, so that it automatically redirects to /nextcloud after calling the web page. This is done via an Apache configuration file (e.g. redirect.conf):
cd /etc/apache2/conf-available
nano redirect.conf
In the nano editor the following line is entered:
RedirectMatch ^/$ /nextcloud/
This line causes Apache to redirect all accesses to the subpage /nextcloud.
Then the file is written (e.g. <ctrl>-s in nano) and nano is left (e.g. <ctrl>-x).
To activate this redirection setting, the following Apache environment configuration command is executed:
a2enconf redirect
Finally, the Apache service is restarted via:
systemctl reload apache2
From this point the redirection to /nextcloud is active.
Usage
Nextcloud instance
To use Nextcloud Talk and set up a meeting, it is necessary to login to the Nextcloud instance.
At this time, a first meeting can be set up. Therefore, the Talk icon is clicked in the Nextcloud header:
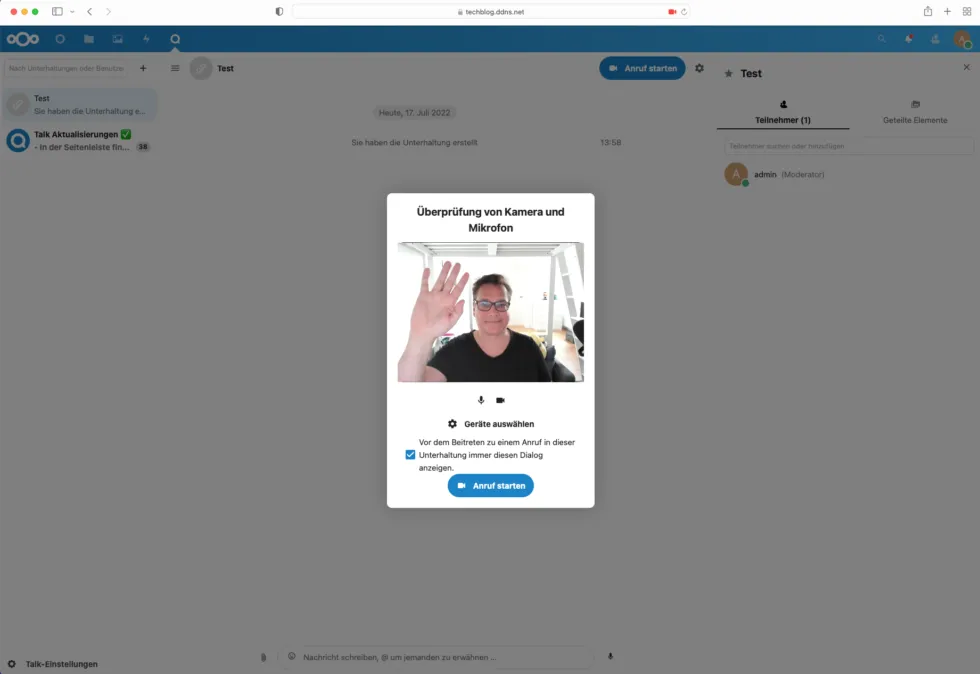
In this dialog, meetings can be set up. They can be enabled only for registered Nextcloud users as well as for guests.
Nextcloud mobile apps
There are Nextcloud apps available for Android users in the Google Play store and for IOS users in the Apple App-Store.
Remark: For the Nextcloud server instance the complete web address containing also /nextcloud has to be entered. An optional redirection does not work within the App.
References
- Original article of Holger Erbe: https://blog.login.gmbh/nextcloud-talk-unter-dietpi/
- Youtube video: https://youtu.be/utEw858dh3g
- DietPi: https://dietpi.com
- Nextcloud Talk in the DietPi documentation: https://dietpi.com/docs/software/cloud/#nextcloud-talk
- No-IP: https://noip.com
dietpi bullseys for pine64 does not have tar xz gzip and can not install from dietpi-software
and can not install any archive source from xxx.xz from dietpi-software for pine64 .
so Dietpi of pine64 bullseyes is bad OS please thinking install gzip .
please under stand what ‘s I said.
Best regards
All DietPi images ship with tar and gzip and can hence extract all archives that are tried to be extracted in all dietpi-software installs. If tar or gzip is missing on your system, please report back, at best at GitHub, since it must be either removed by you or some faulty 3rd party script, or lost due to filesystem corruption, or similar. xz is indeed not pre-installed on DietPi images, but also it isn’t used during any dietpi-software installation. Install it via
apt install xz-utils.Hi,
how to redirect the webroot on step 6 if you using nginx?
What are the main prerequisites needed before setting up an online meeting server using Nextcloud Talk on DietPi?