Pi-hole released a new version – called v6.
It offers several benefits (see Introducing Pi-hole v6) as well as using an internal webserver. This leads to a change in the installation process within DietPi.
This blog post gives an installation description to see how easy it is achievable using DietPi.
The fresh Pi-hole v6 installation as well as an update installation from Pi-hole v5 to v6 is given.
The target is to have Pi-hole and Unbound installed and running. Unbound fits perfect to Pi-hole and offers a safer internet access from the local network on top.
This blog post is based on our older post and is an updated contents of it:
Pi-Hole & Unbound: How to have ad-free & safer internet in just few minutes.
- Overview
- Fresh installation of Pi-hole v6 / Unbound
- Update installation from Pi-hole v5
- Web interface of Pi-hole
- References
1. Overview
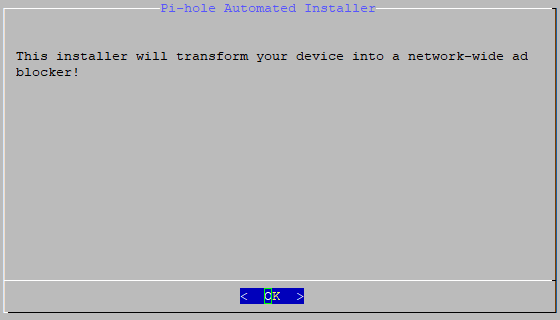
1.1 Pi-hole – Network-wide ad blocking
Pi-hole is an open source project, which can be installed for free, offering much more than a pleasant web browsing and gaming experience. It brings safety and gives ways to avoid ransomware attacks. It may be tempting to open a disguised email, which seems to be received from the bank, school, or a close friend who invites to click on a certain button or link. Pi-hole neutralizes these links making them ineffective.
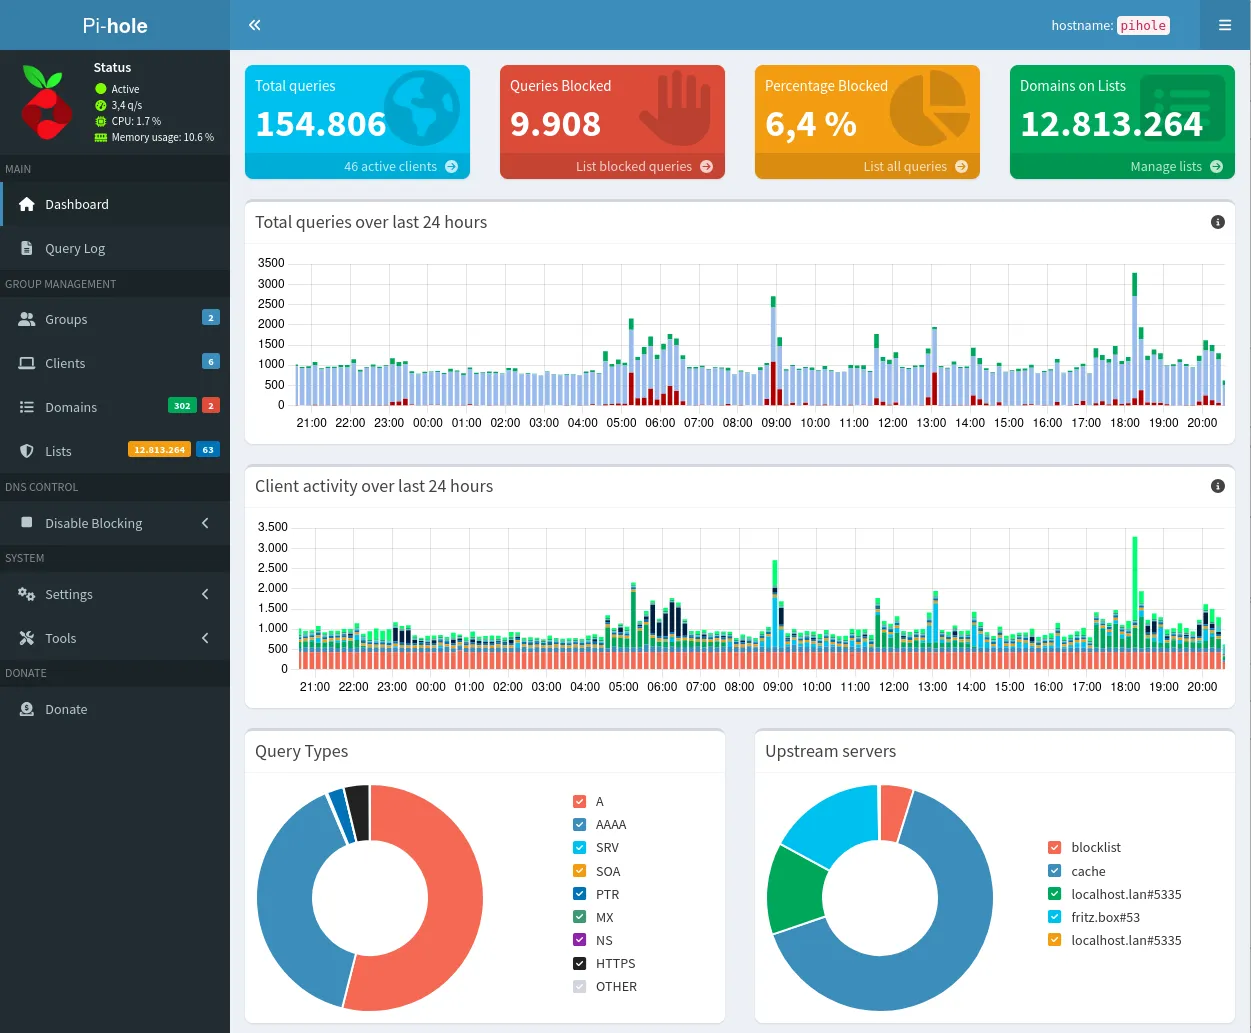
The Pi-hole web admin provides an awesome dashboard to monitor various stats on ad blocking as well as configuring dialogs.
It relies on 3rd party lists, that block ads, trackers, malware link and other not desired queries from the entire network without needing to install anything on smartphones, laptops, media players, TVs, tablets or any other devices. It improves privacy and security for all network devices.
1.2 Unbound
Unbound is a fast and secure DNS server, primarily developed by NLnet Labs.
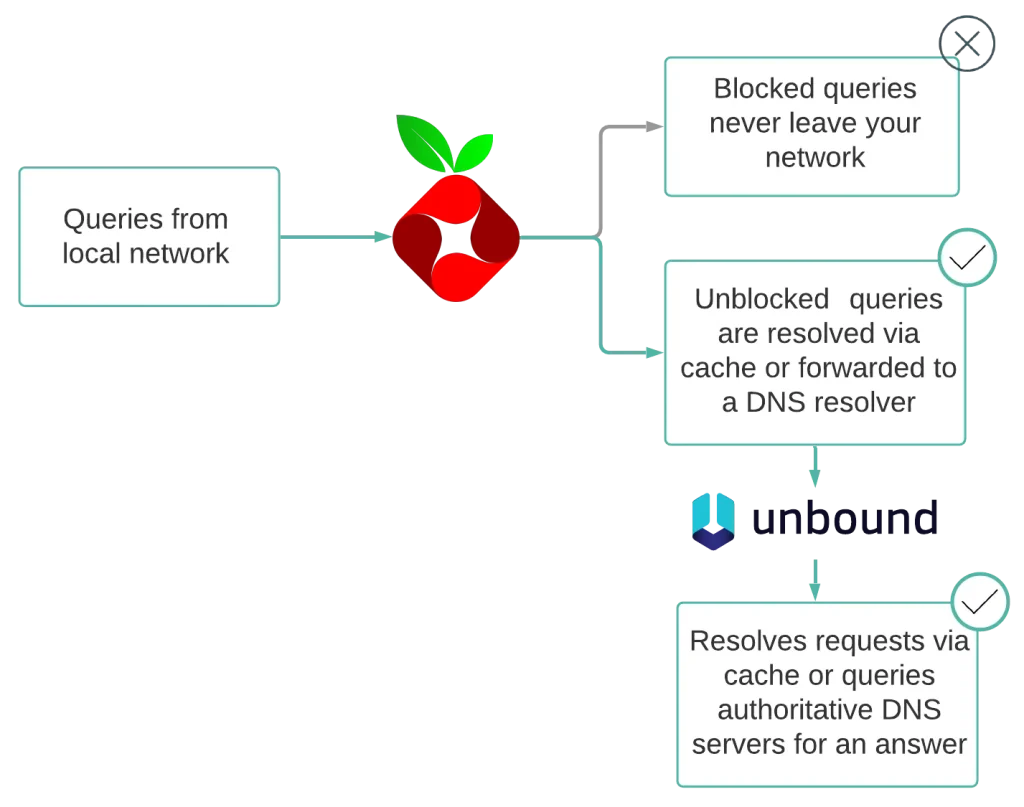
Essentially Unbound will look up a DNS query by asking TLD servers for DNS in a recursive manner. The major benefit is more security: There is no need to trust an upstream DNS traffic monitoring of an internet provider.
Unbound is helpful in many ways and here are a few advantages:
- Privacy – as Unbound is directly contacting the responsive servers, no server can fully log the exact paths the users are going resp. giving unwanted DNS query results. As an additional result, an upstream provider cannot monitor users DNS traffic.
- Validation – If a user wants to check the hostname of its bank, he wants to make sure that hostname matches its bank’s actual IP address and not some phishing site somewhere in the world.
- Caching – A local DNS reduces the traffic across the Internet by reducing load on authoritative name servers, particularly root name servers. DietPi configures both systems (Pi-hole & Unbound) to use caching. All the DNS queries are answered quickly, increasing the performance of any application that use DNS.
The only drawback is a lower performance for initial queries, as they need to traverse which takes time. But with caching, the speed of running any additional query increases a lot!
2. Fresh installation of Pi-hole v6 / Unbound
As mentioned, this post targets the combined installation of Pi-hole and Unbound. If Unbound shall not be installed, the Unbound installation can easily be omitted resp. skipped.
The prerequisite of this installation description is a DietPi base installation. See How to install DietPi for details.
Pi-hole and Unbound are installed via dietpi-software. It should be called without arguments and comes up with its menu interface.
dietpi-softwareThen, Browse Software has to be chosen. In the following dialog Pi-hole and Unbound have to be selected (pressing space to mark them for installation).
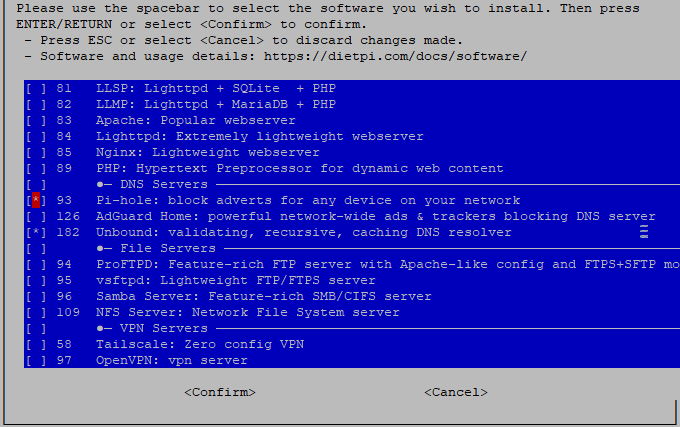
dietpi-softwareThe installation is then started via <Confirm> (selectable with the <tab> key).
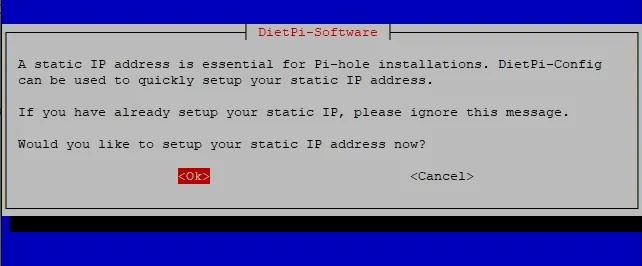
Pi-hole needs a static IP. DietPi assists setting it in the following dialog. Unless it is not already enabled, select OK.
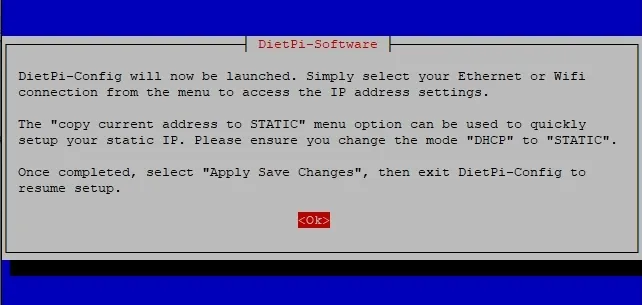
dietpi-config launch dialogIn dietpi-config a static IP address resp. mask, gateway and DNS have to be set (in the example screenshot the IP address was set to 192.168.178.250).
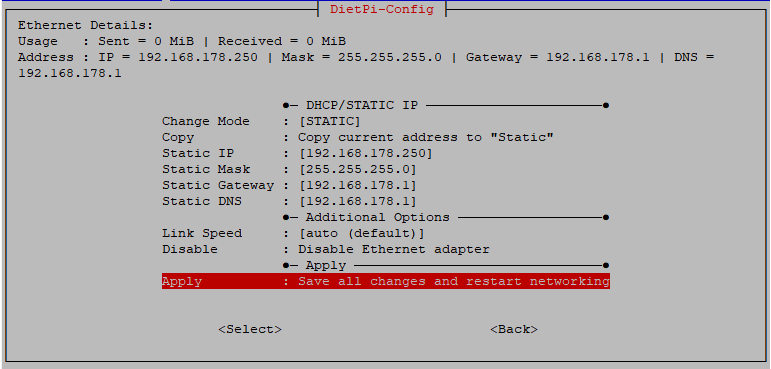
dietpi-config: Setting a static IP address (example 192.168.178.250)The static IP address has to be enabled via the selection of Apply.
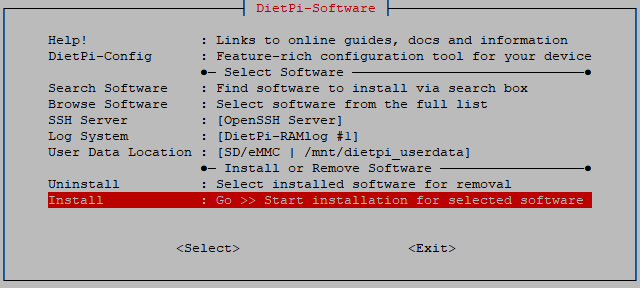
After the static IP address is applied, dietpi-config is exited. This automatically jumps back to dietpi-software and the Pi-hole installation is resumed by selecting Install.
dietpi-softwareThe installation start then has to be finally confirmed via Ok.
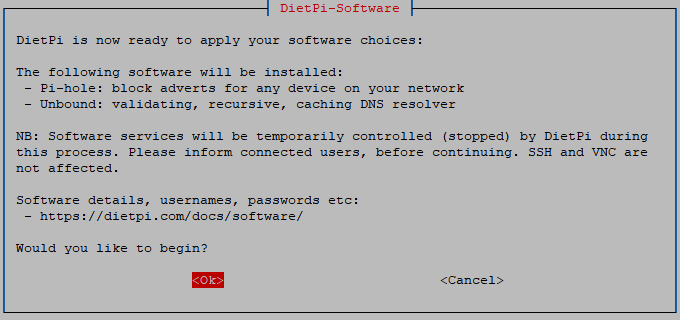
The installation process installs Unbound (silently, without any necessary inputs) and afterwards Pi-hole.
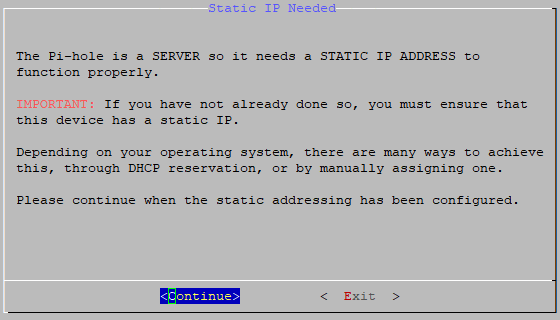
During the Pi-hole installation, the static IP address is queried again. If already set like described above, just <Continue> needs to be selected.
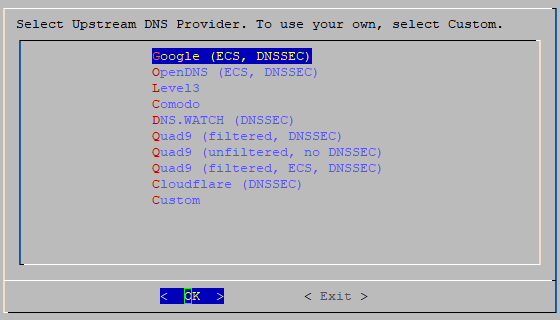
The following dialog can be omitted, it is automatically set to Unbound by the installation process.
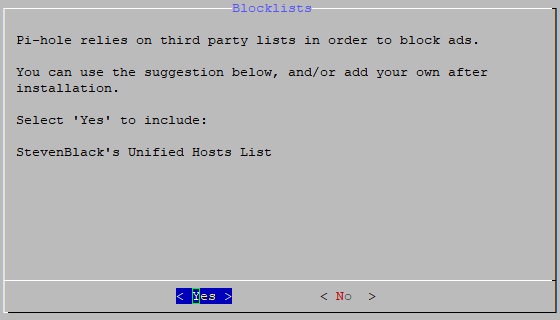
The Pi-hole installation gives the option of loading a basic blocklist from Steven Black. We propose to use it by confirming with <Yes>.
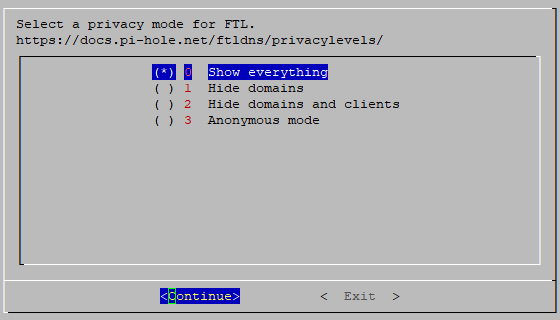
We also propose to leave the privacy settings for the web interface log output to its default which is perfect for local installations.
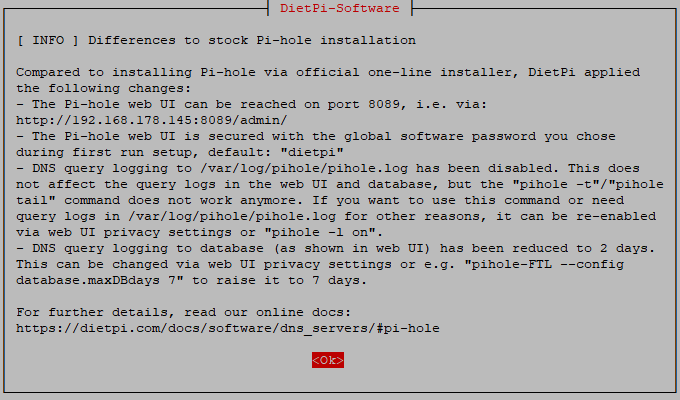
At last, the installation prints some information about the specialities of DietPi’s configuration of Pi-Hole.
That’s it: Pi-hole and Unbound are up and running!
3. Update installation from Pi-hole v5
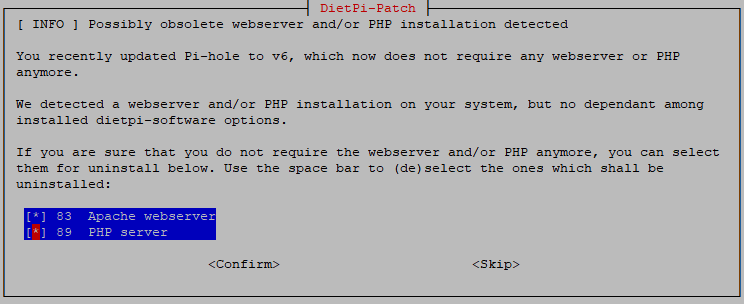
Generally, after the update to Pi-hole v6 via pihole -up from the command line, the DietPi-Update procedure needs to be run. This step uninstalls unnecessary software (web server, PHP) if possible.
In case that the system is already at DietPi v9.11 or higher, DietPi-Update needs to be re-run.
3.1 Case 1: Pi-hole update with DietPi < v9.11 (preferred)
In this case the first step is to update Pi-hole to v6 via
pihole -up Afterwards, DietPi is updated via
dietpi-updateDuring the update, the the removal of existing web servers and PHP is queried. In case that no other software package needs them, the removal can be acknowledged (<Confirm>).
3.2 Case 2: Pi-hole update with DietPi >= v9.11
If DietPi was already updated to a version higher or equal to DietPi v9.11, in the first step, Pi-hole is updated via
pihole -upAfterwards, a DietPi update re-run can be achieved via
dietpi-update -1This executes the DietPi update process with the removal of the web server resp. PHP once again.
Generally, there is no need to directly run dietpi-update -1 because the software update of the next DietPi version will do all necessary steps. Executing it directly after the update of Pi-hole has the advantage that the deinstallation of the web browser and PHP is during the time the user is aware of this process step.
4. Web interface of Pi-hole
DietPi v9.11 and higher bind the Pi-hole web interface to port 8489 for HTTPS and port 8089 for plain HTTP during the installation/update procedure.
This is a slight change to before. The web admin interface can be hence accessed with these URLs:
https://<your.IP>:8489/admin/
http://<your.IP>:8089/admin/
These ports can be changed via web interface or CLI. Do switch to ports 80/443, execute the following command:
pihole-FTL --config webserver.port 80,443s5. References
- Pi-hole website: https://pi-hole.net/
- Pi-hole discource channel: Introducing Pi-hole v6
- DietPi documentation – installation: https://dietpi.com/docs/install/
- DietPi documentation – Pi-hole software: https://dietpi.com/docs/software/dns_servers/#pi-hole
Thanks for posting this. I’ve been hesitant to upgrade since it seemed like extra work. From this post it really doesn’t seem so.
Especially since I am still on DietPi 9.10. And if I want to keep lighttpd around for another purpose I can now see how.
This worked a treat on upgrading this morning. Since I am hosting another local site using lighttpd I opted to keep it.
I used mod_proxy in lighttpd to allow me to access the pihole site on port 80 as follows:
In `/etc/lighttpd.conf` added `mod_proxy` to the `server.modules` directive.
Then added the following directive:
“`
$HTTP[“host”] == “pihole.home.arpa” {
proxy.server = ( “” => ( ( “host” => “127.0.0.1”, “port” => “8089” )))
}
“`
I feel that adblockers are not a good answer. Companies have to make money, and ads are one way to do that.
Another solution is a paid ad-free experience.
The cost of services like YouTube and Facebook are baked in to the prices of advertised products such as Domino’s Pizza, since the companies that make the products pay Google and other advertising companies to advertise them, so have to price their products higher to make up for the wages to advertising.
Therefore, viewing with ads does not really save money compared to the paid ad-free experience.
I mostly agree regarding the business model.
But the ad blocker offers – especially on mobile devices – an additional valuable feature by blocking the ads: The loading of the ads during the page loading often does shuffel the page contents while you are reading it or during navigating. This leads to a worse UX and to klicking on web page areas you don’t want to klick just during the page loading (with ads) e.g. because of moving buttons etc.
This is the dumbest thing I’ve heard yet
I have just done this update and eveything seems to be ok, apart from I can’t seem to access the /api/ endpoint anymore? Am I missing something?
If you can access the web UI, you should be also able to access the API endpoint. What error do you face? In case check its docs: https://docs.pi-hole.net/api/auth/
I can not access http://pi-hole.fritz.box:8089/admin
I can not access http://pi-hole.fritz.box:8089/admin anymore
What error message do you face? The fritz.box hostname is of course only an example. Replace with the actual IP or distributed DNS hostname of your Pi-hole server.
Very easy to follow, thanks for the write-up.
Theres still an older DietPi Pihole&Unbound guide from 2021 online at https://dietpi.com/blog/?p=564 . It might be a good idea to add some kind of “outdated” note to the old guide and include a link to this page.
Is the actual present quite large box at the top of the blog post:
“We have a newer blog post to this issue:
See DietPi and the new Pi-hole version 6”
with the link to this blog post not clear enough?
something has failed. Now the DietPi-Software dialog box is visible. anything I try to do, just gives me an error message saying dietpi is not fully installed and I need to go to Install : Go >> Start Installation
When I try to do that I just ge the same error message as above. Seems like its broke. After a couple of hours struggling with this install Im just too damn tired to keep going. Guess I have to start from the beginning again tomorrow. BTW. Ive installed Pihole on many other devices with no issues. Not sure why it doesnt want to work on a Pi 0W.