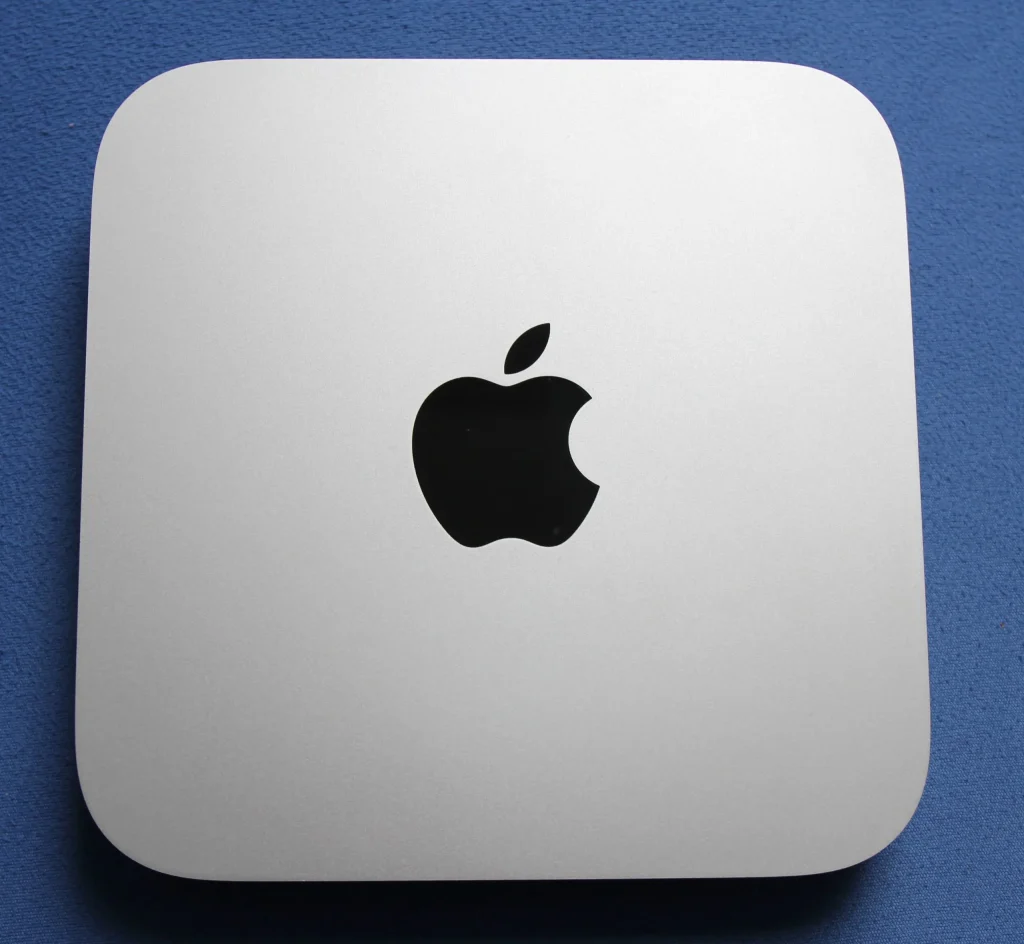
An Apple Mac mini is a robust and stable PC based hardware with a low power consumption which can be used to install DietPi. Compared to Raspberry Pi SBCs, the PC based hardware gives enough options for larger memory, higher computational power and built in storage options.
This blog described how DietPi is installed on this hardware and how the WiFi can be activated.
The following use cases are examples which might be covered by an Apple Mac mini system:
- Cloud storage (e.g. Nextcloud)
- Backup storage
- GUI systems
- General software and memory intensive applications
Used/tested Mac mini models
The following Mac mini models, which can be used for installing DietPi, were tested:
| Mac mini model | Recommendation | CPU | RAM (max) | Disk interface |
| Mac mini Mid 2011 | no (higher power consumption) | Intel Core i5 and i7 2nd generation | 8 GB (official) | SATA 2 x 2,5″ disks |
| Mac mini Late 2012 | recommended | Intel Core i5 and i7 3rd generation | 16 GB (expandable) | SATA 2 x 2,5″ disks |
| Mac mini Late 2014 | recommended | Intel Core i5 and i7 4th generation | 16 GB (fix onboard) | SATA 2 x 2,5″ disks |
Power consumption of the Late 2012 and Late 2014 hardware is typically < 25 Watt.
Older Mac mini variants were not tested, but could be used. The 2018 Mac mini may have problems to boot Linux (at least it has a complex installation procedure), so this is also not recommended. The “Apple Silicon” Mac mini (M1) with its ARM architecture was not investigated.
Installation overview
The installation is executed in these steps:
- DietPi base installation with a LAN connection
- Additional settings via
dietpi-config - Optional: WiFi driver installation and usage of WiFi
Remark: The base installation must be done with a LAN connection. The installation image does not support a WiFi connection via ‘dietpi-wifi.txt’ (WiFi driver is installed in a second step).
Due to the fact that the standard DietPi Native PC installation image does not cover the WiFi chip of the Mac mini, the installation with a WiFi connection via ‘dietpi-wifi.txt’ is not supported.
If WiFi shall be used, the WiFi driver is installed in a second step.
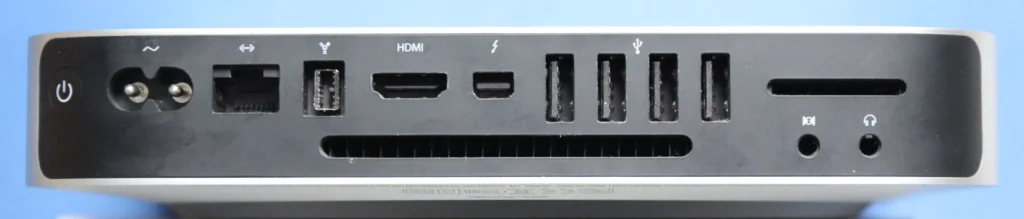
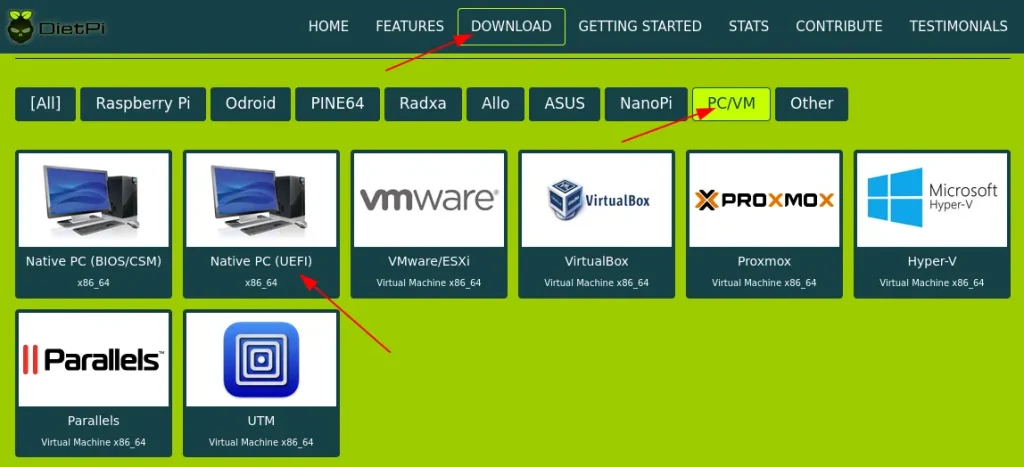
Base installation
The base installation of DietPi on a PC based system is described in the DietPi docs: See the installation documentation, select the tab “Native PC” and follow the “UEFI installer image” instructions.
The difference to the documentation is that there is no need to change any BIOS settings to boot from the USB disk, USB stick or SD card: Just press the ‘Option’ or ‘Alt’ key during the boot (see there for explanations) and select the medium with the installer image. Then follow the instructions of the installer.
The result should be a system where you also did the first boot procedure (e.g. license acknowledge, basic settings via ‘dietpi-config‘ resp. ‘dietpi-software‘).
Additional settings
The following additional settings have to be made via dietpi-config:
- Display options -> Display driver -> Install the ‘Intel GPU driver’

- Advanced options -> RTC mode -> Hardware
WiFi usage (driver installation)
Remark: In the case that you only want to use a LAN connection and no WiFi, this step can be omitted.
The DietPi basic installation does not contain the WiFi driver package, dietpi-config shows in this case “Not Found”:
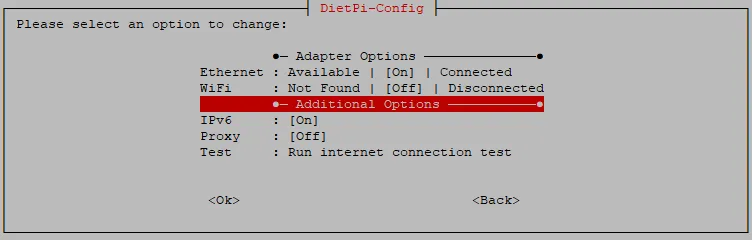
dietpi-config output without WiFi driver installed (Ethernet connected)The Mac mini models contain e.g. these WiFi devices which are covered by the same driver:
- Mac mini Late 2012: Broadcom Inc. and subsidiaries BCM4331 802.11a/b/g/n (rev 02)
- Mac mini Late 2014: Broadcom Inc. and subsidiaries BCM4360 802.11ac Wireless Network Adapter (rev 03)
The installation procedure for the needed WiFi driver can be done with the following steps:
sudo apt-get update
sudo apt-get -y install linux-headers-amd64
sudo apt-get -y install broadcom-sta-dkms
sudo modprobe -r b44 b43 b43legacy ssb brcmsmac bcma
sudo modprobe wl
After this steps have been conducted, reboot your system and activate WiFi via dietpi-config in these steps:
- Detach the LAN cable
- Start
dietpi-config - Activate WiFi (do not forget to set the WiFi country code)
- Check the WiFi connection
- Disable Ethernet in
dietpi-config
If this procedure fails, try to disable and enable WiFi again or reboot.
If all went well, dietpi-config should show
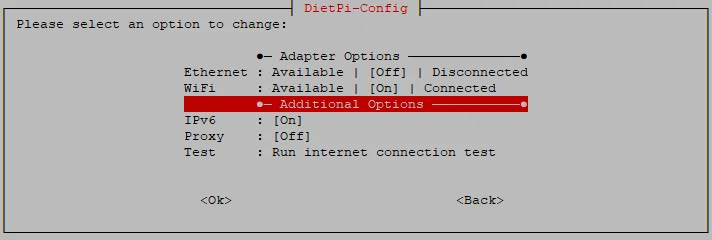
dietpi-config output with WiFi connected (Ethernet disabled)Result
The htop screenshot of a base installation with graphical desktop on an 4 GB 2014 i5 Mac mini is shown below.
It shows a memory consumption of only about 460 MB.

There was an opinion via the community that the system’s stability on a 2014er mac mini using the newer Debian kernel 5.19 seems to be better.
This kernel can be installed via
apt install linux-image-5.19.0-0.deb11.2-amd64.How are folks liking this setup?
I wanted to revive my Mac mini 2014 after I learned about DietPi and found this blog post.
Unfortunately the DietPi_NativePC-UEFI-x86_64-Bookworm_Installer ISO doesn’t seem to work correctly on the Mac.
I boot the Mac with Alt pressed and see the USB stick with the ISO with the name ‘Windows’. When I boot from it, it ends up in a blank console screen with a blinking cursor in the upper left, no progress from there though.
I can successfully boot into other images from USB sticks on this Mac, so it’s not a general Mac problem I assume, but something with the ISO.
However I’m unsure how to proceed from here. It’s a pity as this seems to be a fun project to try.
So here’s how I could proceed with my plan to install DietPi on my Mac Mini 2014:
First I installed a minimal Debian Bookworm on SSD of the Mac Mini. To keep things simple I used a single partition.
Inside Debian I then ran the PREP script as described here: https://dietpi.com/docs/hardware/#make-your-own-distribution
Now DietPi is running headless on the Mac and I can get used to it.
I was trying this with fresh install, but I had the same issue with my etchered SD card showing up “windows” and then black screen.
I just followed the steps to strip the Debian 13 that had been running so that now Diet is removing all the extraneous stuff.
It works like a charm