When copying the whole SD card with the dd command, all files from the SD card are preserved, all files from the target drive are removed.
Thank you for the guide here, I tested it and it works. I use BENFEI USB 3.0 to SATA III Hard Driver Adapter cable to work with my Pi 4 4GB
What I want to add is that if you have tried to test USB SSD before, remember to unmount it, if you wait for the image is done and copied over, the next time you start dietpi-drive_manager it will not start. Otherwise, you have to modify the /etc/fstab file to uncomment on the automount line that the device you tested before and then restart it.
Noob here, how do I copy the system files onto the external drive? do I transfer RootFS? or do I transfer user data?
Depending on the SBC you are running, you could boot the entire system from USB drive. Other than that, RootFS contains system files.
so I moved the RootFS to the SSD but when I plug it into my computer it says I need to format to use, which makes sense cause windows doesn’t support the format, but when I use Win32 thing on the sd card it says there’s nothing found or it cant be used. why is that?
what is a Win32 thing ?? If you use a RPi4 and your system is still empty, flash your system directly to your SSD and avoid using a SD card at all.
The win32 disk imager the original post said to use that, but okay let’s say I flash the dietpi image on the SSD, how do I get all the files and other stuff I had on the SSD? I had a bunch of code and server stuff like terraria world’s and websites stored on it. The micro SD card seems to only have some parts of the image that says it needed to actually boot the OS if the files are on the SSD. I’m very confised right now I apologise.
Theoretically you could have everything on your SSD. However, this would require an additional disk where you are going to place your data on temporary, while moving stuff around. And of course, the willingness to perform that step ![]()
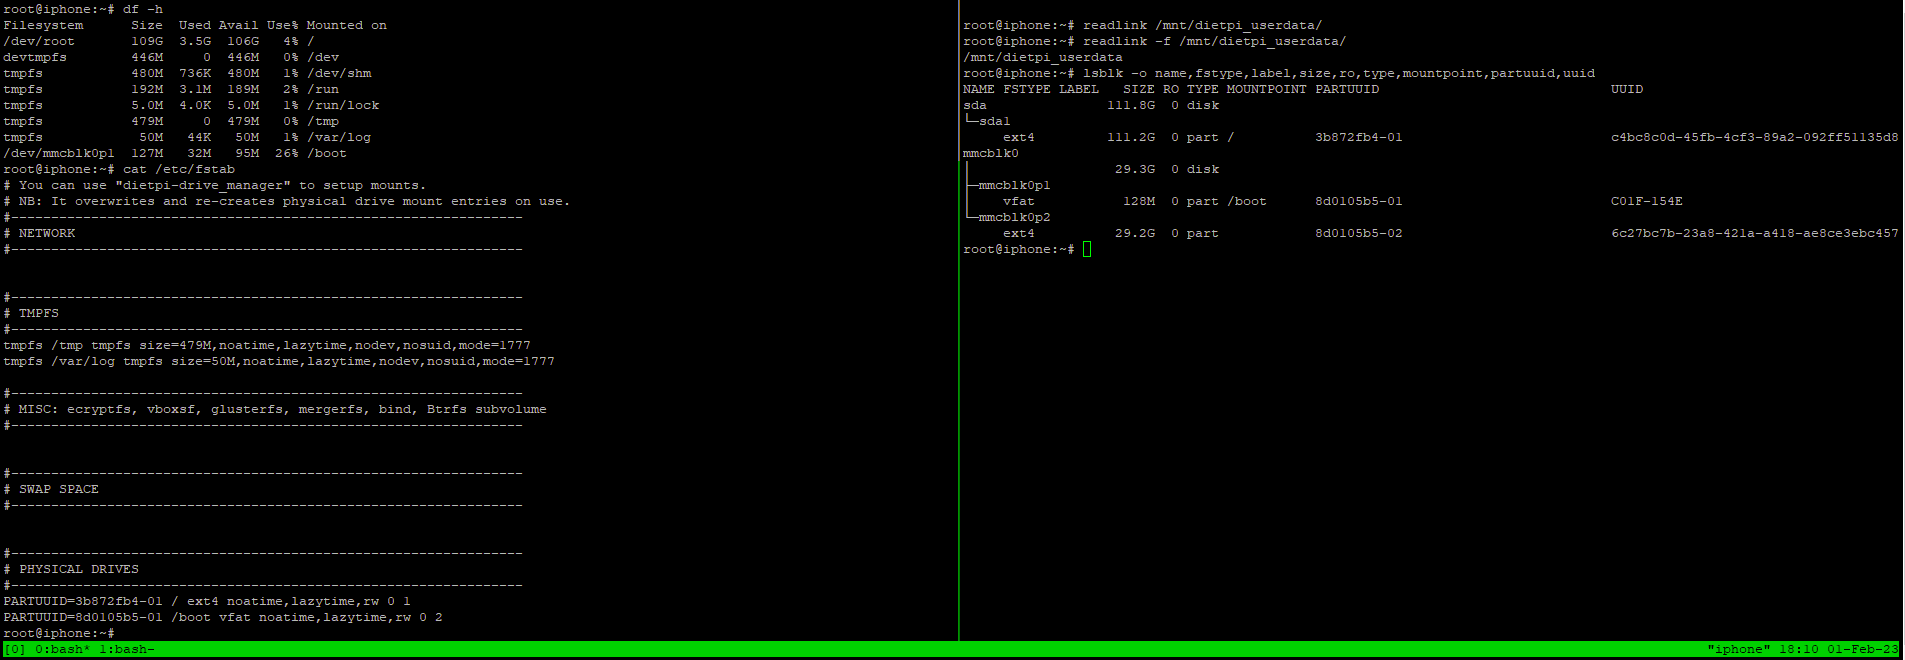
Anyway, let’s check current configuration.
df -h
cat /etc/fstab
readlink /mnt/dietpi_userdata/
readlink -f /mnt/dietpi_userdata/
lsblk -o name,fstype,label,size,ro,type,mountpoint,partuuid,uuid
So far here are the commands you asked me to input.
Also yes I’m hoping to have everything that works off an SSD I have two Micro sd cards that I can use as an additional disk. one of them is smaller the other is 32Gb, I need the bigger one for another project but still want large amounts of space. I’m willing to do whatever.
Try to avoid doing screen prints, you should be able to copy everything directly from SSH terminal. ![]()
As far as I can see, you already moved RootFS to your SSD. Correct? As a first step, you would need to move it back to your SD card.
alright okay, what now?
can you share again following
df -h
cat /etc/fstab
lsblk -o name,fstype,label,size,ro,type,mountpoint,partuuid,uuid
your SSD is empty now?
1 Like
almost its finishing up, taking a bit long for some reason.
Should I format the SSD so its completely empty?
Filesystem      Size  Used Avail Use% Mounted on
/dev/root        29G  3.5G   26G  13% /
devtmpfs        446M     0  446M   0% /dev
tmpfs           480M  736K  480M   1% /dev/shm
tmpfs           192M  3.0M  189M   2% /run
tmpfs           5.0M  4.0K  5.0M   1% /run/lock
tmpfs           479M     0  479M   0% /tmp
tmpfs            50M   44K   50M   1% /var/log
/dev/mmcblk0p1  127M   32M   95M  26% /boot
root@iphone:~# cat /etc/fstab
# You can use "dietpi-drive_manager" to setup mounts.
# NB: It overwrites and re-creates physical drive mount entries on use.
#----------------------------------------------------------------
# NETWORK
#----------------------------------------------------------------


#----------------------------------------------------------------
# TMPFS
#----------------------------------------------------------------
tmpfs /tmp tmpfs size=479M,noatime,lazytime,nodev,nosuid,mode=1777
tmpfs /var/log tmpfs size=50M,noatime,lazytime,nodev,nosuid,mode=1777

#----------------------------------------------------------------
# MISC: ecryptfs, vboxsf, glusterfs, mergerfs, bind, Btrfs subvolume
#----------------------------------------------------------------


#----------------------------------------------------------------
# SWAP SPACE
#----------------------------------------------------------------


#----------------------------------------------------------------
# PHYSICAL DRIVES
#----------------------------------------------------------------
PARTUUID=8d0105b5-02 / ext4 noatime,lazytime,rw 0 1
PARTUUID=8d0105b5-01 /boot vfat noatime,lazytime,rw 0 2
root@iphone:~# lsblk -o name,fstype,label,size,ro,type,mountpoint,partuuid,uuid
NAME        FSTYPE LABEL   SIZE RO TYPE MOUNTPOINT PARTUUID                             UUID
sda                      111.8G  0 disk
└─sda1      ext4         111.2G  0 part            3b872fb4-01                          c4bc8c0d-45fb-4cf3-89a2-092ff51135d8
mmcblk0                   29.3G  0 disk
├─mmcblk0p1 vfat           128M  0 part /boot      8d0105b5-01                          C01F-154E
└─mmcblk0p2 ext4          29.2G  0 part /          8d0105b5-02                          3a6d38d2-0afd-4c4c-b363-68f5537edbd0
ok good. Have a look to following blog post Running DietPi from an USB stick or an onboard eMMC
You could read it fully to get a better understanding of what is done. But you should be able to skip step 1 and 2 ![]()
Once finished, you should be able to boot from SSD directly
2 Likes
nice, thank you so much, man. You’ve helped me on another post before as well so many many thanks!
1 Like
Very cool…I went a different route and boot from USB, then I cloned the root file system over to my SSD.
I used this method, because some times updating (especially if the update tries to fiddle with the EEPROM) borks my boot
I used the Raspberry Pi Imager and made a flash the EEPROM to boot from USB (under extra options I believe) (you could also more than likely just leave it stock EEPROM [boot from SD] and use the SD as the /boot drive holding all the kernel and other bootable files (the partition is only 256mb), and just point it directly at the new SSD for the root filesystem without any issues) which also should work flawlessly on other SBC’s that don’t have an EEPROM that allows for booting from anything but the SD card
Then I installed the OS on the USB drive in the normal fashion, two partitions, the fat32 boot, and the linux / partition
Then using this method cloned the root over to the SSD
Overview | Using an External Drive as a Raspberry Pi Root Filesystem | Adafruit Learning System
From this site too
Move the Raspberry PI root file system to a USB drive - PragmaticLinux
Made sure the new UUID of the SSD was in the /etc/fstab and in the cmdline.txt in /boot, then rebooted, came up like a boss…now the USB is the only bootable device, then it points directly over to the 240GB SSD and everything resides there, well everything except the /boot directory
Oh I did go back after and remove partition 2 from the USB since it was no longer needed
That should reduce corrupted boots because the SD card and /boot is rarely touched unless updating
Plus now you can use the smallest cheapest and more often than not the best quality SD cards to /boot the system and the hotness fast SSD/NVME/HDD for the root filesystem
Failsafe since it always boots from SD card then goes directly to the faster drive for everything else
1 Like
Sorry to bother again but ive gone through all the steps and still i cant get the PI to boot off the ssd. in drive manager the SSD doesnt even appear there. What do i do now? i need to transfer all the files soon because of some uspecified reason.
how is the SSD connected? And does it have an own power supplely?
lsblk -o name,fstype,label,size,ro,type,mountpoint,partuuid,uuid
Any kernel error messages
dmesg -l err,crit,alert,emerg
1 Like
I got a enclosure for it and for most of the time it has functioned properly with no need for a powersupply.
NAME        FSTYPE LABEL   SIZE RO TYPE MOUNTPOINT                                PARTUUID                             UUID
sda                      111.8G  0 disk
├─sda1      vfat           128M  0 part                                           8d0105b5-01                          C01F-154E
└─sda2      ext4          29.2G  0 part                                           8d0105b5-02                          3a6d38d2-0afd-4c4c-b363-68f5537edbd0
mmcblk0                   29.3G  0 disk
├─mmcblk0p1 vfat           128M  0 part /mnt/C01F-154E                            8d0105b5-01                          C01F-154E
└─mmcblk0p2 ext4          29.2G  0 part /mnt/3a6d38d2-0afd-4c4c-b363-68f5537edbd0 8d0105b5-02                          3a6d38d2-0afd-4c4c-b363-68f5537edbd0
The drive appears now but when in drive manager it says cannot be mounted place already exist and as data.