|
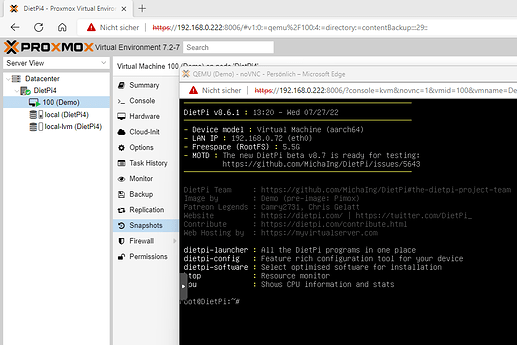
Thanks to the DietPi Automation_Custom_Script.sh it is very easy to install a port of Proxmox Virtual Environment 7 - PiMox7.
The “installer” aka the Automation_Custom_Script.sh can be found here:
→ GitHub - TuxfeatMac/pimox7-installer: Installatin Scripts for PiMox7
→ https://github.com/TuxfeatMac/pimox7-installer/archive/refs/heads/main.zip <— all files in zip, direct download.
The installer cli output may be not that pretty, since it is ment to be run readless, this is okay… it works.
Als so the steps are very minimalistic:
-
Flash the latest DietPi image from:
—> https://dietpi.com/downloads/images/DietPi_RPi-ARMv8-Bullseye.7z . -
Replace orginal “dietpi.txt” and “config.txt” and add the “Automation_Custom_Script.sh” in /boot/ .
-
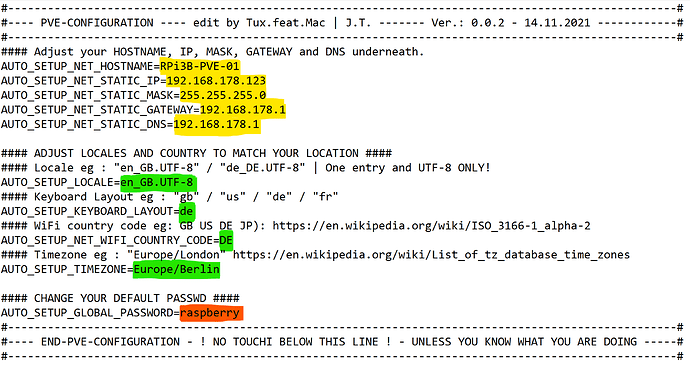
Adjust the NETWORK and locale config in “dietpi.txt” to match your setup!
-
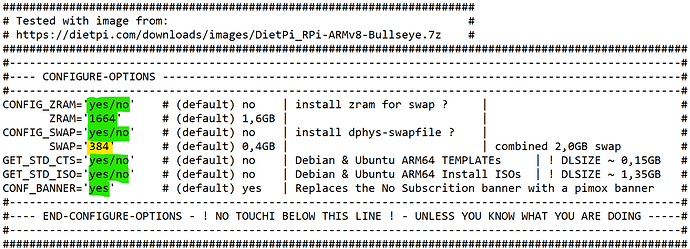
Adjust options in “Automation_Custom_Script.sh” (optional)
-
Insert the sd card into the RPi and power it up.
-
Wait ~ 30 - 45 min, till reboot is done!
-
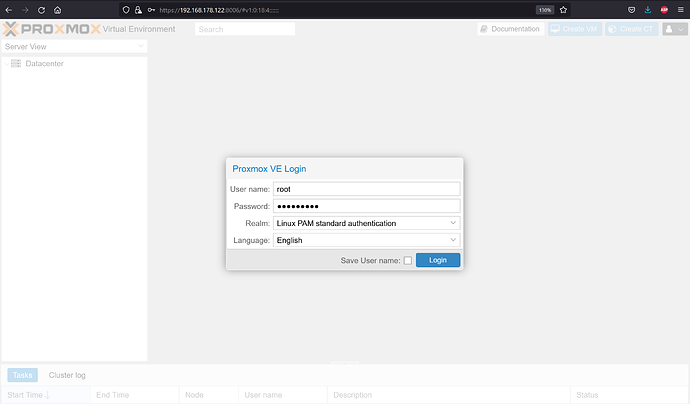
Browse to https://<YOUR_SET_IP>:8006/
-
Login with root and your set password.
-
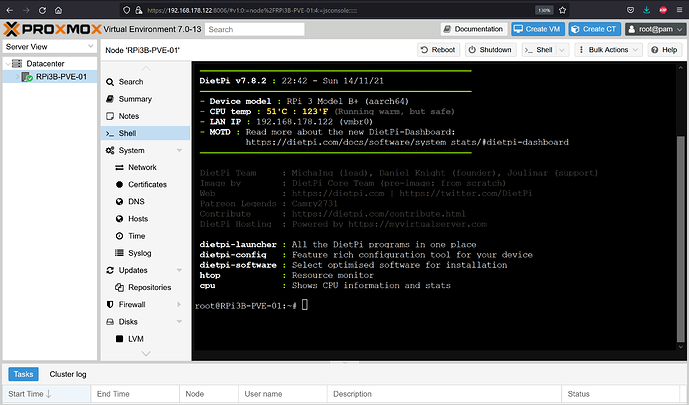
Enjoy ! =)
Bonus: If automatic ISO and CT downloads are enabled, you are now ready set to create your first CT / VM!
Maybe this little “how to” helps to keep you going: PiMox7 - RPi4 - arm64 CT & VM Basic Configuration - YouTube , if you have the “templates” skip to 1:46 .
Notes
more indetail, maybe found here:
—> GitHub - pimox/pimox7: Proxmox V7 for Raspberry Pi
—> GitHub - TuxfeatMac/pimox7-installer: Installatin Scripts for PiMox7
—> [TUTORIAL] - How to run PVE 7 on a Raspberry Pi | Proxmox Support Forum
Greetings Tux_1024
