For those of us that were all excited about getting their NanoPi with the NanoHatOLED screen … http://www.friendlyarm.com/index.php?route=product/product&product_id=189
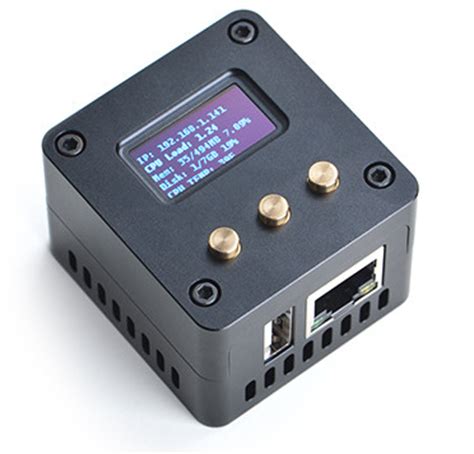
… but had the sad feelings when you could not get the OLED screen to work using DietPi then I have some good news!
Here are the steps I used to get it up and running (everything works!)
Step 0: Make sure you only log into the DietPi using a non-Root account (eg. dietpi:dietpi)
Step 1: Make sure the following components have been installed using the DietPi Software configuration tool.
=> 130 Python Pip
=> 16 Build Essentials
=> 17 Git
Step 2: Execute the following code
sudo apt-get install libfreetype6-dev libjpeg-dev
Step 3: Execute the following code
sudo pip install --upgrade ssd1306
Step 4: Execute the following code (system will reboot at the end)
git clone https://github.com/friendlyarm/NanoHatOLED.git && cd NanoHatOLED && sudo -H ./install.sh
Once the system reboots you should see the FriendlyElec logo flash up and then everything should just work!
HOWEVER …
After running mine 24x7 for about a month I discovered that my little OLED screen had developed a nasty case of “screen burn” ![]()
This inspired me to do a little hacking and make a few fixes.
Executing the following code will do two things:
- Replace the default script with one that turns off the screen after five(ish) minutes (as soon as you click a button it will turn back on for another five minutes).
- Replaces the boot image with a muuuch better one. dietpi logo
wget -O NanoHatOLED.zip http://dietpi.com/phpbb/download/file.php?id=1033 && sudo unzip -o NanoHatOLED.zip -d NanoHatOLED/BakeBit/Software/Python
Reboot and all should be good with the world.
NanoHatOLED.zip (5.59 KB)