How can I resize (grow) the disk of an installed proxmox VM?
Followed the guide https://dietpi.com/docs/install/ and it installed an 8GB disk. I need it to be bigger. Searched and haven’t found a working solution.
Default Plex installation installs all into /var/lib/plexmediaserver; also Emby same thing. Seems to be hardcoded.
Really need to grow the main HD… As you provide the template with 8GB there has to be a way to increase this, why hardcode it to 8GB?
I guess you are mixing thinks. Using dietpi-software, executable of Emby is installed into /opt/emby-server. But this doesn’t mean that this is the location of the media files as well. Opening Emby web page first time, you need to run an initial setup. There you could specify location of media files. And it doesn’t matter where they are located.
Similar with Plex. Don’t mix location of executable with location of media files.
This worked! I was trying to use parted from the command line and was completely confused as to why it wasn’t seeing more space even though I had expanded the drive from 8 to 14 GB. Running the resize option from within drive manager did the trick!
Some words about the Proxmox image size:
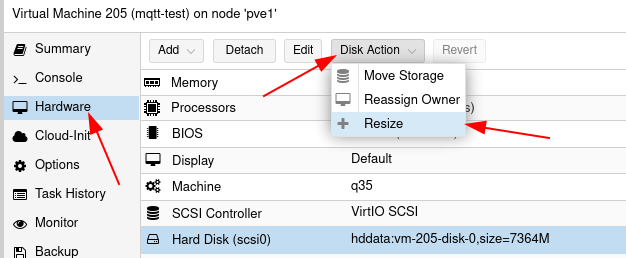
Proxmox only allows an increasing of the VMs disk via this dialog:
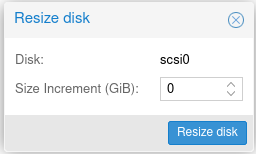
and then add the additional size in GiB (!):
Afterwards you need to use the resizing functionality of dietpi-drive_manager like mentioned above to tell DietPi to use the increased disk size.
We have chosen such a small disk size in our image because then we can implément “small” VMs with a small disk size footprint (e.g. using a VM only with an MQTT server inside, 1 CPU, 512 MB RAM). On the other hand, with resizing you get the disk size you need (e.g. using a VM with 100 GB disk as a plex server).
Reducing the size of the VM is not possible with the Proxmox built-in features, so you should take care if you increase it via the dialog shown above. It could be a safe choice to make a clone of the VM before adding extra disk size to the VM, if you mistype in the dialog with the additional size (see above) then you could roll it back with your clone. If you are sure what you do, of course this can be skipped.