How to install DietPi
The installation of DietPi consists of few steps:
- Provide an installation media (e.g. SD card for single board computer or USB stick for PC)
- Get the DietPi image (and put it on the installation media)
- Boot up the DietPi device and go through one time installation steps
Following these steps you will be able to initially setup DietPi and install additional software packages you would like to use, using dietpi-software.
Select the following tabs for the installation description of your target.
Introduction
Single board computers (SBCs) based on the well known Raspberry PI ARM based architecture gained more and more friends in the last years. The low cost in combination with the power and hardware flexibility makes these SBCs optimal for embedded systems, like e.g. home automation or cloud applications.

Prerequisites
To follow this tutorial, you will need the next hardware list:
- A Raspberry Pi, Odroid or other SBC - open the list of all supported SBC
- An SD card, USB flash drive or eMMC of at least 4 GiB size, and a way to write it
- Optional: Ethernet (network) cable
Note: Following this guide you could run the installation directly from a console via keyboard and screen, via SSH client or serial console.
1. Download and optionally extract the DietPi disk image
Open dietpi.com, select your SBC and click on Download. The disk image will be downloaded locally.
Example:
The downloaded file is compressed (.xz file extension). Many flash tools (e.g. balenaEtcher, Rufus, Raspberry Pi Imager) can directly use this file format.
Otherwise an appropriate extraction tool has to be installed (e.g. 7zip for Windows, The Unarchiver (Macintosh), xz-utils (Linux)) to extract the .img file. They are free of charge and have been tested to decompress the image correctly (see below for extract instructions).
Extracting DietPi images (for flash tools not supporting the .xz file format)
- Install the extraction tool (e.g. 7zip for Windows, The Unarchiver (Macintosh),
xz-utils(Linux) - Extract the downloaded
.xzformatted file. This will generate the image file (file format.img).
How to extract DietPi images on Linux (xz-utils)
On Debian and Ubuntu-based systems, open a terminal and type:
sudo apt install xz-utils
Once xz-utils is installed, type the following at the terminal to decompress the file:
xz -d DietPi-Image.img.xz
Replace DietPi-Image.img.xz with the correct name of the downloaded archive, e.g. DietPi_*.xz. This will decompress the DietPi image file for you to use.
Raspberry Pi: Using the Raspberry Pi Imager tool to download and flash the image in one step
The Raspberry Pi Imager (rpi-imager, download e.g. Windows or MacOS installer here #1 resp. Debian .deb file here #2) contains an option to download and flash images for the Raspberry Pi family quite easily:
In the step when the Raspberry Pi Imager asks for the OS version (“Choose operating system”), the “Other general-purpose OS” option is selected:

In the next step, “DietPi” is selected, afterwards the DietPi image version has to be chosen:

If previously a Raspberry Pi hardware was selected (e.g. Raspberry Pi 5), invalid image versions are filtered and not listed.
Then the rest of the wizard can be executed and at least the SD card is flashed.
Remark: In Debian systems it might be necessary to install the OpenGL lib via apt install libopengl0 when a corresponding message about a missing libOpenGL.so library occurs.
2. Flash the DietPi image
At first, download and install balenaEtcher. This application flashes OS images to SD cards and USB drives, safely and easily on Windows, macOS, Linux.
On Windows you may also use Rufus to flash the image.
Click on the Install on native PC tab above to see an example of using Rufus. In case of SBC images, all options are greyed out, which is correct, so after selecting the image and the target drive, you only need to hit START.
Start balenaEtcher and make sure you have your drive or SD card inserted into your computer. Locate and select the DietPi image (.xz resp. .img).

Next, ensure that the selected device is the correct one.
All data on the drive will be erased!
The flash procedure will wipe the drive clean, so if you choose the wrong one, you may risk losing data.

Once you have confirmed all the details are correct, proceed to flash the SD card. This process may take a while.

Click here if you want to use a WiFi connection
To setup the WiFi, open the SD card folder, and update next two files using a text editor of your choice:
- Open the file named
dietpi.txt. FindAUTO_SETUP_NET_WIFI_ENABLEDand set to value 1. - Open the file
dietpi-wifi.txtand setaWIFI_SSID[0]to the name of your WiFi network. - In the same file
dietpi-wifi.txt, setaWIFI_KEY[0]to the password of your WiFi network. - Save and close the files
3. Prepare the first boot
Remove the drive resp. SD card from the PC and insert it into your SBC device, preparing to boot for the first time.
Power on the SBC to login and execute the first boot procedure.
Option: Automatic base installation at first boot (running an unattended base installation)
DietPi offers the option for an automatic first boot installation. See section “How to do an automatic base installation at first boot” for details.
Initial boot duration
Due to an automated resize of the root filesystem and basic setup steps, this initial boot takes a longer time than further system booting sequences. It may last up to a couple of minutes, depending on the system drive and hardware.
Introduction
Virtual machine images are great for those occasions where you want to set up a DietPi system very quickly and test things. Also it may be used as a Debian based Linux system with a small footprint for development purposes, e.g. with the X11 window system. The small footprint makes it optimally usable on PCs without a huge built in RAM. Also several VMs may be run for different applications.
One big advantage of such a VM is that it needs only a couple of minutes coming to a running DietPi system.
One of the options of a virtual machine is Oracle VirtualBox.

Prerequisites
As a starting point you need a PC with a running VirtualBox software on which the DietPi system will run.
On this PC a free harddisk space of about
- 1.2 GiB for a minimal running system
- 5 - 10 GiB for a typical running system with X11
is needed. A recommended size is at least a free space of 10 GiB.
Installation of VirtualBox with VirtualBox extension pack (“Guest additions”)
If you plan to install the VirtualBox extension pack, some things have to be taken into account to achieve a working time synchronization. In general:
- The VirtualBox expansion pack contains an own time sync functionality, which can keep the VM system time in sync with the host system time. The time sync mode in
dietpi-configshould hence be switched to Custom to avoid conflicts or timeouts during the boot process. - VirtualBox without the extension pack requires a network time sync solution, e.g. one of the
dietpi-configconfigurable time sync modes (which are based onsystemd-timesyncd).
The needed additional installation steps (use of the extension pack) are described here (installation steps on the host system) and below (installation steps within the DietPi guest system).
The installation on the host system contains the base VirtualBox installation and the installation of the extension pack. The VirtualBox host installation is described in the case of a Linux based host system (the description assumes a root user, otherwise add sudo appropriate).
Installation of VirtualBox on a Linux host system
Following is the description of a manual installation (you need to change this depending on the actual VirtualBox release):mkdir ~/Downloads cd ~/Downloads curl -LO 'https://download.virtualbox.org/virtualbox/7.0.10/virtualbox-7.0_7.0.10-158379~Debian~bookworm_amd64.deb' apt install ./virtualbox-7.0_7.0.10-158379~Debian~bookworm_amd64.debInstallation of the VirtualBox extension pack on a Linux host system
Following is the description of a manual installation (you need to change this depending on the actual VirtualBox release):cd ~/Downloads curl -LO 'https://download.virtualbox.org/virtualbox/7.0.10/Oracle_VM_VirtualBox_Extension_Pack-7.0.10-158379.vbox-extpack' VBoxManage extpack install Oracle_VM_VirtualBox_Extension_Pack-7.0.10-158379.vbox-extpack
After these two steps the host installation of the VirtualBox extension pack is completed. Further installation steps on the guest system are described below.
1. Download and extract the DietPi disk image
Open dietpi.com, select PC/VM, then VirtualBox. Download the OVA appliance file locally.

The downloaded file is xz-compressed and contains the .ova file for VirtualBox, so you will need to have installed either 7zip for Windows or The Unarchiver (Macintosh) or xz-utils (Linux) to extract it. They are free of charge and have been tested to decompress the image correctly.
How to extract DietPi images on Linux (xz-utils)
On Debian and Ubuntu-based systems, open a terminal and type:
sudo apt install xz-utils
Once xz-utils is installed, type the following at the terminal to decompress the file:
xz -d DietPi-Image.img.xz
Replace DietPi-Image.img.xz with the correct name of the downloaded archive, e.g. DietPi_*.xz. This will decompress the DietPi image file for you to use.
2. Import of the .ova file in VirtualBox
As next, the .ova file is imported into VirtualBox.
Therefore, the VirtualBox virtual machine has to be instantiated by importing the .ova file (via \File\Import Appliance):

In the following dialog the user has to choose the .ova file which shall be imported.

Keep the settings in the next dialog and klick “Import”.
After the importing has finished the DietPi VirtualBox virtual machine is present:

3. First boot of the new VirtualBox image
Press the start button (green arrow) to ‘boot up’ your system based on the DietPi image.
You must disable IPv6 when the host uses WiFi
When your host uses WiFi to connect to the Internet, and the VM network is attached in bridged mode (default for DietPi appliances), IPv6 routes to the Internet from within the VM will fail, e.g. reported here).
As a result, the IPv6 connection test on very first boot/login of the VM fails. the error dialogue offers the option to disable IPv6, which is the correct way to overcome the issue.
Installation steps within the DietPi guest system when using the VirtualBox extension pack
If you use the VirtualBox extension pack, after the DietPi base installation (done during the very first boot of the DietPi system), further installation steps within the DietPi guest system have to be done to achieve a working time synchronization. In general you have to use the following Time sync mode options set via the dietpi-config command (in the Advanced Options):
- VirtualBox without extension pack: The time synchronisation has to use options 1..4 (“Boot only”, “Boot + Daily”, “Boot + Hourly”, “Daemon + Drift”). No further installation steps are necessary.
VirtualBox with extension pack: The time synchronisation must use option 0 (“Custom”). Further installation steps are necessary, see below.

Additional installation steps in case of the use of the extension pack (the description assumes a root user, otherwise add sudo appropriate):
Check whether an optical disk with the VirtualBox extensions (
.iso) is present:lsblkIf you do not see a
/dev/sr0optical drive, you need to add this in the virtual machine settings (in the shutdown state of the VM)\Machine->Settings->Storage: Add an optical storage which is linked to the guest additions (.iso).Install the kernel headers and the extension pack:
apt -y install build-essential dkms linux-headers-amd64
mkdir /root/mnt
mount /dev/sr0 /root/mnt
cd /root/mnt
./VBoxLinuxAdditions.run
If you see an error message “VirtualBox Guest Additions: Kernel headers not found for target kernel” then the kernel headers are not installed properly (execute
apt -y install linux-headers-amd64and afterwards try./VBoxLinuxAdditions.runagain).Reboot and check service
Check a running VirtualBox extension pack service withsystemctl status vboxadd-serviceThe
vboxadd-serviceshould be in state active.Settings in the host system
To assure that the guest VM syncs the time with the host at boot and when restoring from saved state, run the following three commands on the host system (not the DietPi guest system):VBoxManage guestproperty set "<vm_name>" --timesync-set-start VBoxManage guestproperty set "<vm_name>" --timesync-set-on-restore 1 VBoxManage guestproperty set "<vm_name>" "/VirtualBox/GuestAdd/VBoxService/--timesync-set-threshold" 10000Replace
<vm_name>with the name of your virtual machine, shown in the VM VirtualBox Manager UI, e.g.DietPi_VirtualBox-x86_64-Bookwormif you import the VM without changing its name.
With all these setup steps the time synchronization with the usage of the extension pack should work. Sometimes it needs a couple of minutes until the time is synchronized, so be somehow patient.
Introduction
Virtual machine images are great for those occasions where you want to set up a DietPi system very quickly and test things. Also it may be used as a Debian based Linux system with a small footprint for development purposes, e.g. with the X11 window system. The small footprint makes it optimally usable on PCs without a huge built in RAM. Also several VMs may be run for different applications.
One big advantage of such a VM is that it needs only a couple of minutes coming to a running DietPi system.
One of the options of a virtual machine is VMware Workstation Player resp. VMware Fusion (macOS).

Tested with Windows 10
This description relates to VMware Workstation 16 Player on a Microsoft Windows system.
VMware Workstation Pro as well as VMware Fusion for MAC were not tested but should work also.
Prerequisites
As a starting point you need a PC with a running VMware Workstation Player software on which the DietPi system will run.
On this PC a free harddisk space of about
- 3 GiB for a minimal running system (1.5 GiB in switched off state)
- 5 - 10 GiB for a typical running system with X11
is needed. A recommended size is at least a free space of 10 GiB.
1. Download and extract the DietPi disk image
Open dietpi.com, select PC/VM, then VMware/ESXi. Download the VMX appliance file locally.
The downloaded file is xz-compressed and contains the .vmx and .vmdk file for VMware, so you will need to have installed either 7zip for Windows or The Unarchiver (Macintosh) or xz-utils (Linux) to extract it. They are free of charge and have been tested to decompress the image correctly.
How to extract DietPi images on Linux (xz-utils)
On Debian and Ubuntu-based systems, open a terminal and type:
sudo apt install xz-utils
Once xz-utils is installed, type the following at the terminal to decompress the file:
xz -d DietPi-Image.img.xz
Replace DietPi-Image.img.xz with the correct name of the downloaded archive, e.g. DietPi_*.xz. This will decompress the DietPi image file for you to use.
The archive contains two files: .vmx and .vmdk which have to be copied to a VMware machine folder (The folder can be located anywhere on the PCs harddisk).
2. Add the files in VMware
As next, the VMware virtual machine is setup by just opening the .vmx file (via Open a Virtual Machine):

In the following dialog the user has to navigate to the directory where the .vmx and .vmdk files were stored. Choose the .vmx file to open.
After this the DietPi VMware virtual machine is present and can be started:

3. First boot of the new VMware image
Press the Play virtual machine (green arrow) to ‘boot up’ your system based on the DietPi image. Possibly you have to acknowledge in an appearing dialog “I Copied it” and go on. If you want to use a WiFi connection you have to change the network settings matching your environment (files \boot\dietpi.txt and \boot\dietpi-wifi.txt).
You must disable IPv6 when the host uses WiFi
When your host uses WiFi to connect to the Internet, and the VM network is attached in bridged mode (default for DietPi appliances), IPv6 routes to the Internet from within the VM will fail, e.g. reported here).
As a result, the IPv6 connection test on very first boot/login of the VM fails. the error dialogue offers the option to disable IPv6, which is the correct way to overcome the issue.
Additional information
For information about running DietPi in an VMware ESXi environment, you can read this article: Running the DietPi VMware image on ESXi 6.7.
Introduction
Virtual machine images are great for those occasions where you want to set up a DietPi system very quickly and test things. Also it may be used as a Debian based Linux system with a small footprint for development purposes, e.g. with the X11 window system. The small footprint makes it optimally usable on PCs without a huge built in RAM. Also several VMs may be run for different applications.
One big advantage of such a VM is that it needs only a couple of minutes coming to a running DietPi system.
One of the options of a virtual machine appliance server is the freely available VMware vSphere Hypervisor which contains the VMware ESXi Hypervisor.

Prerequisites
As a starting point you need a PC with a running VMware ESXi Hypervisor software on which the DietPi system will run.
1. Download and extract the DietPi appliance image
Open dietpi.com, select PC/VM, then VMware/ESXi. Download the OVA appliance file locally.
The downloaded file is xz-compressed and contains the .ova file for the ESXi server, so you will need to have installed either 7zip for Windows or The Unarchiver (Macintosh) or xz-utils (Linux) to extract it. They are free of charge and have been tested to decompress the image correctly.
How to extract DietPi images on Linux (xz-utils)
On Debian and Ubuntu-based systems, open a terminal and type:
sudo apt install xz-utils
Once xz-utils is installed, type the following at the terminal to decompress the file:
xz -d DietPi-Image.img.xz
Replace DietPi-Image.img.xz with the correct name of the downloaded archive, e.g. DietPi_*.xz. This will decompress the DietPi image file for you to use.
The resulting DietPi_ESXi-x86_64-Bookworm.ova has to be uploaded to the ESXi server.
2. Create the Virtual Machine
The first step is to select the Virtual Machine management tab on the left to create the DietPi VM:

As next, enter the following in the VM creation dialog:
- Tab Select creation type: Choose Deploy a virtual machine from an OVF or OVA file. Then click Next.
Tab Select OVF and VMDK files: Enter the name of your VM and drop or select the decompressed
.ovafile. Then click Next.
Tab Select storage: Choose the location where the VM shall reside. Then click Next.
- Tab Deployment options: Set options according to your preferences and click Next.
- Tab Ready to complete: Check dialog and click Finish.
3. First boot of the new VMware image
Depending on your settings the VM automatically starts up and is shown in the VM management dialog. Otherwise click on the VM name.

You can open a console of your VM just by clicking on the small VM screen output to open a console window. Klick into the new console window to redirect your keyboard to this console.
Install VM tools
To install VM tools in your ESXi machine, it is an option to do it with the open-vm-tools via:
apt install open-vm-tools
Another article with DietPi install and setup instructions on vSphere has been published by virtualizationhowto.com: https://www.virtualizationhowto.com/2023/09/dietpi-tiny-os-for-home-server-self-hosting/
Introduction
Virtual machine images are great for those occasions where you want to set up a DietPi system very quickly and test things. Also it may be used as a Debian based Linux system with a small footprint for development purposes, e.g. with the X11 window system. The small footprint makes it optimally usable on PCs without a huge built in RAM. Also several VMs may be run for different applications.
One big advantage of such a VM is that it needs only a couple of minutes coming to a running DietPi system.
One of the options to run and manage virtual machines is Proxmox.

Prerequisites
Proxmox runs on any x86_64 system. ISO images for the Virtual Environment server can be found here: https://www.proxmox.com/de/downloads/category/iso-images-pve
Aside of the Proxmox server’s system requirements, a DietPi VM additionally requires:
- 1.2 GiB RAM for a minimal DietPi system
- 5 - 10 GiB RAM for a typical running system with X11
1. Get the DietPi VM ISO image to the Proxmox system
In this step, the .iso file is downloaded to be used as the boot image (CD/DVD) when starting the VM for the first time.
Login to the Proxmox GUI
Therefore access the Proxmox web interface via HTTPS on TCP port 8006:- URL:
https://<your.IP>:8006 - Username:
root - Password:
<root user password you entered during Proxmox VE install>
- URL:
Select the local storage where ISO files reside (ISO file repository)

Click the button “Download from URL” and enter the necessary fields in the following dialog
Insert the URL of the ISO image to the dialog
(e.g. https://dietpi.com/downloads/images/DietPi_VM-x86_64-Bookworm_Installer.iso)Press the button “Query URL” to verify the URL

Optionally, check the SHA256 checksum
Therefore- Activate the “Advanced” dialog option
- Select SHA-256 as the “Hash algorithm”
- Open or download the SHA checksum (e.g. https://dietpi.com/downloads/images/DietPi_VM-x86_64-Bookworm_Installer.iso.sha256) and paste the checksum value from the file into the “Checksum” field
Click Download
The file is downloaded and the checksum is verified.
After these steps, the file should appear in the ISO file repository.

2. Generate a new Proxmox VM
In the Proxmox web interface, select the Create VM button at the top right corner. Choose a Node , a VM ID and a Name, then click Next.

Tab OS: Select the downloaded DietPi ISO file:

For the Guest OS assure that Linux and version “6.x - 2.6 Kernel” is selected.
Click Next.Tab System: As Machine you can select
q35, but the older default will work as well. We recommend the para-virtualised VirtIO SCSI controller, which should be the default.
Important: The check boxQemu Agentshould to be activated.
Click Next.Why to activate the
Qemu Agentcheck box?The QEMU Guest Agent (QGA) is a service that runs inside the virtual machine (VM) and enables better communication between the host (
Proxmox VE) and the guest operating system:- Accurate Guest Information: QGA lets
Proxmox VEfetch real-time IP addresses and guest details, providing a more seamless management experience. - Consistent Backups: Using the QGA commands
fs-freezeandfs-thawhelps to ensure that the guest’s filesystem is in a consistent state before snapshots or backups are made, therefore reducing the risk of data corruption. - Automated TRIM: When moving or migrating VMs on thin-provisioned storage, QGA triggers TRIM commands to reclaim unused disk space, optimizing storage usage.
The QEMU Guest Agent is installed automatically by DietPi during the initial first run setup, if the check box has been activated before the first startup of the VM.
- Accurate Guest Information: QGA lets
Tab Disks: Optionally, change the VM disk storage location (“Storage”), optionally adjust the disk size (“Disk size (GiB)”).
Important: A disk size of at least 8 GB is required.
Click Next.Tab CPU: Adjust CPU details as required, we recommend to use the default
x86-64-v2-AEStype.
Click Next.Tab Memory: While DietPi runs with less, depending on the software you want to install and run within the VM, we recommend at least 1024 MiB memory size, 2048 MiB allows the DietPi system to setup itself without a swap file by default.
Important: During the first run (i.e. during the Clonezilla based installation) a memory size of at least 1024 MB is required. Afterwards this might be reduced depending on the target VM memory size.
Click Next.Dynamic memory allocation via ballooning device
The ballooning device allows Proxmox to dynamically allocate memory from the host system based on actual memory usage within the VM. I.e. you are able to run VMs with a higher overall memory size than the host system has, as long as all VMs do not fully use their memory at the same time.
Tab Network: Using a network bridge allows the VM to show up as dedicated system in your LAN, which simplifies SSH and network application access. We recommend to use the default para-virtualised VirtIO adapter model.
Click Next.- Tab Confirm: Start the VM creation by clicking Finish.
3. Execute the Clonezilla based DietPi installation
The VM can now be started, select it via left side navigation of the Proxmox web interface, then the Start button at the top right side, finally the Console button to watch and execute the DietPi installation (Clonezilla based installation procedure). The Clonezilla setup finishes its procedure by shutting down the VM.
Then the CD/DVD drive of the VM can be removed via the “Hardware” option dialog of the created VM. After this, the VM can be restarted again, so that the DietPi first run installation procedure is executed.
This first run setup can be monitored by clicking the “Console” button to watch and finish the DietPi first run setup. Alternatively the VM can be connected via SSH, after giving it some time to finish initial setup steps (typically obtaining its IP from the router).

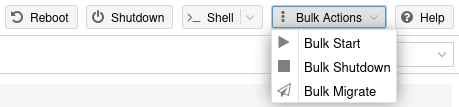
Comfortably control the DietPi VM from the Proxmox GUI
In Proxmox there is the option to start/stop VMs resp. Container via
the mouse context menu on the VM in the tree view
the pull down menu “bulk actions” which appears, when the Proxmox node in the tree is selected
Alternative: Import virtual disk image via console
An alternative installation method is to import a virtual disk image (QCOW2 format) directly into a newly generated VM. This skips the additional installation process when using the ISO image, but requires some manual commands on the Proxmox OS console. To simplify the process, there is a script from Darren Bennett which allows to enter the essential parameters via terminal UI and creates the VM and volume for you. See dazeb/proxmox-dietpi-installer for details.
The script can be executed with this command from the Proxmox OS console:
bash <(curl -sSfL https://raw.githubusercontent.com/dazeb/proxmox-dietpi-installer/main/dietpi-install.sh)
Click here if you want to do the VM creation and image import manually
1. Generate a new Proxmox VM
- Access the Proxmox web interface via HTTPS on TCP port 8006:
- URL:
https://<your.IP>:8006 - Username:
root - Password:
<root user password you entered during Proxmox VE install>
- URL:
Tab General: Select the Create VM button at the top right corner. Choose a Node , a VM ID and a Name, then click Next.
Remember the VM ID, you need it later.
Tab OS: Select “Do not use any media “, for the Guest OS assure that Linux and version “6.x - 2.6 Kernel” is selected, then click Next.
- Tab System: As Machine you can select
q35, but the older default will work as well. We recommend the para-virtualised VirtIO SCSI controller, which should be the default.
Click Next. - Tab Disks: Delete the default
scsi0disk with the trash bin button, then click Next. - Tab CPU: Adjust CPU details as required, we recommend to use the default
x86-64-v2-AEStype.
Click Next. Tab Memory: While DietPi runs with less, depending on the software you want to install and run within the VM, we recommend at least 1024 MiB memory size, 2048 MiB allows the DietPi system to setup itself without a swap file by default.
Click Next.Dynamic memory allocation via ballooning device
The ballooning device allows Proxmox to dynamically allocate memory from the host system based on actual memory usage within the VM. I.e. you are able to run VMs with a higher overall memory size than the host system has, as long as all VMs do not fully use their memory at the same time.
Tab Network: Using a network bridge allows the VM to show up as dedicated system in your LAN, which simplifies SSH and network application access. We recommend to use the default para-virtualised VirtIO adapter model.
Click Next.- Tab Confirm: Start the VM creation by clicking Finish.
2. Download, extract and import the DietPi image
Transferring a disk image to Proxmox
A DietPi disk image can be transferred to the Proxmox server via e.g. USB flash drive or by uploading it as CD/DVD ISO image. Since the import needs to be done via console (accessible via web interface and SSH), we guide you through the path of downloading it directly on the Proxmox server.
- Select the Proxmox node, then click the Shell button at the top right corner. Alternatively connect via SSH to the Proxmox server, using the same login credentials you used for the Proxmox web interface.
In the console window, enter the following commands to download the DietPi image, optionally check its integrity, decompress it via
xz, import it as disk to your new VM (using the VM ID you chose during creation) and make it the boot drive.
If not done yet, we recommend to upgrade all APT packages to the latest version.apt update apt full-upgrade apt install xz-utils curl -O https://dietpi.com/downloads/images/DietPi_Proxmox-x86_64-Bookworm.qcow2.xz sha256sum -c <(curl -sSf 'https://dietpi.com/downloads/images/DietPi_Proxmox-x86_64-Bookworm.qcow2.xz.sha256') xz -d DietPi_Proxmox-x86_64-Bookworm.qcow2.xzNext, the disk image is imported.
Note: Replace100below with the VM ID entered during VM creation.ID=100 qm importdisk "$ID" DietPi_Proxmox-x86_64-Bookworm.qcow2 local-lvm qm set "$ID" --scsi0 "local-lvm:vm-$ID-disk-0" qm set "$ID" --boot order=scsi0
The VM can now be started, select it via left side navigation of the Proxmox web interface, then the Start button at the top right side, finally the Console button to watch and finish the DietPi first run setup.
Alternatively you can connect to the VM via SSH, after giving it some time to finish initial setup steps and obtaining its IP with your router or IP scanner.
Introduction
Virtual machine images are great for those occasions where you want to set up a DietPi system very quickly and test things. Also it may be used as a Debian based Linux system with a small footprint for development purposes, e.g. with the X11 window system. The small footprint makes it optimally usable on PCs without a huge built in RAM. Also several VMs may be run for different applications.
One big advantage of such a VM is that it needs only a couple of minutes coming to a running DietPi system.
One of the options of a virtual machine is Parallels Desktop.

Prerequisites
As a starting point you can use an Apple Mac with a running Parallels Desktop software on which the DietPi system will run (x86 system, e.g. Mac mini 2011/2012/2014/2018).
On this Mac a free harddisk space of about
- 1.2 GiB for a minimal running system
- 5 - 10 GiB for a typical running system with X11
is needed. A recommended size is at least a free space of 10 GiB.
1. Download and extract the DietPi disk image
Open dietpi.com, select PC/VM, then Parallels. Download the VMX appliance file locally.
Double click on the downloaded tar.xz file to extract it (or via option “Open in Finder”).
2. Import and start the virtual machine in Parallels Desktop
Double click on the extracted .vmx file, which will open a Parallels dialogue to import it as virtual machine and starts it right away after the import.

You must disable IPv6 when the host uses WiFi
When your host uses WiFi to connect to the Internet, and the VM network is attached in bridged mode (default for DietPi appliances), IPv6 routes to the Internet from within the VM will fail, e.g. reported here).
As a result, the IPv6 connection test on very first boot/login of the VM fails. the error dialogue offers the option to disable IPv6, which is the correct way to overcome the issue.
Introduction
Virtual machine images are great for those occasions where you want to set up a DietPi system very quickly and test things. Also it may be used as a Debian based Linux system with a small footprint for development purposes, e.g. with the X11 window system. The small footprint makes it optimally usable on PCs without a huge built in RAM. Also several VMs may be run for different applications.
One big advantage of such a VM is that it needs only a couple of minutes coming to a running DietPi system.
One of the options of a virtual machine is UTM.

Prerequisites
As a starting point you can use an Apple Mac with macOS 11 Big Sur or higher running the UTM software (x86 system, e.g. Mac mini 2011/2012/2014/2018 as well as M1 Apple silicon).
On this Mac a free harddisk space of about
- 1.2 GiB for a minimal running system
- 5 - 10 GiB for a typical running system with X11
is needed. A recommended size is at least a free space of 10 GiB.
Emulation feature of UTM
The emulation feature is an option of the virtualization technique to run x86 code on a M1 Mac system and vice versa an M1 Mac code on a x86 Mac system.
This might be a good choice e.g. for testing purposes, but typically there will be a performance drawback using the emulation instead of running native x86 images on a x86 system resp. native aarch64 images on an M1 system.
UTM machine for M1 (Apple silicon)
The available DietPi UTM image is an image which is x86 based. On a M1 Mac it will run with lower performance because it uses the slower emulation and not the faster virtualization technique.
If you plan to run DietPi on an M1 Mac with UTM, it is a good choice to create a native aarch64 DietPi image for getting the best performance. This can be achieved by adding a new UTM VM via the + option in the UTM program. Then a new VM can be generated by using a standard Debian image for the arm64 architecture Native PCs (e.g. with the mini.iso image) and afterwards executing the scripts described in Make your own distribution.
1. Download and extract the DietPi disk image
Open dietpi.com, select PC/VM, then UTM. Download the UTM appliance file locally.
Double click on the downloaded file to decompress it (or via option “Open in Finder”). Copy/Move the contained .utm file to the UTM virtual machine directory. This is typically located within the (hidden) user subdirectory .../Library/Containers/com.utmapp.UTM/Data/Documents.
2. Import the virtual machine in UTM
As next, start resp. restart the UTM program. The imported DietPi virtual machine should be visible there.

Then select the imported machine to start it up.

Introduction
Virtual machine images are great for those occasions where you want to set up a DietPi system very quickly and test things. Also it may be used as a Debian based Linux system with a small footprint for development purposes, e.g. with the X11 window system. The small footprint makes it optimally usable on PCs without a huge built in RAM. Also several VMs may be run for different applications.
One big advantage of such a VM is that it needs only a couple of minutes coming to a running DietPi system.
One of the options of a virtual machine is Microsoft Hyper-V.

Tested with Windows 10
This description relates to Hyper-V on a Microsoft Windows system.
Prerequisites
As a starting point you need a PC with a activated Hyper-V on which the DietPi system will run.
Hyper-V activation within Windows
Hyper-V needs to be activated within Windows (e.g. see there). The activation is done by enabling all Hyper-V features in the Turn Windows features on or off within the Apps and Features area in the Windows settings.

On this PC a free harddisk space of about
- 3 GiB for a minimal running system (1.5 GiB in switched off state)
- 8 - 10 GiB for a typical running system with X11
is needed. A recommended size is at least a free space of 10 GiB.
1. Download and extract the DietPi disk image
Open dietpi.com, select PC/VM, then Hyper-V. Download the Virtual disk image file locally.

The downloaded file is xz-compressed and contains the .vhdx file for Hyper-V, so you will need to have installed either 7zip for Windows or The Unarchiver (Macintosh) or xz-utils (Linux) to extract it. They are free of charge and have been tested to decompress the image correctly.
How to extract DietPi images on Linux (xz-utils)
On Debian and Ubuntu-based systems, open a terminal and type:
sudo apt install xz-utils
Once xz-utils is installed, type the following at the terminal to decompress the file:
xz -d DietPi-Image.img.xz
Replace DietPi-Image.img.xz with the correct name of the downloaded archive, e.g. DietPi_*.xz. This will decompress the DietPi image file for you to use.
Move the .vhdx file to the desired virtual machine folder on your harddisk.
2. Add a Hyper-V virtual machine
Next, a Hyper-V machine needs to be created. Start the Hyper-V-Manager, right click on your PCs node in the left tree and open the dialog wizard for the machine generation (“New” -> “Virtual Machine”):

In the following wizard you have to set the following:
- Give your machine a name (“Specify Name and Location”)
- Select the Hyper-V Generation: Select Generation 1 (“Specify Generation”)
- Choose your RAM size (e.g. 2048 MB)
- If you have already configured a network, select your network. Otherwise let it “Not connected” and change it afterwards
- Choose to use the decompressed
.vhdxHyper-V disk file (see above)
If you have not set up any network connection, go on with the Virtual Switch Manager and add a network. Select that network in your virtual machine settings afterwards.

3. First boot of the new Hyper-V machine
First, click on Connect to open a window of the virtual machine:

Then press Start to boot up the machine:

After this, your machine should boot up.
You must disable IPv6 when the host uses WiFi
When your host uses WiFi to connect to the Internet, and the VM network is attached in bridged mode (default for DietPi appliances), IPv6 routes to the Internet from within the VM will fail, e.g. reported here).
As a result, the IPv6 connection test on very first boot/login of the VM fails. the error dialogue offers the option to disable IPv6, which is the correct way to overcome the issue.
Additional information / troubleshooting
Network connection not found
In the case that you did not setup your network configuration properly, the booting procedure will not find a network connection and may respond with this boot console output:

Then you have to check and repair your network configuration within the Virtual Switch Manager.
Generate a Hyper-V Generation 2 machine
An option to get a Hyper-V Generation 2 machine is to generate your own Hyper-V image via a Debian network installation (booting the Hyper-V machine from a Debian netinst.iso installer like you would do it on a PC). Install a minimal Debian machine (i.e. no X11 desktops, etc.). Afterwards run the procedure described in section “Make your own distribution”. Generation 2 machines support (and require) to boot in UEFI mode, support Secure Boot, TPM, use modern SCSI controllers and have higher hardware limits. For use as a home server, however, you will not need any of these functions.
Introduction
The Native PC images are great for those occasions where SBC performance is just not enough, or where you require an x86_64 system. It also works great with small Thin Clients, affordable little x86 machines, settled somewhere between SBCs and desktop PCs.

It could be also a great way to make use of an old computer that’s not capable of running the latest version of Windows or macOS.
UEFI or BIOS?
First, you have to find out whether your PC contains UEFI (Unified Extensible Firmware Interface) or BIOS (Basic Input/Output System):
- In case of an UEFI based PC see the “UEFI Installer image” tab.
- In case of a BIOS based PC see the “BIOS Installer image” tab or “BIOS direct write image” tab.
“Live image” or “Installer image”?
The “Installer image” is used to boot from and install the DietPi system on a different target boot drive (storage medium). In contrary to that the “Live image” is used to be write the image directly to the target DietPi boot drive.
Prerequisites
You would need the next:
- one working PC with internet access, helping to write the boot media
- one bootable USB drive (e.g. flash disk, at least 2 GiB), to hold the DietPi installer image and to boot the target PC
- target PC to be installed
1. Download the DietPi installer image
Download the Native PC for UEFI > Installer Image from dietpi.com. It is xz-compressed, but most flashing tools support flashing xz-compressed images without the need to first decompress them. Otherwise we recommend 7zip for Windows to decompress the image.

Download Rufus and run the application. There is a portable version of Rufus available which doesn’t require any local installation.
Be careful if you run alternative applications!
While Balena Etcher is recommended for installing DietPi on SBCs, it does not provide good results for UEFI images. The same also with win32diskimager, which does not work as an alternative.
2. Write image to USB drive
Start Rufus application and make sure you have your USB drive inserted into your computer. Follow the next steps:
- Select the USB device
- Select the downloaded DietPi image
- Select GPT as partition scheme
- Select UEFI as target system
- Click on Start button
Ensure that the selected USB medium is the correct one.
All data on the USB medium and later on the target PCs harddisk will be erased!
Before starting the installation first make a backup of the data available on the target PC and USB drive if you need it later again!

3. Boot the target PC and install the image on the local disk
Boot the target PC from the USB image and install the image on the local disk / harddisk. Put the USB stick into the target PC and boot from this USB stick.
BIOS settings
It may be necessary to change BIOS settings to enable the UEFI boot. This action is not described here.
During the initial boot, the following dialog may appear to boot from the USB stick:

After booting the graphics selection dialog appears:

You can select the default settings. In case of problems, please select “Safe graphic settings”.
Once this step is completed, you will able to select a different keyboard. If necessary, change your keyboard settings and go through the appropriate dialogues.
Then the installation process begins with the help of the wonderful Clonezilla tool.
Select the image file to be installed on the target PCs harddisk. Normally you should only see one single option:

After this, you have to select the target PCs harddisk where your DietPi shall be installed. In this example there is only one harddisk present:

After this, the installation process starts with several steps, e.g. showing the process of the image copying:

These steps take some time, be patient! Otherwise buy an SSD. :-)
At the end the system executes a shutdown.
Click here if you want to use a WiFi connection
To setup the WiFi, you have to change the network settings matching to your environment:
- Open the file
dietpi-wifi.txtand setaWIFI_SSID[0]to the name of your WiFi network. - In the same file
dietpi-wifi.txt, setaWIFI_KEY[0]to the password of your WiFi network. - Save and close the files
You need to set these values before you boot up the PC for the first time (initial boot).
For the first boot up of your PC disconnect your USB stick from the target PC and power on the PC to login and execute the first boot procedure.
Prerequisites
You would need the next:
- one working PC with internet access, helping to write the boot media
- one disk drive, to hold the DietPi system. It is written with the direct write image and will be the disk drive in the DietPi system.
- target PC to be installed
1. Download the DietPi Live image
Download the Native PC for UEFI > Live Image from dietpi.com. It is xz-compressed, but most flashing tools support flashing xz-compressed images without the need to first decompress them. Otherwise we recommend 7zip for Windows to decompress the image.
Download Rufus and run the application. There is a portable version of Rufus available which doesn’t require any local installation.
2. Write image to disk drive
Start Rufus application and make sure you have your disk drive connected into your computer. This may e.g. be done using an USB to SATA controller if you use a SATA disk drive. Follow the next steps:
- Show advanced drive properties and select List USB hard drives
(in case that you have connected your disk drive via a USB adapter) - Select the disk drive device
- Select the downloaded DietPi image
- Click on Start button
Ensure that the selected disk drive is the correct one.
All data on the disk drive will be erased!
Before starting the installation first make a backup of the data available on the disk drive if you need it later again!

3. Boot the target PC
Click here if you want to use a WiFi connection
To setup the WiFi, you have to change the network settings matching to your environment:
- Open the file
dietpi-wifi.txtand setaWIFI_SSID[0]to the name of your WiFi network. - In the same file
dietpi-wifi.txt, setaWIFI_KEY[0]to the password of your WiFi network. - Save and close the files
You need to set these values before you boot up the PC for the first time (initial boot).
For the first boot up of your PC disconnect your disk drive from your working PC and connect it to the target PC. Then power on the target PC to login and execute the first boot procedure.
Option: Automatic base installation at first boot (running an unattended base installation)
DietPi offers the option for an automatic first boot installation. See section “How to do an automatic base installation at first boot” for details.
Prerequisites
You would need the next:
- one working PC with internet access, helping to write the boot media
- one bootable USB drive (e.g. flash disk, at least 2 GiB), to hold the DietPi installer image and to boot the target PC
- target PC to be installed
Remark: If your PC is not able to boot from a USB drive you can do a similar installation by burning the installer image onto a DVD and boot from the DVD. The same installation procedure will take place. Do not forget to eject your DVD before the installed DietPi shall boot from the hard disk for the first time.
1. Download the DietPi installer image
Download the Native PC for BIOS/CSM > Installer Image from dietpi.com. It is xz-compressed, but most flashing tools support flashing xz-compressed images without the need to first decompress them. Otherwise we recommend 7zip for Windows to decompress the image.

Download Rufus and run the application. There is a portable version of Rufus available which doesn’t require any local installation.
2. Write image to USB drive
Start Rufus application and make sure you have your USB drive inserted into your computer. Follow the next steps:
- Select the USB device
- Select the downloaded DietPi image
- Select MBR as partition scheme and BIOS or UEFI as target system
- Click on Start button
Ensure that the selected USB medium is the correct one.
All data on the USB medium and later on the target PCs harddisk will be erased!
Before starting the installation first make a backup of the data available on the target PC and USB drive if you need it later again!

3. Boot the target PC and install the image on the local disk
Boot the target PC from the USB image and install the image on the local disk / harddisk. Put the USB stick into the target PC and boot from this USB stick.
BIOS settings
It may be necessary to change BIOS settings to enable the boot from the USB stick. This action is not described here.
After booting the graphics selection dialog appears:
You can select the default settings. In case of problems, please select “Safe graphic settings”.
Once this step is completed, you will able to select a different keyboard. If necessary, change your keyboard settings and go through the appropriate dialogues.
Then the installation process begins with the help of the wonderful Clonezilla tool.
Select the image file to be installed on the target PCs harddisk. Normally you should only see one single option:
After this, you have to select the target PCs harddisk where your DietPi shall be installed. In this example there is only one harddisk present:
After this, the installation process starts with several steps, e.g. showing the process of the image copying:
These steps take some time, be patient! Otherwise buy an SSD. :-)
At the end the system executes a shutdown.
Click here if you want to use a WiFi connection
To setup the WiFi, you have to change the network settings matching to your environment:
- Open the file
dietpi-wifi.txtand setaWIFI_SSID[0]to the name of your WiFi network. - In the same file
dietpi-wifi.txt, setaWIFI_KEY[0]to the password of your WiFi network. - Save and close the files
You need to set these values before you boot up the PC for the first time (initial boot).
For the first boot up of your PC disconnect your USB stick from the target PC and power on the PC to login and execute the first boot procedure.
Prerequisites
You would need the next:
- one working PC with internet access, helping to write the boot media
- one disk drive, to hold the DietPi system. It is written with the direct write image and will be the disk drive in the DietPi system.
- target PC to be installed
1. Download the DietPi Live image
Download the Native PC for BIOS/CSM > Live Image from dietpi.com. It is xz-compressed, but most flashing tools support flashing xz-compressed images without the need to first decompress them. Otherwise we recommend 7zip for Windows to decompress the image.
Download Rufus and run the application. There is a portable version of Rufus available which doesn’t require any local installation.
2. Write image to disk drive
Start Rufus application and make sure you have your disk drive connected into your computer. This may e.g. be done using an USB to SATA controller if you use a SATA disk drive. Follow the next steps:
- Show advanced drive properties and select List USB hard drives
(in case that you have connected your disk drive via a USB adapter) - Select the disk drive device
- Select the downloaded DietPi image
- Click on Start button
Ensure that the selected disk drive is the correct one.
All data on the disk drive will be erased!
Before starting the installation first make a backup of the data available on the disk drive if you need it later again!
3. Boot the target PC
Click here if you want to use a WiFi connection
To setup the WiFi, you have to change the network settings matching to your environment:
- Open the file
dietpi-wifi.txtand setaWIFI_SSID[0]to the name of your WiFi network. - In the same file
dietpi-wifi.txt, setaWIFI_KEY[0]to the password of your WiFi network. - Save and close the files
You need to set these values before you boot up the PC for the first time (initial boot).
For the first boot up of your PC disconnect your disk drive from your working PC and connect it to the target PC. Then power on the target PC to login and execute the first boot procedure.
Option: Automatic base installation at first boot (running an unattended base installation)
DietPi offers the option for an automatic first boot installation. See section “How to do an automatic base installation at first boot” for details.
4. First logon on DietPi
The hostname of the system will be: DietPi.
You might change the name before the first boot within the configuration file dietpi.txt.
After the system has booted up, you can continue following the instructions on the screen, or connect via network:
- If you have a keyboard and a monitor connected to your system you login via this console.
- If you have a headless system without keyboard and monitor attached, you can use an SSH client like PuTTY to connect from a remote system. The SSH server Dropbear is installed and enabled by default on DietPi.
- Most SBCs alternatively allow to connect a serial console via UART, which is by default enabled on DietPi as well.
A login prompt will appear. Use the initial credentials:
- login:
root - password:
dietpi(resp. the one you set viadietpi.txt)
Click here if you want to connect via SSH (running a headless install)
On first login DietPi will immediately upgrade system and packages. If your network connection is not stable it is recommended to perform this step locally instead.
IP Scanning tool
For the following steps we require an IP Scanning tool to determine the IP address of the Raspberry Pi.
- For Windows, you could try
Advanced IP Scanner. Download the tool from here. For Linux, you can use the
nmapcommand:sudo apt-get install nmap # for installing Nmap sudo nmap -sn 192.168.1.0/24 # for scanning IP address in the eange 192.168.1.0 - 192.168.1.255
Alternatively you may also determine the IP address in the DHCP status page of your DHCP server (often included in a router): Search for the hostname DietPi and obtain the IP address.
Connect to DietPi via SSH
A popular SSH Client for Windows is PuTTY. You can download PuTTY from here. Enter in the Host Name field the IP address found during the scanning, select SSH and then click on Open button.
Depending on your DHCP configuration, also just dietpi may be sufficient as the hostname.
Sometimes it needs to be followed by your router’s domain (e.g. dietpi.fritz.box).

Most Linux distributions come packaged with an ssh client. Type in your Terminal next command (replace the sample IP address 192.168.1.20 with the one found via scanning the network):
ssh root@192.168.1.20
resp.
ssh root@dietpi
DietPi will then immediately begin to search for and install updated software packages, which will take some time to complete.
Once the packages have been updated, DietPi will ask you to confirm whether you would like to enable user analytics.
DietPi Survey
DietPi Survey is optional, and not enabled by default. It is anonymous, secured and requires a minimal data transfer. ALL the shared details are published on the dietpi.com/survey page. Checkout and see how DietPi is used!

The default DietPi password is public, so you’ll be asked to change this at the next stage for both the root and dietpi user accounts. Select OK and hit Enter, then provide your password (twice) to confirm.
You can change the password again later by typing passwd at the terminal or also via the command line script dietpi-config (within the “Security options”).

5. Further steps
The base installation of DietPi is minimal by design, allowing you to choose what software you want to install and use: Just run dietpi-software and install DietPi Optimised Software.
You can return to the DietPi-Software tool to make further changes at any time by typing dietpi-software at the terminal, or enter dietpi-launcher and select DietPi-Software tool.
If you want to make further changes to your DietPi configuration, you can run dietpi-launcher at the terminal to view all the available DietPi tools, including DietPi-Update to update your device and DietPi-Backup to back up your device.
For more details, check DietPi Tools section.
YouTube tutorials (made by community)
- YouTube video #1: DietPi - HOW To Install & Initial Configuration on the Raspberry Pi 4
- YouTube video #2: Installing DietPi : Fast Linux For Any Raspberry Pi!!!
- YouTube video #3: How Install Diet Pi Raspberry Pi 4 Or Any SBC - Install Set Up Configure
- YouTube video #4: Headless install of Dietpi | No Monitor, No LAN, No router login | Pre Configure WiFi
- YouTube video #5: Installing DietPi on Raspberry Pi, First Boot and Configuration
- YouTube video #6 (German language): Raspberry Pi 4 & DietPi - die schnelle Alternative - Grundinstallation einfach erklärt