Hi,
Now is running  Have fun. I hope you can rebuild it.
Hardware:
ODROID XU4 as PlexMediaServer (Master)
Raspberry PI 3 as remote Trascoder (Slave)
Netgear 5 Port Gbit-Switch
Router as DHCP Server GBit
Server IP address:
192.168.1.110
Slave IP address.
192.168.1.111
Software:
Server (Master) DietPi V122
SSH Server OpenSSH
File Server Samba
Webserver Preference Apache2
Software Additional:
• Build
• Git
• FFmpeg
• Java
• Node.js
Software Optimized.
• Plex Server
───────────────────────────────────────
DietPi | 21:40 | Thu 30/06/16
───────────────────────────────────────
V122 | oDroid XU3/4 (armv7l)
───────────────────────────────────────
IP Address | 192.168.1.110
───────────────────────────────────────
Created by: Daniel Knight
Web: DietPi.com
Twitter: twitter.com/dietpi_
DietPi’s web hosting is powered by MyVirtualServer.com
DietPi is a free product and relies on your donations for funding.
Donations: DietPi Community Forum - Welcome to the DietPi OS Community Forum
dietpi-launcher = All the DietPi programs in one place.
dietpi-config = Feature rich configuration tool for your device.
dietpi-software = Select optimized software for installation.
htop = Resource monitor.
cpu = Shows CPU information and stats.
root@DietPi-ODROID:~#
Client (Slave) DietPi V122
SSH Server OpenSSH
File Server Samba
Webserver Preference Apache2
Software Additional:
• Build
• Git
• FFmpeg
• Java
• Node.js
───────────────────────────────────────
DietPi | 22:25 | Thu 30/06/16
───────────────────────────────────────
V122 | RPi 3 Model B (armv7l)
───────────────────────────────────────
IP Address | 192.168.1.111
───────────────────────────────────────
Created by: Daniel Knight
Web: DietPi.com
Twitter: twitter.com/dietpi_
DietPi’s web hosting is powered by MyVirtualServer.com
DietPi is a free product and relies on your donations for funding.
Donations: DietPi Community Forum - Welcome to the DietPi OS Community Forum
dietpi-launcher = All the DietPi programs in one place.
dietpi-config = Feature rich configuration tool for your device.
dietpi-software = Select optimized software for installation.
htop = Resource monitor.
cpu = Shows CPU information and stats.
root@DietPi-Slave:~#
These are my startconditions:
Setup Master/Server:
First we have to Setup the native Plexserver for some conditions.
For that we use the plex homepage you already have installed with the PlexMediaServer with this brilliant DietPi Setup.
So take a browser you like and open the Serverconfig. Follow for this the DietPi instructions found at: USB External HDD
(1) If needed create a new Plex Temp Transcoding Directory
sudo mkdir -p /opt/plex/tmp
(2) Define the Accessrights and owner (Note: This differs a little from the guide; we have no usergroup “plex”; only user “plex”)
sudo chown -R plex:nogroup /opt/plex
(3) Define the Plex Teamp Transcoder Diectory. You’ll find this on the own Plex Server properties:
Save these changes.
Some basic thoughts about Plex, Mediafiles, Access from Windows, …
We have to take a minute to think about our mediafiles. I recommend one single mountpoint eg. /mnt because if you mount more than one device on XU4 all Devices are accessable from PlexMaster and his Slaves. Very important at this point: Always remember to set the owner and the rights of all files/directoys mounted on XU4 are set to plex:nogroup. If not, the PlexMediaServer weaves at startup and won’t start anymore until you fix this.
With DietPi we have one mountpoint witch we can use for our Plex to start
I prefer ext4 as filesystem, because if the space on the first mounted usb-disk you’ll be able to create with LVN a Huge Memoryspace and it’s easier to define access rights for plex
So I mount a empty USB Stick now, only for demonstration - because this is not my active plex.
There already is a automount process integrated in DietPi, but I want to use a direct mount via UUID, so that always, when plex reboots, is ensured to get the same mountpoint disk combination.
XU4 has 2 USB 3.0 interfaces and it’s very recommendet to use this or in combination with an USB 3.0 Hub. We’ll need the performance.
To find out mountable devices
sudo blkid
We’re lookin for something like
/dev/sda1
the others are from DietPi installation or OS. For later note the UUID
To create an ext4 partition of the whole drive:
sudo mkfs.ext4 /dev/sda1
you have to use your device
After that we modify
/etc/fstab
to mount the drive at startup
sudo nano /etc/fstab
Find in this File
#External Drives-------------------------------
And create a new Line after that
UUID="your UUID*3ae3ad10-05ec-4dd0-8608-68facd31268a*" /mnt/usb_1 ext4 defaults,noatime,nofail 0 0
DietPi already has created a Mountpoint named usb_1
CTRL O for save and CTRL X for Exit
After that I reboot my system with reboot to check if everything is right.
sudo reboot
Now check if everthing works
df
If you find /dev/sda1 or something like that, the mount is comlete and works.
Now we remember we have a specific problem with plex. so set the owner to the mountpoint
sudo chown -R plex:nogroup /mnt/usb_1
To transfer Mediafiles from a Windows PC we need a samba server we already hast installed with DietPi Setup.
Samba hast it’s own usermanagment. So we have to create a samba user. In this case I’ll take “root” for that.
sudo smbpasswd -a root
New SMB password:
To create a the share we have to modify
/etc/samba/smb.conf
sudo nano /etc/samba/smb.conf
The Basics already done by DietPi Setup. So go to End of the file and add following lines.
[usb_1]
  comment = usb_1 Share
path = /mnt/usb_1
  browseable = yes
  read only = no
  create mask = 0775
  directory mask = 0775
  valid users = root
  guest ok = no
  writeable = yes
  public = yes
Now
dietpi-services restart
So copy some mediafiles on this share and change the owner as we know.
Now I follow the guide: Ubuntu Install · wnielson/Plex-Remote-Transcoder Wiki · GitHub
Install python-setuptools
sudo apt-get install python-setuptools
Now get the repository
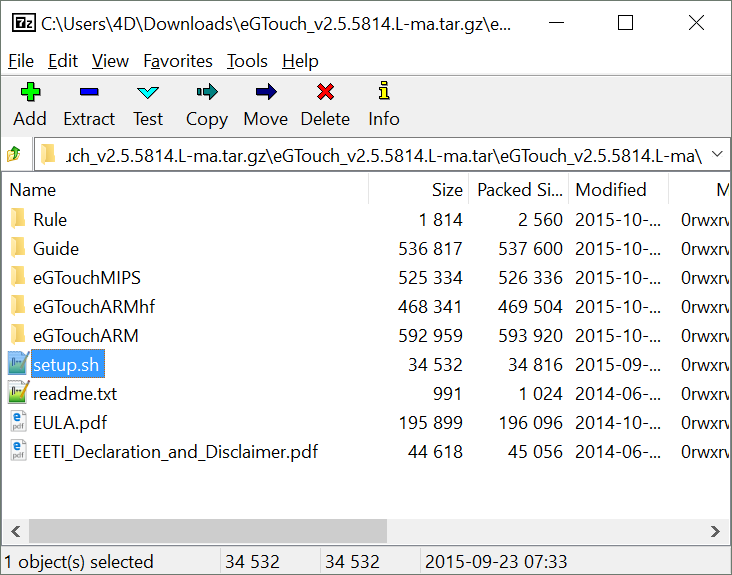
git clone https://github.com/wnielson/Plex-Remote-Transcoder.git
cd Plex-Remote-Transcoder
Special thanks to:
wnielson
After that it is time to run the setup script
sudo python setup.py install
Now setup the new configuration
sudo prt install
Please answer the questions
This look like that:
IP address of this machine: 192.168.1.110
Renaming original transcoder
Here we have to leave again the Tutorial
Orig.:
sudo install -o plex -g plex ~/.prt.conf ~plex/
In our Plex installation with DietPi we have no Usergroup “plex”; so we use instead of the orig. command
sudo install -o plex -g nogroup ~/.prt.conf ~plex/
Next Step it’s time to tell the Master (192.168.1.110 in this case) whom is it’s slave.
So use the following command:
sudo -u plex -H prt add_host
This means, that we execute the command as a different user. For our Setup this is the “plex”-user.
“add_host” tells the server something about the slave:
Host: 192.168.1.111
Port: 22
User: plex
To finalize that you’ll be asked to Proceed: Answer this with “y”.
Configure Network Shares between Master and Slave:
Now the Master have to have access to the slave for transcoding and vice versa! For that we have to install NFS to create a dedicated network connection between master and slave.
sudo apt-get install nfs-kernel-server
Once you have installed nfs-kernel you’ll get a new file in /etc
This file named exports
There we’ll define the shares for remote transcoding
PMS need 4(+) Directorys for that:
(1) Plex configuration /var/lib/plexmediaserver
(2) Plex binaries /usr/lib/plexmediaserver
(3) the tmp directory we have defined bevore /opt/plex/tmp
(4) every media data directory /mnt/usb_1
To do this edit new config file of nfs
sudo nano /etc/exports
At the End of the File ad following lines
/var/lib/plexmediaserver 192.168.1.111(ro,sync,no_subtree_check)
/usr/lib/plexmediaserver 192.168.1.111(ro,sync,no_subtree_check)
/opt/plex/tmp 192.168.1.111(rw,sync,no_subtree_check)
/mnt/usb_1 192.168.1.111(ro,sync,no_subtree_check)
Only the transcoder path needs Write permissions; all others read only is enough.
Restart NFS
sudo service nfs-kernel-server restart
Master/Server Side is completed now.
For further configuration of the slave we need information about the plex user on the master. It’s necessary to get the same information on the slave.
id plex
You’ll get as answer something like that:
uid=107(plex) gid=65534(nogroup) groups=65534(nogroup)
Sometimes you cannot use the UID at the slave, because it’s alreday used. In this case
usermod -u <NEW UNIQUE ID> plex
If there is an errormessage than stop the services or kill the processes
dietpi-services stop
Than create a new unique UserID for plex
usermod -u <NEWID> plex
Now you have to correct the accessrights/owner from the plexdirectories with
chown -R plex:nogroup /var/lib/plexmediaserver
chown -R plex:nogroup /usr/lib/plexmediaserver
Setup Slave:
Create new user on the slave
sudo adduser --uid 107 --gid 65534 plex --home /var/lib/plexmediaserver --no-create-home
You’ll get asked about a password.
Leave it without password. This question comes up for several time. Always without password.
Check the characteristics of the user
id plex
Should give you the same answer as the Server. If not you have to Change on both Master and Slave the UID to the same value! for that
usermod -u UID username
helps you.
Install python-setuptools
sudo apt-get install python-setuptools
and
git clone https://github.com/wnielson/Plex-Remote-Transcoder.git
cd Plex-Remote-Transcoder

sudo python setup.py install
Install nfs as we already did at master
sudo apt-get install nfs-kernel-server
Once the installation of nfs has finished modify
/etc/fstab
sudo nano /etc/fstab
Mount the path the master exports. Add the lines in the file
192.168.1.110:/var/lib/plexmediaserver /var/lib/plexmediaserver nfs defaults 0 0
192.168.1.110:/usr/lib/plexmediaserver /usr/lib/plexmediaserver nfs defaults 0 0
192.168.1.110:/opt/plex/tmp /opt/plex/tmp nfs defaults 0 0
192.168.1.110:/mnt/usb_1 /mnt/usb_1 nfs defaults 0 0
Now create these mountpoints
sudo mkdir -p /var/lib/plexmediaserver
sudo mkdir -p /usr/lib/plexmediaserver
sudo mkdir -p /opt/plex/tmp
The Mountpoint
/mnt/usb_1
already exists
Now mount it with
sudo mount -a
To check these links change to one or all of these directorys and you’ll find the files of the master
Enable Key-Based Authentication
At the end it’s necessary for the all this to work the plex user on the master must be able to login to the slave without enter a password.
This can be realized via key-based authentication.
For that we have to change to master again!
Login and
sudo su plex
Now you are user plex
ssh-keygen
Don’t add a password just hit Enter some times and finish it with “y”.
Install this new generated key
cat ~/.ssh/id_rsa.pub >> ~/.ssh/authorized_keys
Try the connection
ssh plex@192.168.1.111
Answer the question with “yes”.
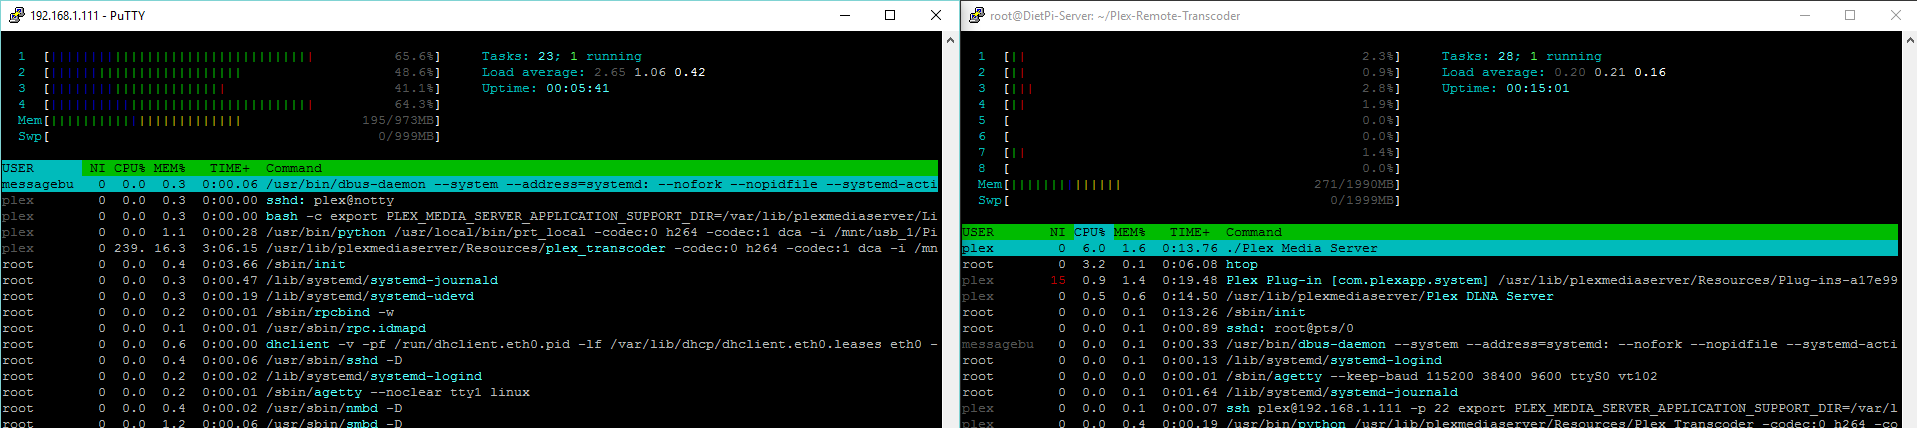
Should all done now!
Should look like this if it’s running
Greets
Luzi