Okay, so each system is made up of the following parts:
Pi 3 and Power Adapter Kit: CanaKit Raspberry Pi 3 with 2.5A Micro USB Power Supply (UL Listed)
MicroSD Card: SanDisk Ultra 128GB microSDXC UHS-I Card
Heatsinks: Btek® Aluminum Cooling Heatsink for Raspberry Pi
Power Button: RemotePi Board for Pi 3
Case: Acrylic Case for RemotePi Board for Pi 3
They apparently do not sell the Official Power Supply in the states, at least not through Amazon, but the one in the CanaKit is supposedly made specifically for the Pi 3. I should note that all the cables, including the power supply, that work fine in my Pi 3 are the same ones being used in my friend’s Pi 3 while I’m setting up their systems; I simply took the cables out of my system and plugged them into their system for the process.
I have never received a rainbow colored box, just the yellow box and the red box. The red box is much more rare, usually it is the yellow box that just shows up. Neither box shows up when idle, though, only when the system is busy doing something, so being able to run the “cpu” command when either the yellow or red box shows up is tough, since by the time I exit out of what I’m doing so I can run the command, the box has vanished. I managed to run it while the yellow box was on the screen, however, by creating a dietpi-backup, logging into OpenSSH via WinSCP, and then creating a zip file of the backup folder. This got the system working enough to make the yellow box appear. I snapped a pic the moment it did.
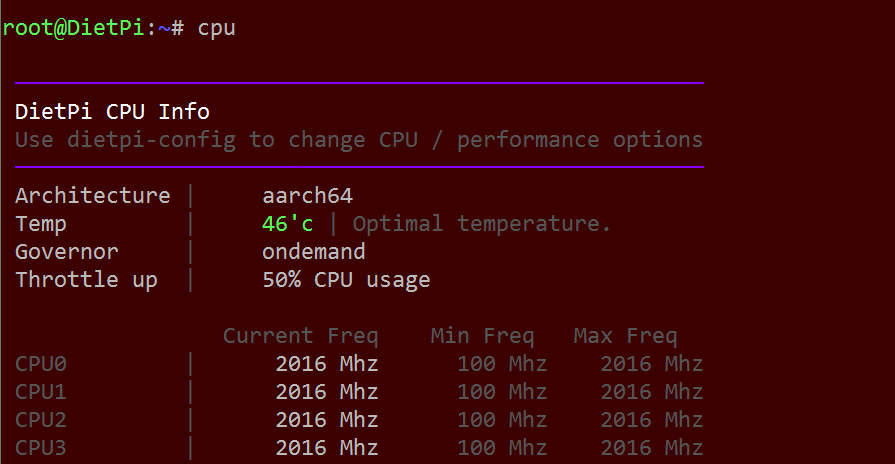
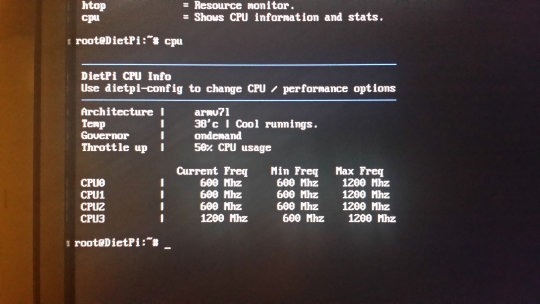
This is what cpu gave me when I first start my system:
This is the yellow box that appears:

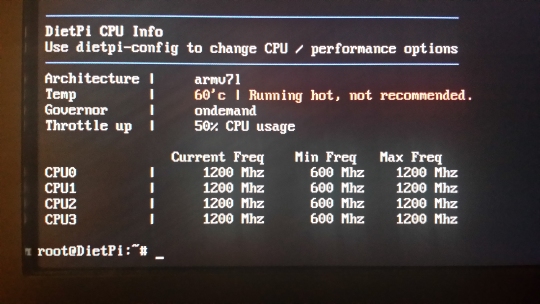
This is what cpu says when I run it the moment the yellow box appears:
The yellow box issue was discovered after giving the Pi to the first friend who asked me to build a system for him (since it never occurred on my system, I was unaware of the issue.) I still held onto the other systems I was building for my other two friends until I could solve the yellow box problem. None of the systems are overclocked at all. These are the exact steps I took in installing their systems. After booting up the system, it updates the 115 image to 118 and then reboot. I sign in again.
The first question I am asked is if I will be running things from a hard drive instead of memory card. I answer no.
I change SSH Server from Dropbear to OpenSSH.
I go into “Software Optimized” and put an asterix next to LXDE: Desktop and Kodi. (Note that I have never run these, I just install them in case I need to in the future.)
The setup asks me if I want to configure Autoboot Options. I say yes and choose “Console: Automatic Login”.
I then go down to DietPi-Config on the menu.
I choose Display Options, Set the Resolution to 1080p and GPU/RAM Memory Split to Gaming.
I don’t select Audio Options, Performance Options, or Advanced Options at all.
I go into Language/Regional Options and choose Locale. I add an asterix next to en_US.UTF-8 UTF-8. I choose None for the Default Locale.
I next choose Timezone > America > New_York.
I go into Keyboard and choose Generic 104-Key PC > Other > English (US) > English (US) > Default for Keyboard Layout > No Compose Key.
I skip Security Options, both Network Options, AutoStart Options, and Tools.
I exit DietPi-Config and then finally go to “Go” to start the installation.
That’s it. Same setup on all four systems, and my original with v112 is the only one that doesn’t get a yellow square under load.
So what’s interesting now, is that I managed to find my old image for v111, so I wrote that to the memory card from one of my friends’ system and booted it up without the Ethernet cable attached. I attempted to install DietPi without allowing it to connect to internet and update to v118 and at first it would not let me. So I plugged the cable in, applied the internet settings and when I left the screen, it attempted to upgrade to v118. I started tapping some keys and managed to stop it from updating. So I installed everything I normally do as per my steps above, this time using v111. When I did the backup and zipped it up over WinSCP, I periodically typed in cpu to check the temperature. Eventually, it did hit the 60°C as shown in the screenshot and gave the same red “Running Hot, Not Recommended” warning. But for whatever reason, the yellow box never appeared. Originally, I was thinking that a change between v111 and v118 was causing a higher temperature, but this experiment leads me to believe that whatever change happened between v111 and v118 did not change the temperature, it simply added the yellow box graphic.
Doesn’t change the fact that I shouldn’t be hitting 60°C simply by zipping a file or playing a retro game, right?