Hey there,
I managed to clone my Root-Partition (big thx to k-plan) to an USB-Drive, which is now used as my primary Root.
Now I want to backup the existing Boot-Partition of my working DietPi-Installation to another SD-Card.
The reason is that I installed DietPI before changing to the USB-Drive on a 32GB SD-Card which would be a waste of money to be used only as a booting device. So I would like to transfer the Boot-Partiton of that 32B SD-Card to another one I found in my desktop (2GB).
I already tried to manage it with the dd-command but it failed.
Does anybody already managed to backup the Boot-Partition and restore it again (on the same SD-Card or another one)?
Any help would be great. Thx a lot!
mike
Hi mike,
Can only describe, how I have done this.
# Preparation
-
Take your 2 GB SD-Card, reformat it with FAT or FAT32 in your PC
-
Write a fresh DiePi image on it, without modding any config files. (simply out-of-the-box)
-
Take 2 GB SD-Card out of your card-reader.
-
Power down your device:
root@RPi-B-Plus:~# poweroff
# Test the new SD-Card and backup needed files and folder
-
Take the 32GB SD-Card out of your device.
-
Put 2GB SD-Card in your device and boot it up. This take some time.
-
Watch monitor output or wait until it is possible to login via ssh.
\
-
In the meantime you can put 32 GB SD-Card in your PC card-reader an copy all files and folders from “BOOT” partition on the SD-Card to a “backup folder” on your PC.
-
Take 32GB SD-Card out of your card-reader and store it on your desk.
\
-
If your device has completely boot up, login, answer “No” in dialog and finish running “dietpi-launcher” with not installing anything.
-
Have a look on your filesystem:
root@DietPi:~# df -h
Filesystem      Size  Used Avail Use% Mounted on
/dev/root        1.9G  613M   1.3G   31% /
devtmpfs        238M     0  238M   0% /dev
tmpfs           242M     0  242M   0% /dev/shm
tmpfs           242M  4.4M  237M   2% /run
tmpfs           5.0M     0  5.0M   0% /run/lock
tmpfs           242M     0  242M   0% /sys/fs/cgroup
tmpfs            10M  1.1M  9.0M  11% /DietPi
tmpfs            20M  8.0K   20M   1% /var/log
tmpfs           242M     0  242M   0% /tmp
/dev/mmcblk0p1   60M   22M   39M  36% /boot
root@DietPi:~# lsblk
NAME        MAJ:MIN RM  SIZE RO TYPE MOUNTPOINT
sda           8:0    1 29.5G  0 disk
└─sda1        8:2    1 29.5G  0 part
mmcblk0     179:0    0   15G  0 disk
├─mmcblk0p1 179:1    0   60M  0 part /boot
└─mmcblk0p2 179:2    0 1.9G  0 part /
Boot- and root filesystem is on SD-Card (mmcblk0). USB device (sda) is realise, but not mounted.
root@RPi-B-Plus:~# poweroff
# Transfer needed files and folders
-
Take 2 GB SD-Card out of your device.
-
Put 2 GB SD-Card in your PC card-reader.
-
Delete all files and folders in “BOOT” partition on SD-Card.
-
Copy all files and folders from “backup folder” on your PC to “BOOT” partition on SD-Card.
-
Wait until completed the file transfer.
-
Take 2GB SD-Card out of your card-reader.
# Final Boot Up
-
Put 2GB SD-Card in your device and power it up. Cross your fingers …
-
Watch monitor output or wait until it is possible to login via ssh. This can take some time.
-
Have a look on your filesystem:
root@RPi-B-Plus:~# df -h
Filesystem      Size  Used Avail Use% Mounted on
/dev/root        29.5G  816M   29.5G   3% /
devtmpfs        238M     0  238M   0% /dev
tmpfs           242M     0  242M   0% /dev/shm
tmpfs           242M  4.4M  237M   2% /run
tmpfs           5.0M     0  5.0M   0% /run/lock
tmpfs           242M     0  242M   0% /sys/fs/cgroup
tmpfs            10M  1.1M  9.0M  11% /DietPi
tmpfs            20M   12K   20M   1% /var/log
tmpfs           242M     0  242M   0% /tmp
/dev/mmcblk0p1   60M   22M   38M  37% /boot
root@RPi-B-Plus:~# lsblk
NAME        MAJ:MIN RM  SIZE RO TYPE MOUNTPOINT
sda           8:0    1 29.5G  0 disk
└─sda1        8:1    1 29.5G  0 part /
mmcblk0     179:0    0   2G  0 disk
├─mmcblk0p1 179:1    0   60M  0 part /boot
└─mmcblk0p2 179:2    0 1.9G  0 part
-
Watch the hostname, IP-Address and test previously installed software
-
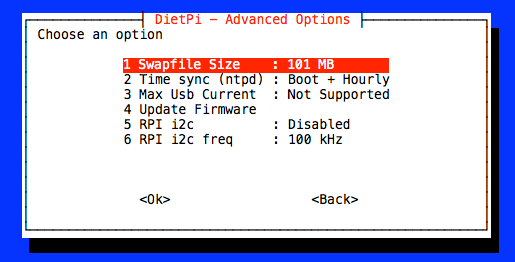
It can be a good idea to create a new swap file (e.g. 101 MB):
root@RPi-B-Plus:~# dietpi-config
dietpi-config => 4 Advanced Options => 1 Swapfile Size

Did this work for you as well?
cu
k-plan
Thx k-plan!
Again your knowledge is overwhelming!
Worked like described.
Greets
Hi Mike,
very nice to hear, it’s working for you on a Odroid C2. 
Thanks for your response.
Sorry, no!
It is more a " workaround " or a " bricolage " because I don’t find a way to set new addresses correct for Odroid devices , if you clone the FAT boot partition of the prior SD-Card or get a working u-boot on it: “Das-U-Boot”
# Booting
fatload mmc 0:1 0x21000000 uImage
fatload mmc 0:1 0x22000000 uInitrd
fatload mmc 0:1 0x21800000 meson8b_odroidc.dtb
fdt addr 21800000
