Gaming & Emulation
Overview
- OpenTyrian - Open-source port of the DOS game Tyrian
- Cuberite - Fast Minecraft server with web interface
- MineOS - Multiple Minecraft servers with web interface
- Nukkit - Server for Minecraft Pocket Edition
- Amiberry - Amiga emulation system
- DXX-Rebirth - Descent 1 and 2 OpenGL port
- Steam - Steam client
- PaperMC - Fast and optimised Minecraft server
- Box86 - i386 userspace emulation for ARMv7
- Box64 - x86_64 userspace emulation for ARMv8
- Moonlight (CLI) - CLI game streaming client for Sunshine and NVIDIA GameStream
- Moonlight (GUI) - GUI game streaming client for Sunshine and NVIDIA GameStream
- GZDoom - Modder-friendly OpenGL and Vulkan source port based on the DOOM engine
How do I run DietPi-Software and install optimised software items?
To install any of the DietPi optimised software items listed below run from the command line:
dietpi-software
Choose Browse Software and select one or more items. Finally select Install.
DietPi will do all the necessary steps to install and start these software items.

To see all the DietPi configurations options, review the DietPi Tools section.
Return to the Optimised Software list
OpenTyrian
Tyrian is an arcade-style vertical scrolling shooter. The story is set in 20,031 where you play as Trent Hawkins, a skilled fighter pilot employed to fight MicroSol and save the galaxy.

- Console: To run OpenTyrian from console, use the following command:
opentyrian - Desktop: To run OpenTyrian from desktop, a desktop icon and start menu entry have been added.
- Autostart: To run OpenTyrian automatically at boot, select it from
dietpi-autostartmenu or directly via:dietpi-autostart 4
Tyrian (OpenTyrian) if not the best game in the world, is the best top down shooter/scroller game ever created.
OpenTyrian is best experienced by using a mouse and the Enter key to change rear fire mode.
It’s old, retro, and a classic etc, but I doubt you will to find a similar recent game that is anywhere close to OpenTyrian addictiveness.
Cuberite
Cuberite allows you to create a single, blazingly fast Minecraft server, which utilizes the performance benefits of C++ (instead of Java) and comes with a handy web interface.

The web interface is accessible via port 1339:
- URL =
http://<your.IP>:1339 - Username =
admin - Password =
<globalSoftwarePassword>(default:dietpi)
Using <hostname>.local instead of using <your.IP> (Avahi-Daemon)
By installing Avahi-Daemon, the web interface can be accessed with <hostname>.local (default: dietpi.local) instead of using <your.IP>. See the Avahi-Daemon documentation for details.
Tweak the server settings by modifying the following files:
General server settings:
/mnt/dietpi_userdata/cubrite/settings.iniSettings for the web administration:
/mnt/dietpi_userdata/cubrite/webadmin.iniSettings for the world:
/mnt/dietpi_userdata/cubrite/world/world.ini
You can restart the service by running:
systemctl restart cuberite
- Log files:
/mnt/dietpi_userdata/cubrite/logs/ - Service logs:
journalctl -u cuberite
Cuberite can be updated to the latest version by reinstalling it via
dietpi-software reinstall 52
MineOS
MineOS allows you to create multiple Minecraft servers with ease, using a simple web interface.

The web interface is accessible via port 8443:
- URL:
https://<your.IP>:8443
You can safely ignore the certificate “warning” if one appears. - Username:
mineos - Password =
<globalSoftwarePassword>(default:dietpi)
Using <hostname>.local instead of using <your.IP> (Avahi-Daemon)
By installing Avahi-Daemon, the web interface can be accessed with <hostname>.local (default: dietpi.local) instead of using <your.IP>. See the Avahi-Daemon documentation for details.
To change the password to myPassword, run the following command:
sudo chpasswd --crypt-method SHA512 <<< 'mineos:myPassword'
Once logged into the web interface:
- Click profiles on the left hand side of screen
- Choose a Minecraft version to match your needs, then click download
- Click create new server on the left hand side of screen
- Enter a server name, then click create new server at the bottom
- Your server will now be visible at the bottom of the dashboard screen, select it
- In the drop down boxes
Change profile to:andChange runnable jar to:select the entry which contains the server version number you downloaded in profiles - Click accept EULA
- Click accept EULA again
- Click Start
Your server should now be running, on the default port 25565.
Minecraft Java version requirements
Note that Minecraft 1.20.5 and above requires Java 21, which is available on Debian Trixie/testing only, or with a custom Java installation.
ARMv6 RPi models (RPi 1 and Zero 1) can only run Minecraft 1.16 or older, as newer Java versions do not support ARMv6 with Hotspot VM anymore.
Source code: hexparrot/mineos-node
License: GPLv3
Nukkit
Nukkit is a Java-based server for Minecraft Pocket Edition.

Nukkit by default runs a single server, available on LAN.
Tweak the server settings by modifying the following file:
/usr/local/bin/nukkit/server.properties
You can restart the service by running:
systemctl restart nukkit
Amiberry
Amiberry is an optimised Amiga emulator for the Raspberry Pi and other ARM-based SoCs, that brings you the highest performance Amiga emulation. Be it a classic A500, A1200, CD32 or up to a high-end model equipped with a 68040 and a graphics card, we have got you covered.
This installation is possible due to a collaboration with Dimitris Panokostas (Amiberry) and Daniel Knight (DietPi).
- Keyboard + mouse is highly recommended.
- We also offer completely automated installation images for Amiberry on Raspberry Pi, which can be found on our download page: https://dietpi.com/#download

- Kickstarts (Amiga BIOS/boot system)
Amiga Kickstart ROM images are required to run the system(s) you want to emulate. These can not be bundled due to copyright restrictions.
If you own the Amiga Forever product, you can legally download and use Kickstarts you are eligible for, from: https://www.amigaroms.com/
Remark:Kickstart 1.3 (A500-A2500-A3000-CDTV) is highly recommended to work with most games.
Kickstarts can be placed in/mnt/dietpi_userdata/amiberry/kickstarts. Floppy disks (Amiga
.adfimages)
Amiga’s floppy disk images have a.adffile extension.
You will need obtain at least one ADF image to start your Amiga experience.
Load your ADF from or place them where every you want it, e.g. create and use:/mnt/dietpi_userdata/amiberry/floppy_images
To allow uploads via file servers, remember to grant required permissions, e.g.:chown dietpi:dietpi /mnt/dietpi_userdata/amiberry/floppy_images
Amiberry can be started by running:
systemctl start amiberryOptionally, you can enable Amiberry autostart to boot straight into the Amiga environment as fast as possible, with the least possible interference from Linux.
Rundietpi-autostart 6from console ordietpi-autostartand select Amiberry fast boot from the menu, then reboot your system.
If you face issues with the fast boot option or need to have other services starting up first, usedietpi-autostart 8or select Amiberry standard boot respectively.
Once Amiberry is running, you will need to configure the emulator, to tell it which Amiga system to emulate.
- Select Quickstart (from the left hand side menu)
- Under Amiga model: Select the Amiga model you’d like to emulate (example A500)
- Under Config: Select the additional options for the target Amiga model (if required)
- Click the Set configuration, button to apply changes.
Next you will need to setup the emulator for the Kickstart and floppy disk image you wish to use:
Select a Kickstart (ROM):
- On the left hand side, select ROM.
- Under Main ROM File:, select the browse button (3 dots) …
- Navigate to your Kickstarts directory:
/mnt/dietpi_userdata/amiberry/kickstarts* - Select the Kickstart (1.3 is recommended) you wish to use.
Select a Floppy disk image (ADF):
- On the left hand side, select Floppy drives.
- Under
DF0:, select the browse button (3 dots) … - Navigate to your floppy image directory:
/mnt/dietpi_userdata/amiberry/floppy_images* - Select the ROM you wish to use.
* Remark: Amiberry does not currently support symbolic links. If you moved DietPi userdata to an external drive, run the following command to derive it’s actual path:
readlink -f /mnt/dietpi_userdata/amiberry
With dietpi-drive_manager’s default mount point it looks like:/mnt/<UUID>/dietpi_userdata/amiberry
On the left hand side, select Display.
Ensure the Fullscreen option is enabled.
This will emulate the Amiga as fast as possible, ensuring you get the maximum FPS for your SBC hardware.
- On the left hand side, select CPU and FPU.
- Under CPU Speed, select the fastest option.
- If you find this change slows down the emulation, try using the fixed value of 25 MHz.
It is recommended to save your settings. This will ensure the settings are applied on next startup of Amiberry.
- On the left hand side, select Configurations.
- Enter the name, e.g. “autostart”, then click Save.
To update Amiberry to the latest version, simply reinstall it:
dietpi-software reinstall 108
How can I transfer Kickstarts & Floppy Images to the device?
Make sure you have one of DietPi’s File Servers installed.
- Floppy Disk Image (
.adf) directory as chosen before, e.g./amiberry/floppy_images - Kickstarts (
.rom) directory =/amiberry/kickstarts
How can I open the configuration window once the emulator has started?
The pre-defined key for that is F12.
How can I reboot the Amiga emulation environment (Amiga reset)?
Use Ctrl+Left Win+Right Win keys.
If you don’t have an Right Win key, try using the Menu key instead.
What are the default controls for Joystick, when using a Keyboard?
When using a keyboard, the default joystick controls are:
- Up/Down/Left/Right = Up/Down/Left/Right
- Page Down = Fire/Button 1
- Page Up = Fire/Button 2
How can I improve performance (frame rate)?
A lower resolution may improve performance on most games. From the emulator main menu:
- On the left hand side, select Display.
- 640x256 is high resolution.
- 320x256 is low resolution and should provide improved performance.
Overclocking your system will improve performance. Stability may vary across devices and overclocking is not officially supported:
- From a terminal, run
dietpi-config. - Select the Performance Options menu.
- Select Overclocking.
- Select an overclocking profile, then
rebootthe system to apply the change.
How do I set the floppy drive speed for compatibility?
Floppy drive emulation is to set to 800 % by default. This reduces loading times by up to 8x.
You can lower this to 100 %, increasing compatibility:
- On the left hand side, select Floppy drives.
- Change the Floppy Drive Emulation Speed value to 100 %.
Some games are not in full screen
Games run at various resolutions, from the emulator main menu:
- On the left hand side, select Display.
- Change the Height value to 200 or 256.
- Press the Resume or Start button.
Good to GO
When ready, select Start to launch the emulator. Have fun!
YouTube video tutorial #1: Amiga on the Raspberry Pi with DietPi and Amiberry: I got the Pi 400 to work!
YouTube video tutorial #2: Amiga on the Raspberry Pi with DietPi and Amiberry: Workbench and Autobooting
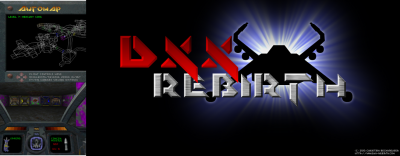
DXX-Rebirth
Descent 1 & 2. A masterpiece 3D FPS. Brought back to life with the DXX-Rebirth project. Play Descent as true to the original with OpenGLES rendering.
- DietPi will install the Demo and Shareware versions of Descent. Please see the FAQ below to transfer the full game.
- Keyboard + mouse is highly recommended
- We have compiled the latest version of DXX-Rebirth (0.58.1) with support for FB and RPi OpenGL.
DXX-Rebirth can be started by running dxx-rebirth.
To automatically start DXX-Rebirth at boot, simply run dietpi-autostart 7 from console or dietpi-autostart and select DXX-Rebith (Descent 1/2) from the menu, then reboot your system.
We have created a pilot called DietPi. The config has been setup for WSAD style play and is recommended for FPS players who use WSAD + mouse.
- W/A/S/D = Forward/Backwards/Left/Right
- Q/Z = Up/Down
- E/R = Rotate Z (forward) axis
- F = Launch flare
- Alt+F2 = Save game
How do I transfer the original Descent full game files?
Before you begin, you will need the original game files, from a legal copy and installation of Descent.
Make sure you have one of DietPi’s File Servers installed.
- Copy your Descent 1 Game files to
/mnt/dietpi_userdata/dxx-rebirth/descent_1_game - Copy your Descent 2 Game files to
/mnt/dietpi_userdata/dxx-rebirth/descent_2_game
Official website: https://www.dxx-rebirth.com/
Steam
Steam is a gaming client and store made by Valve.
Steam on ARM
Steam is made for x86, but it, and many Steam games that have Linux versions, can be run on ARM with the help of Box86. Note that 2D games are the best to play, and more complex ones may require overclocking your device.
Known issues on ARM
- Only small mode (the mini games list) is supported, as the internal library browser depends on 64-bit components.
- Hence it is not possible to search/add games from the client, which needs to be done from the website store (doesn’t work for free games) or a different client.
- Quitting the Steam client only works by running
killall steam.shfrom a console. Using the exit button from the menu or panel icon will hang Steam.
PaperMC
A highly optimized Minecraft server with plugins, written in Java.
PaperMC by default runs a single server, available on LAN, but can be port forwarded so other people can connect.


- The default server/query port is: 25565
- Port: 25575
- Password:
<globalSoftwarePassword>(default:dietpi) - Console command:
mcrcon -p <globalSoftwarePassword>
- Launcher:
/opt/papermc - Config and data:
/mnt/dietpi_userdata/papermc - Logs:
/var/log/papermc
Tweak the server settings by modifying the following file or any file within the config directory that ends in .yml:/mnt/dietpi_userdata/papermc/server.properties
Since PaperMC runs as Java application, it’s system memory demand highly depends on the Java heap size, that can be adjusted. The absolute minimum head size that is required to run PaperMC is 512 MiB, which will result in ~850 MiB overall used system memory. We recommend to raise it to a minimum of 1 GiB (~1.35 GiB overall memory usage) for production use, or higher, depending on the amount of users and installed plugins.
To change the Java heap size, do the following:
- Run
dietpi-servicesfrom console. - Select
papermc. - Select
Edit. Uncomment the line that starts with
#ExecStart=(remove the leading#) and add/change e.g.-Xms1G -Xmx1Gright behind thejavacommand to apply 1 GiB heap size. Additionally you need to add anExecStart=above to unset the command of the original service, so that it finally looks like this:ExecStart= ExecStart=/usr/bin/java -Xms1G -Xmx1G -jar /opt/papermc/paperclip.jar --nogui --noconsoleUse Ctrl+O and Enter to save the file, then Ctrl+X to return to the
dietpi-servicesmenu. On exit, it will ask whether you want to restart the service to apply the changes.
Do not keep your swap file on an SD card!
If the used system memory exceeds the physical RAM of your SBC, we highly recommend to not store the swap file on an SD card, but on an external drive, in case, as SD cards usually won’t survive regularly used swap file writes for long, leading to server crashes and data loss in worst case.
Since PaperMC runs as systemd service, it can be controlled with the following commands:
systemctl status papermc
systemctl stop papermc
systemctl start papermc
systemctl restart papermc
- Service:
journalctl -u papermc - File:
/var/log/papermc/latest.log
dietpi-software reinstall 181
How do I interface with the server’s console?
Use the installed tool MCrcon: mcrcon -p <globalSoftwarePassword>
How do I find and install plugins?
https://www.spigotmc.org/resources/categories/spigot.4/
Just move the downloaded JAR file to the /mnt/dietpi_userdata/papermc/plugins directory.
What version of Minecraft does this work on?
PaperMC is built to run on Java edition, however with the optional Geyser and Floodgate plugins, it can run on Bedrock edition as well.
Just choose to install them at the beginning.
Official website: https://docs.papermc.io/paper/admin
Source code: PaperMC/Paper
Box86
Box86 lets you run i386 Linux programs (such as games) on ARMv7 systems. Thanks to binfmt_misc, which is enabled by default, you can execute i386 binaries like every other executable and Box86 is invoked automatically.
Box64
Box64 lets you run x86_64 Linux programs (such as games) on ARMv8 systems. Thanks to binfmt_misc, which is enabled by default, you can execute x86_64 binaries like every other executable and Box64 is invoked automatically.
Moonlight (CLI)
Moonlight is a game streaming client for Sunshine and NVIDIA GameStream streaming servers. This section is about the CLI variant of Moonlight, aka Moonlight Embedded.

After the installation, you need to pair your Moonlight with the streaming server with the following command:
moonlight pair
This attempts to auto-detect compatible streaming servers in your network. If this fails, you can add the hostname or IP address manually. In this example 192.168.0.1 is the IP of a Sunshine streaming server:
moonlight pair 192.168.0.1
Moonlight will print a 4-digit PIN to the console which you need to enter into the streaming server’s UI to finish pairing. Then you can start streaming, in this simple example the current desktop session of the streaming server:
moonlight stream -app=Desktop 192.168.0.1
To make configuration and startup of Moonlight simpler, you can edit the config file /etc/moonlight.conf accordingly, enter streaming server host, app and other settings, and then start Moonlight using this config file:
moonlight /etc/moonlight.conf
To quit streaming and exit Moonlight, press Ctrl+Alt+Shift+Q.
Since Moonlight is installed from an APT repository, updates will be offered via APT:
apt Update
apt install moonlight-embedded
Official website: https://moonlight-stream.org/
Official documentation: https://github.com/moonlight-stream/moonlight-embedded/wiki/Usage
Source code: moonlight-stream/moonlight-embedded
License: GPLv3
Moonlight (GUI)
Moonlight is a game streaming client for Sunshine and NVIDIA GameStream streaming servers. This section is about the GUI variant of Moonlight, aka Moonlight Qt or Moonlight PC.
The Moonlight GUI can be started with the following command:
moonlight-qt
When doing this via SSH or from plain console outside of a desktop session, we observed that it can show a disturbing black border at the top of the screen, covering important parts of the GUI. If happens, it is best to start it from a terminal emulation within a desktop session.
On first start, it will search for and list compatible streaming servers on your network. If this does not work for some reason, you can enforce with a streaming server, using its IP address or hostname. In this example 192.168.0.1 is the IP of a Sunshine streaming server:
moonlight-qt pair 192.168.0.1
The GUI will show a 4-digit PIN which you need to enter into the streaming server’s UI to finish pairing. Then streaming can be started by selecting an available app.
You can also quick start streaming of a specific app from a specific host. In this simple example the current desktop session of the streaming server is streamed, skipping the Moonlight GUI:
moonlight-qt stream 192.168.0.1 Desktop
To quit streaming, press Ctrl+Alt+Shift+Q. To exit the Moonlight GUI, simply hit Q.
Since Moonlight is installed from an APT repository, updates will be offered via APT:
apt Update
apt install moonlight-qt
Official website: https://moonlight-stream.org/
Official documentation: https://github.com/moonlight-stream/moonlight-docs/wiki/Setup-Guide
Source code: moonlight-stream/moonlight-qt
License: GPLv3
GZDoom
GZDoom is a modder-friendly OpenGL and Vulkan source port based on the DOOM engine.
![]()
While GZDoom is a game engine, it does not contain actual game content. To play, a Doom game in IWAD format is needed. Aside of the official commercial Doom and Doom II, and a free-to-play shareware version of those, there are FLOSS ports, like the Freedoom project, which aims to be compatible with most custom levels, music, graphics and other mods made for the original Doom and Doom II games.
To get you started, the DietPi GZDoom package contains Freedoom, including its multi-player deathmatch version FreeDM.
An overview of available and supported IWADs, and where to obtain them, can be found here: https://zdoom.org/wiki/IWAD
For GZDoom to find the IWADs, place them into the current directory, or one of the directories defined in ~/.config/gzdoom/gzdoom.ini, e.g. ~/.config/gzdoom/.
From console, run the following command to start the GZDoom launcher and select an IWAD to play:
gzdoom
To start Freedoom Phase 1, Phase 2, or FreeDM directly:
gzdoom -iwad freedoom1
gzdoom -iwad freedoom2
gzdoom -iwad freedm
An overview of available command-line parameters can be found here: https://zdoom.org/wiki/Command_line_parameters
Run GZDoom as non-root user
For GZDoom to access audio, video, and input devices, additional permissions are required. To apply them for the user dietpi, run the following command:
sudo usermod -aG audio,video,render,input dietpi
Our gzdoom APT package ships with an own build of ZMusic, GZDoom’s separated stand-alone music system library, as well as a tailored build of the SDL2 library. It has been compiled with Vulkan renderer support, additionally OpenGLES 2.0 for ARM and RISC-V systems, and full OpenGL for x86_64.
If you face problems or miss features related to video, audio, or input devices, feel free to reach out.
The build script can be found here: https://github.com/MichaIng/DietPi/blob/dev/.build/software/gzdoom/build.bash
Since GZDoom is installed from our APT repository, updates will be offered via APT:
apt update
apt install gzdoom
Official website: https://zdoom.org/index
Official documentation: https://zdoom.org/wiki/Main_Page
Official forum: https://forum.zdoom.org/
Source code: ZDoom/gzdoom
License: GPLv3