File Servers
Overview
- ProFTPD - Simple, efficient, lightweight FTP file server
- Samba - Feature rich file server
- vsftpd - Feature rich FTP file server
- NFS - Network file system server
How do I run DietPi-Software and install optimised software items?
To install any of the DietPi optimised software items listed below run from the command line:
dietpi-software
Choose Browse Software and select one or more items. Finally select Install.
DietPi will do all the necessary steps to install and start these software items.

To see all the DietPi configurations options, review the DietPi Tools section.
Return to the Optimised Software list
ProFTPD
ProFTPD gives you access to files/music/downloads etc. on your DietPi system quickly and efficiently with minimal overhead.

The access to ProFTPD with Windows is achieved as follows:
- Go to My Computer (Windows Explorer).
- In the address bar at the top type
ftp://dietpi:dietpi@192.168.0.100press enter.
Change 192.168.0.100 to the IP address of your DietPi system.
The access to ProFTPD with an FTP client is achieved as follows:
- Username =
dietpi - Password = The same as your root login password. Default is
dietpi - Address = Your IP address (e.g.: 192.168.0.100)
- Port = 21
The destination directory can be changed by replacing /Path/To/Directory to your target directory (within the configuration file /etc/proftpd/proftpd.conf):
systemctl stop proftpd
sed -i '/DefaultRoot /c\DefaultRoot /Path/To/Directory' /etc/proftpd/proftpd.conf
systemctl start proftpd
Jailing means to lock users to their home folders.
Jailing can be enabled in the configuration file /etc/proftpd/proftpd.conf via
systemctl stop proftpd
sed -i '/DefaultRoot /c\DefaultRoot ~' /etc/proftpd/proftpd.conf
systemctl start proftpd
Wikipedia: https://wikipedia.org/wiki/ProFTPD
Samba
The Samba server lets you share files on your DietPi system with ease based on the well known SMB networking protocol.
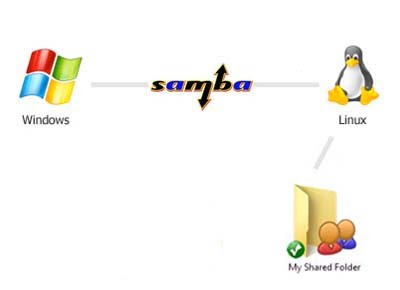
The access to the Samba file server is achieved as follows:
- Address =
\\192.168.0.100\dietpi - Username =
samba - Password =
<your global application password>(default:dietpi)
The Samba password can be changed with
smbpasswd -a samba
In case of further users added to the system (e.g. via adduser smbuser), they need to be added to the group sambashare (e.g. via adduser smbuser sambashare) to be able to access the Samba exported shares.
In addition the Samba passwords of these users also have to be set via the smbpasswd command (e.g. smbpasswd -a smbuser).
To add/change the valid user do the following steps:
- Edit
/etc/samba/smb.conf- Search the entry
[dietpi], changevalid users = username_i_require - Add the user to Samba with
smbpasswd -a username_i_require
- Search the entry
- Restart services with
systemctl restart nmbd smbd
You can now connect to the samba server with the username and password you entered above.
The destination directory can be changed by replacing /Path/To/Directory to your target directory (within the configuration file /etc/samba/smb.conf):
sed -i '/path = /c\path = /Path/To/Directory' /etc/samba/smb.conf
systemctl restart nmbd smbd
In case of problems with the Samba share not showing up in the Windows network view, the wsdd2 daemon (Web Service Dynamic Discovery host daemon) can be installed. This is achieved with the following steps:
apt install wsdd2
Start the service via:
systemctl start wsdd2
Check the service status via:
systemctl status wsdd2
We use the WSDD2 variant written in C here
The original WSDD is written in Python, but we prefer the C variant, for less dependencies and RAM usage. In case, you could also use the original variant, where package and service are called wsdd instead of wsdd2.
Wikipedia: https://wikipedia.org/wiki/Samba_(software)
YouTube video tutorial (German language): Raspberry Pi als Datei-Server - einfache Installation eines Fileservers Samba unter DietPi
vsftpd
Very secure FTP file server with feature rich security options.

The access to vsftpd with Windows is achieved as follows:
- Go to My Computer (Windows Explorer).
- In the address bar at the top type
ftp://dietpi:dietpi@192.168.0.100press enter.
Change 192.168.0.100 to the IP address of your DietPi system.
The access to vsftpd with an FTP client is achieved as follows:
- Username =
dietpi - Password = The same as your root login password. Default is
dietpi - Address = Your IP address (e.g.: 192.168.0.100)
- Port = 21
The destination directory can be changed by replacing /Path/To/Directory to your target directory (within the configuration file /etc/vsftpd.conf):
sed -i '/local_root=/c\local_root=/Path/To/Directory' /etc/vsftpd.conf
systemctl restart vsftpd
Wikipedia: https://wikipedia.org/wiki/Vsftpd
NFS
Network file system server.
The access to the NFS share with an NFS client is achieved as follows:
- Address = IP address of your DietPi system (e.g.: 192.168.0.100)
- Port = 2049
The NFS access configuration is done via export files.
Therefore, the file /etc/exports can be edited as well as adding further export files within the /etc/exports.d directory.
Explanations of the export file format are available in the internet or can be read in the man pages (use man exports, therefore the package man needs to be installed).
After changing the access configuration, the export information can be re-read via command
exportfs -ra
Alternatively the service can be restarted (systemctl restart nfs-server).
The actual access configuration can be displayed with the command
exportfs
On the client side the mountable exports can be queried with the command
showmount -e <NFS_SERVER>
By default the DietPi NFS installation exports the directory /mnt/dietpi_userdata for everyone. This is configured in /etc/exports.d/dietpi.exports. You can edit this file to restrict the access.
E.g. access to the NFS share can be limited to the IP address range of 192.168.0.1-255, by editing /etc/exports.d/dietpi.exports as follows:
/mnt/dietpi_userdata 192.168.0.*(rw,async,no_root_squash,crossmnt,no_subtree_check)
Apply the new configuration via systemctl restart nfs-server or exportfs -ra.
NFS v3 is an older NFS version which ideally should be replaced by the usage of NFS v4.
One option to disable NFS v3 is to add a file to the directory /etc/nfs.conf.d/ with the following content:
cat << _EOF_ > "/etc/nfs.conf.d/00-dietpi.conf"
# Disable NFS v3 (to only have NFS v4 enabled)
#
[nfsd]
vers3=n
#vers4=y
#vers4.1=y
#vers4.2=y
_EOF_
A restart of the NFS service is then necessary:
systemctl restart nfs-server
The disabled NFS v3 can be examined with:
root@NFS-server:/etc/nfs.conf.d# cat /proc/fs/nfsd/versions
-3 +4 +4.1 +4.2
The example output gives that NFS v3 is not active (-3) whereas NFS v4 is active (+4 +4.1 +4.2).
To re-enable NFS v3 again, the entry vers3=y can be used, or the complete file /etc/nfs.conf.d/00-dietpi.conf can be deleted (also restarting the nfs-server service afterwards).
There are some specialities when using NFS mounts on macOS:
- Since macOS uses a non standard port to connect to NFS shares, port usage above port number 1024 need to be enabled via the
insecureoption in the server configuration. - Also, the remote exported path must be the full path and not only the IP address (e.g. in the macOS Finder or the mount command).
If an NFS v4 share shall be mounted via the macOS Finder, the file
/etc/nfs.confmust containnfs.client.mount.options = vers=4:sudo echo "nfs.client.mount.options = vers=4.0" >> /etc/nfs.confIt should be ensured beforehand that this line is not already included in
/etc/nfs.conf.
NFS Server configuration
On the NFS Server side, the /etc/exports resp. files in the /etc/exports.d/ directory need to contain the insecure option, e.g. for the default DietPi NFS Server configuration:
/mnt/dietpi_userdata 192.168.0.*(rw,async,insecure,no_root_squash,crossmnt,no_subtree_check)
NFS Client configuration
To mount a DietPi NFS share on a macOS client, the full remote exported path is entered, e.g. with the following command:
mkdir ~/dietpi.exports
mount_nfs -o vers=4 192.168.0.100:/mnt/dietpi_userdata ~/dietpi.exports
This generates a mount point in the macOS user’s directory space and mounts the exported /mnt/dietpi_userdata from the NFS Server (with IP address 192.168.0.100) to it.
Note: NFS v4 is recommended via the vers=4 option.
On macOS, a permanent mount can be achieved by going to the System Settings, searching for Login Items and drag&drop the mount:

Note: Further details about the nfs and mount_nfs commands can be found with typing man nfs and man mount_nfs in the terminal on macOS. The man pages contain the current information about how the system behaves and optional parameters on how to mount successfully.
Wikipedia: https://wikipedia.org/wiki/Network_File_System
DietPi Blog: DietPi and NFS: Basics and improving security