Databases and Data Stores
Overview
- MariaDB - Open Source Relational Database
- phpMyAdmin - SQL Administration Tool for MariaDB
- SQLite - Small, Fast and High reliable SQL database engine
- Redis - Open Source In-memory key–value Data Store
- InfluxDB - Open Source Time Series Database
- PostgreSQL - Persistent and advanced SQL database engine
- WhoDB - Database management tool with AI-powered chat interface
How do I run DietPi-Software and install optimised software items?
To install any of the DietPi optimised software items listed below run from the command line:
dietpi-software
Choose Browse Software and select one or more items. Finally select Install.
DietPi will do all the necessary steps to install and start these software items.

To see all the DietPi configurations options, review the DietPi Tools section.
Return to the Optimised Software list
MariaDB
MariaDB Server is one of the most popular open source relational databases. It’s made by the original developers of MySQL and guaranteed to stay open source1. It is part of most cloud offerings and the default in most Linux distributions.

As root user, run mariadb from command line, no separate authentication required. But note that this won’t work via sudo, but an interactive root user shell session is required.
- Username =
root - Password = The same as your root login password, default is
dietpi
Directories
- Database files:
/mnt/dietpi_userdata/mysql - Configuration files:
/etc/mysql
Configuration files
The MariaDB/MySQL tools read configuration files in the following order:
/etc/mysql/my.cnfsymbolic links to this file, reason why all the rest is read./etc/mysql/mariadb.cnf(this file) to set global defaults./etc/mysql/conf.d/*.cnfto set global options./etc/mysql/mariadb.conf.d/*.cnfto set MariaDB-only options.~/.my.cnfto set user-specific options.
As a best practice, it is recommended to place MariaDB related user configuration files into /etc/mysql/mariadb.conf.d/*.cnf and to name the files in the manner of <2-digit-number>-<configurationname>.cnf (example: 99-my_config.cnf).
Configuration example
[mysqld]
# Disable file logging in favour of "journalctl -u mariadb"
skip_log_error=1
# Disable host name resolving
# NB: For remote access, IP addresses then need to be used when creating/altering database users.
skip_name_resolve=1
# Disable the TCP listener all together
# NB: Prefer "/run/mysqld/mysqld.sock" as database host, but "127.0.0.1" is usually resolved to the UNIX socket, too.
skip_networking=1
# The query cache is not recommended on multi-core machines.
query_cache_size=0
query_cache_type=0
# Since MyISAM tables are usually not used, disable key buffer
key_buffer_size=0
# Reduce Aria page cache to 512 KiB, usually used by some internal tables only
aria_pagecache_buffer_size=512k
# Reduce the number of concurrent connections to ~2x the number of PHP-FPM workers
max_connections=16
The above can be applied almost as is for MariaDB instances used only by software which runs on the same host. There are other settings like innodb_buffer_pool_size and innodb_log_file_size for the commonly used InnoDB engine, which have a much larger impact on performance and resource usage. However, to get a performance benefit instead of a penalty, those should only be set after estimating the actual database usage.
A common tool to collect info and get performance recommendations is MySQLTuner. Run the following commands after your database was in production use for some days:
curl -sSf https://raw.githubusercontent.com/major/MySQLTuner-perl/master/mysqltuner.pl | sudo perl - --skippassword
It will show you a bunch of info and some recommendations, e.g. assuring that innodb_buffer_pool_size has at least the size of all InnoDB tables, and innodb_log_file_size being 25% of the former. We recommend to use the next power of two above the InnoDB data/table size.
Not all recommendations are reasonable in every case. E.g. it recommends to raise tmp_table_size and max_heap_table_size if more than 25% of temporary tables were created on disk. However, some queries simply cannot used the memory engine, and raising those settings then won’t reduce the temporary tables on disk ratio, but just consume unnecessarily much RAM.
Official documentation: https://mariadb.com/docs/server
MariaDB configuration variables: https://mariadb.com/docs/server/server-management/variables-and-modes/server-system-variables
MySQLTuner, a tool to get optimisation ideas: major/MySQLTuner-perl
phpMyAdmin

phpMyAdmin is a free software tool written in PHP, intended to handle the administration of MySQL / MariaDB over the Web.
Frequently used operations (such as: managing databases, tables, columns, relations, indexes etc.) can be performed via the web user interface. Using the same application you could also directly execute any SQL statement.
- URL =
http://<your.IP>/phpmyadmin - Username =
phpmyadmin - Password = The same as your root login password, default is
dietpi
Using <hostname>.local instead of using <your.IP> (Avahi-Daemon)
By installing Avahi-Daemon, the web interface can be accessed with <hostname>.local (default: dietpi.local) instead of using <your.IP>. See the Avahi-Daemon documentation for details.
Website: https://www.phpmyadmin.net
Official documentation: https://www.phpmyadmin.net/docs/
SQLite

Source: Part of the SQLite documentation, which has been released by author D. Richard Hipp to the public domain. SVG conversion by Mike Toews. Public Domain
SQLite is an embedded relational database engine. It it a self-contained, high-reliability and full-featured SQL database engine. It is very popular and there are hundreds of millions copies worldwide in use today2.
To create a database and run commands, use the quick start documentation.
Since SQLite is a file based, zero configuration database without any server process, no dedicated database and configuration directories are defined.
Website: https://www.sqlite.org/index.html
Official documentation: https://www.sqlite.org/docs.html
Redis
A non-SQL based data store.
![]()
Redis is an open source (BSD licensed), in-memory data structure store, used as a database, cache and message broker.
Redis is in the family of databases called key-value stores. The essence of a key-value store is the ability to store some data, called a value, inside a key. This data can later be retrieved only if we know the exact key used to store it.
The first thing to do in order to check Redis is working properly is sending a PING command:
redis-cli ping
For more commands and an introduction to Redis data types and commands, read the quick start documentation.
Directories
- Configuration directory:
/etc/redis - Main configuration file:
/etc/redis/redis.conf
Website: https://redis.io/
Official documentation: https://redis.io/docs/latest/
Commands: https://redis.io/docs/latest/commands/
Configuration: https://redis.io/docs/latest/operate/oss_and_stack/management/config/
InfluxDB
InfluxDB is a time series database and it is optimised to handle high write and query loads. For this purpose is a very good fit for saving sensor data or time series info from various logs. InfluxDB is not only a time series platform, but it provides also an Web UI and dashboard tools, background processing and monitoring agent.
The main interface to the database for management and data transferred are HTTP requests that are handled directly by the influxdb service, which by default listens on TCP port 8086.
The data can be nicely viewed with Grafana. This installation and documentation was possible, thanks to @marcobrianza.

After the installation, the data transfers are made via the HTTP requests, and are handled directly by the InfluxDB service running on http://<your.IP>:8086.
Create a database using influxdb via command line tool. This tool also uses HTTP, so it can manage a database on a remote machine setting the -host option:
influx -execute 'create database myfirstdb'
Create a database using a HTTP request and curl tool:
curl -i -X POST http://<your.IP>:8086/query --data-urlencode 'q=CREATE DATABASE myfirstdb'
Post data:
curl -i -X POST 'http://<your.IP>:8086/write?db=myfirstdb' --data-binary 'temperature value=20.12'
Retrieve and display data from the database:
influx -database myfirstdb -execute 'SELECT * FROM temperature'
Retrieve data using a HTTP request and curl tool:
curl -i -XPOST http://<your.IP>:8086/query?db=mydb --data-urlencode "q=SELECT * FROM temperature"
Create users and authorizations using influx CLI
To start the InfluxDB database management interface enter:
influx -username admin -password admin01
Then create the database entries:
CREATE USER admin WITH PASSWORD 'admin01' WITH ALL PRIVILEGES
CREATE USER test_user WITH PASSWORD 'test_user01'
GRANT ALL ON mydb TO test_user
exit
By default the HTTP authentication is disabled. To enable it, follow next two steps:
Change next setting in the configuration file
/etc/influxdb/influxdb.conf:auth-enabled = trueRestart the service:
systemctl restart influxdb
Directories
- Data location (database files):
/mnt/dietpi_userdata/influxdb
(The data location for InfluxDB is stored respectively linked with symbolic links.) - Configuration file:
/etc/influxdb/influxdb.conf
Website: https://www.influxdata.com/products/influxdb/
Official documentation: https://docs.influxdata.com/influxdb/v1.8/
Configuration file documentation: https://docs.influxdata.com/influxdb/v1/administration/config/
Getting started: https://docs.influxdata.com/influxdb/v1.8/introduction/get-started/
PostgreSQL
PostgreSQL is a persistent advanced object-relational database server, used in similar scenarios as MariaDB.

While the Debian package by ships PostgreSQL with an active TCP/IP listener, though on localhost only, when installed via DietPi-Software this is disabled by default. We recommend using the UNIX domain socket in /run/postgresql to connect to the database, which has performance benefits. When TCP/IP connections are required, best practice is to create an override config like /etc/postgresql/*/main/conf.d/99local.conf and setting the listening address:
listen_addresses = 'localhost'
Replace localhost with an actual IP address to allow remote access or with * to all access via all LAN and public IP addresses and domain names.
When installed via DietPi-Software, the actual database files are stored in /mnt/dietpi_userdata/postgresql, so that it can easily moved to an external drive, together with other DietPi userdata. For backwards-compatibility, a symlink is created at /var/lib/postgresql.
Directories
- Config directory:
/etc/postgresql/*/main
with the asterisk*being the PostgreSQL version number, e.g.11or13 - Main config file:
/etc/postgresql/*/main/postgresql.conf - DietPi config override:
/etc/postgresql/*/main/conf.d/00dietpi.conf
Configuration override
To add or change settings, best practice is to create a new override configuration, e.g.:
/etc/postgresql/*/main/conf.d/99local.conf
For changes to take effect, the service needs to be reloaded:
systemctl reload postgresql
Since PostgreSQL runs as systemd service, it can be controlled with the following commands:
systemctl status postgresql
systemctl stop postgresql
systemctl start postgresql
systemctl restart postgresql
Reload configuration:
systemctl reload postgresql
Service logs are done to the system journal an can be viewed via:
journalctl -u postgresql
The server itself by default logs to a file:
cat /var/log/postgresql/postgresql-*-main.log
Since PostgreSQL is installed via APT, it can be updated via:
apt install postgresql
Official website: https://www.postgresql.org/
Official documentation: https://www.postgresql.org/docs/
Source code: https://git.postgresql.org/gitweb/?p=postgresql.git
License: PostgreSQL Licence
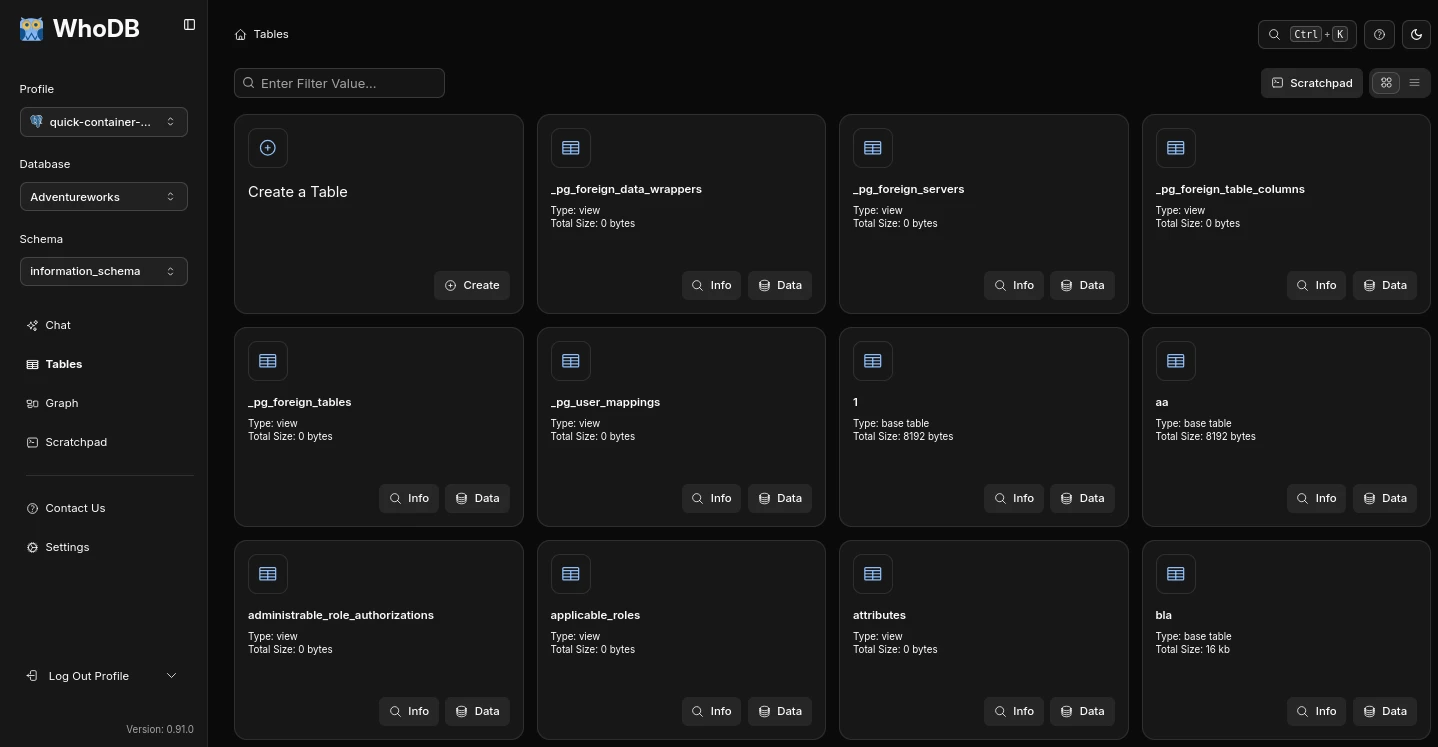
WhoDB
WhoDB is a database management tool with an AI-powered chat interface. It supports PostgreSQL, MySQL, SQLite3, MongoDB, Redis, MariaDB, Elastic Search and ClickHouse — all through a single clean web interface.
- URL =
http://<your.IP>:8091
Using <hostname>.local instead of using <your.IP> (Avahi-Daemon)
By installing Avahi-Daemon, the web interface can be accessed with <hostname>.local (default: dietpi.local) instead of using <your.IP>. See the Avahi-Daemon documentation for details.
Directories
- Data directory:
/mnt/dietpi_userdata/whodb - Environment file:
/mnt/dietpi_userdata/whodb/whodb.env
Service configuration
The service is configured via variables in the environment file:
/mnt/dietpi_userdata/whodb/whodb.env
The file is pre-populated with the following options:
Server
| Variable | Default | Description |
|---|---|---|
PORT | 8091 | TCP port WhoDB listens on |
WHODB_LOG_LEVEL | warning | Log level: debug, info, warning, error, none |
WHODB_LOG_FILE | (unset) | Log file path for non-HTTP logs. When unset, logs go to stdout (journal via systemd) |
WHODB_ACCESS_LOG_FILE | (unset) | Log file path for HTTP access logs. When unset, logs go to stdout (journal via systemd) |
WHODB_ALLOWED_ORIGINS | (unset) | Comma-separated CORS origins (defaults to all origins) |
Database connection profiles
Database connections can be configured via environment variables in two formats:
# Array format — multiple connections in a single variable
WHODB_MYSQL='[{"alias":"prod","host":"localhost","user":"user","password":"password","database":"mysql","port":"3306"},{"alias":"dev","host":"localhost","user":"user","password":"secret","database":"test_db","port":"3306"}]'

# Numbered format — one connection per variable
WHODB_POSTGRES_1='{"alias":"local","host":"localhost","user":"user","password":"secret","database":"test_db","port":"5432"}'
WHODB_POSTGRES_2='{"alias":"staging","host":"staging.example.com","user":"user","password":"secret","database":"app","port":"5432"}'
If the variable name does not end in a number, the value must be a JSON array of connections. If it ends in a number (e.g. _1, _2), the value is a single JSON object. Each connection object supports the fields alias, host, user, password, database and port.
For a full list of all environment variables, including AI provider configuration and advanced connection options, see the official WhoDB documentation.
All options except PORT and WHODB_LOG_LEVEL are commented out by default. To apply changes, restart the service:
systemctl restart whodb
Since WhoDB runs as systemd service, it can be controlled with the following commands:
systemctl status whodb
systemctl stop whodb
systemctl start whodb
systemctl restart whodb
Logs are written to the system journal:
journalctl -u whodb
You can easily update WhoDB by reinstalling it. Your settings are preserved:
dietpi-software reinstall 214
Website: clidey/whodb
Official documentation: https://docs.whodb.com/
License: Apache 2.0