BitTorrent / Download Tools
Overview
- Transmission - Lightweight BitTorrent server with web interface
- Deluge - Alternative BitTorrent server with web interface
- qBittorrent - Lightweight and fast (C++) BitTorrent server with web interface
- rTorrent - BitTorrent server with ruTorrent web interface
- Aria2 - Download manager with web interface
- SABnzbd - NZB download manager with web interface
- Medusa - Automatically download TV shows
- Sonarr - Automatically download TV shows
- Radarr - Automatically download Movies
- Bazarr - Automatically download Subtitles for Sonarr/Radarr
- Lidarr - Automatically download Music
- Readarr - Automatically download Ebooks
- Prowlarr - Indexer manager & proxy for PVR
- Jackett - API Support for your favourite torrent trackers
- NZBGet - NZB download manager with web interface
- HTPC Manager - combines all your favourite software into one slick interface
- youtube-dl - download videos from YouTube and other sites
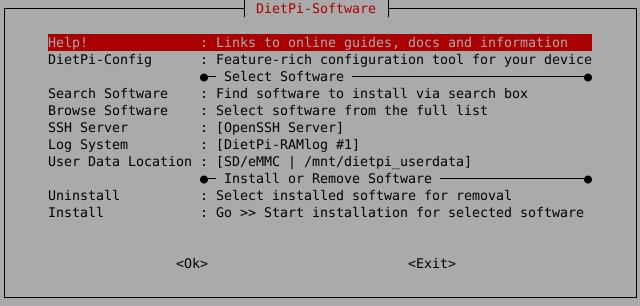
How do I run DietPi-Software and install optimised software items?
To install any of the DietPi optimised software items listed below run from the command line:
dietpi-software
Choose Browse Software and select one or more items. Finally select Install.
DietPi will do all the necessary steps to install and start these software items.
To see all the DietPi configurations options, review the DietPi Tools section.
Return to the Optimised Software list
Transmission
Transmission, the lightweight web interface BitTorrent server that allows you to download BitTorrent files.
USB dedicated hard drive highly recommended
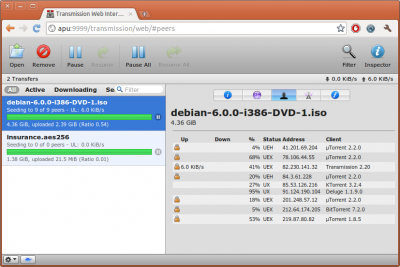
The web interface is accessible via port 9091:
- URL:
http://<your.IP>:9091 - Username:
root - Password:
<your global password>
Make sure you have one of DietPi’s File Servers installed.
Folders used by Transmission:
- folder accessed via file server:
downloads - local folder:
/mnt/dietpi_userdata/downloads
DietPi sets up Transmission to use port forwarding on the router.
In rare cases this won’t work with some routers and you will need to manually setup port forwarding:
- Use TCP+UDP with the default DietPi transmission port of 51413.
- Point this port to the IP address of your DietPi system.
Once port forwarding is setup, simply complete the following to update transmission:
- Load up the transmission web interface
- Click the
settingsbutton (bottom left spanner) - Click the
networktab - Where is says
Use port forwarding on my router, uncheck this box.
Simply close and reopen this screen to refresh the port status.
Although we enable forced encryption on all our BitTorrent clients, if you wish to ensure complete privacy and piece of mind for all your downloaded content, using a VPN is critical. We highly recommend NordVPN as it offers unlimited bandwidth, zero logging and up to 6 devices on a single account. It can be easily setup using our DietPi-VPN tool.![]()
Deluge
Deluge, the web interface BitTorrent server that allows you to download BitTorrent files. This Python coded BitTorrent server is an alternative to the Lightweight Transmission option.
USB dedicated hard drive highly recommended
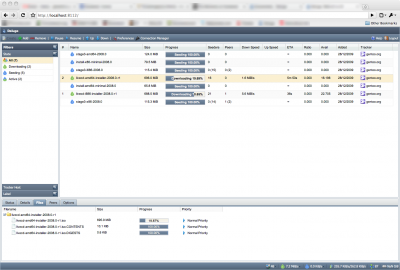
The web interface is accessible via port 8112:
- URL:
http://<your.IP>:8112 - Password:
<your global password>
Select the host 127.0.0.1 and click connect.
sudo -u debian-deluged deluge-console
- Open up Deluge client on your other system
- Select
Preferences>Interfaceand disable (uncheck)Classic Mode. Save changes and restart Deluge - When the connection manager appears, select
Add. - Enter the following details:
- Hostname: Your device’s IP address (e.g.: 192.168.0.100)
- Port: 58846
- Username:
root - Password:
<your global password>
- Simply select and connect to the new entry
Make sure you have one of DietPi’s File Servers installed.
Folders used by Deluge:
- Folder accessed via file server:
downloads - Local folder:
/mnt/dietpi_userdata/downloads
Although we enable forced encryption on all our BitTorrent clients, if you wish to ensure complete privacy and piece of mind for all your downloaded content, using a VPN is critical. We highly recommend NordVPN as it offers unlimited bandwidth, zero logging and up to 6 devices on a single account. It can be easily setup using our DietPi-VPN tool.![]()
qBittorrent
qBittorrent is a lightweight BitTorrent server with a slick web interface. As its coded in C++ (Qt), it offers excellent performance on any device.
USB dedicated hard drive highly recommended
The web interface is accessible via port 1340:
- URL:
http://<your.IP>:1340 - Username:
qbittorrent - Password:
<your global password>(default:dietpi)
NB: Since qBittorrent v4.2.0 (Debian Bullseye), a new safer hash algorithm is used, which we are currently not able to replicate dynamically for the global software password with common shell tools. Until then, for your first login the password isdietpi. Please change it directly after first login: MichaIng/DietPi#5078
Make sure you have one of DietPi’s File Servers installed.
Folders used by qBittorrent:
- Folder accessed via file server:
downloads - Local folder:
/mnt/dietpi_userdata/downloads
Before activating search plugins within qBittorrent, you would need to install Python first. Afterwards you can search and activate the plugins.
Although we enable forced encryption on all our BitTorrent clients, if you wish to ensure complete privacy and piece of mind for all your downloaded content, using a VPN is critical. We highly recommend NordVPN as it offers unlimited bandwidth, zero logging and up to 6 devices on a single account. It can be easily setup using our DietPi-VPN tool.![]()
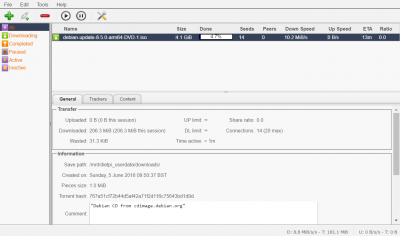
rTorrent
rTorrent is a BitTorrent server. ruTorrent is also installed to allow for web interface access and control.
Also installs:
- Webserver
USB dedicated hard drive highly recommended

- URL:
http://<your.IP>/rutorrent - Username:
root - Password:
<your global password>(default:dietpi)
The login credentials can be changed, depending on the webserver choice, with the following commands:
# With Lighttpd (default):
echo "username:rtorrent:$(echo -n 'username:rtorrent:password' | md5sum | mawk '{print $1}')" > /etc/.rutorrent-htaccess

# With Apache:
htpasswd -c /etc/.rutorrent-htaccess

# With Nginx:
echo "username:$(openssl passwd -apr1 'password')" > /etc/.rutorrent-htaccess
Make sure you have one of DietPi’s File Servers installed.
Folders used by rTorrent:
- Folder accessed via file server:
downloads - Local folder:
/mnt/dietpi_userdata/downloads
Important note:
rTorrent creates a lock file based on the systems hostname. When the hostname is changed (e.g. via dietpi-config > Security Options), then the old lock file needs to be removed to allow rTorrent creating a new one based on the new hostname:
rm /mnt/dietpi_userdata/downloads/.session/rtorrent.lock
systemctl restart rtorrent
rTorrent by default listens on the UNIX domain socket at /mnt/dietpi_userdata/downloads/.session/rpc.socket. The webserver is configured to proxy http://<your.IP>/RPC2 calls to the UNIX socket, but HTTP authentication is enforced for that URL.
Although we enable forced encryption on all our BitTorrent clients, if you wish to ensure complete privacy and piece of mind for all your downloaded content, using a VPN is critical. We highly recommend NordVPN as it offers unlimited bandwidth, zero logging and up to 6 devices on a single account. It can be easily setup using our DietPi-VPN tool.![]()
To view rTorrent service logs, run the following command:
journalctl -u rtorrent
Issues with the web interface can be debugged via webserver logs:
# With Lighttpd (default):
journalctl -u lighttpd
more /var/log/lighttpd/error.log

# With Apache:
journalctl -u apache2
more /var/log/apache2/error.log

# With Nginx:
journalctl -u nginx
more /var/log/nginx/error.log
rTorrent itself is installed via APT, and hence can be updated by running the following commands:
apt update
apt install rtorrent
If the ruTorrent web interface shall be updated as well, easiest is a reinstall:
dietpi-software reinstall 107
Official website: https://rakshasa.github.io/rtorrent/
Official documentation: https://github.com/rakshasa/rtorrent/wiki
Wikipedia: https://wikipedia.org/wiki/RTorrent
Source code: rakshasa/rtorrent
License: GPLv2
ruTorrent documentation: https://github.com/Novik/ruTorrent/wiki
ruTorrent source code: Novik/ruTorrent
ruTorrent license: GPLv3
Aria2
Download manager, with a slick web UI interface. Also supports BitTorrent downloads.
Also installs:
- Webserver
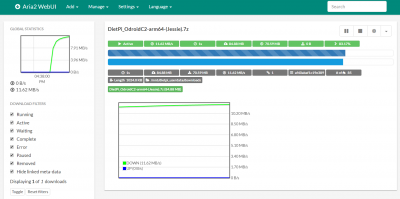
- URL:
http://<your.IP>/aria2/docs - rpc secret password:
<your global password>
This needs to be entered in the following location, in the web interface:
SettingsConnection Settings- Enter the rpc secret password into the
Enter the secret token (optional):box, then save changes
Make sure you have one of DietPi’s File Servers installed.
Folders used by Aria2:
- Folder accessed via file server:
downloads - Local folder:
/mnt/dietpi_userdata/downloads
Please note, the aria2-webui does not support saving settings after session shutdown, this is a known limitation with the software, please use the file aria2.conf to make changes:
- Stop services with
systemctl stop aria2 - Edit the following configuration file:
/mnt/dietpi_userdata/aria2/aria2.conf, making your required changes. - Start services with
systemctl start aria2
Full list of aria2.conf settings: https://aria2.github.io/manual/en/html/aria2c.html
Although we enable forced encryption on all our BitTorrent clients, if you wish to ensure complete privacy and piece of mind for all your downloaded content, using a VPN is critical. We highly recommend NordVPN as it offers unlimited bandwidth, zero logging and up to 6 devices on a single account. It can be easily setup using our DietPi-VPN tool.![]()
SABnzbd
NZB download manager with web interface.

The web interface uses port 8080:
- URL:
http://<your.IP>:8080/sabnzbd
In some instances, initial config generation during installation isn’t successful.
If you experience this, please run the following commands to reapply config settings for DietPi (copy and paste all).
systemctl stop sabnzbd
G_CONFIG_INJECT 'log_level[[:blank:]]+=' 'log_level = 0' /etc/sabnzbd/sabnzbd.ini # Warnings and errors only
G_CONFIG_INJECT 'auto_browser[[:blank:]]+=' 'auto_browser = 0' /etc/sabnzbd/sabnzbd.ini
G_CONFIG_INJECT 'host[[:blank:]]+=' 'host = 0.0.0.0' /etc/sabnzbd/sabnzbd.ini
G_CONFIG_INJECT 'admin_dir[[:blank:]]+=' 'admin_dir = /mnt/dietpi_userdata/downloads/sabnzbd_admin' /etc/sabnzbd/sabnzbd.ini
G_CONFIG_INJECT 'download_dir[[:blank:]]+=' 'download_dir = /mnt/dietpi_userdata/downloads/incomplete' /etc/sabnzbd/sabnzbd.ini
G_CONFIG_INJECT 'complete_dir[[:blank:]]+=' 'complete_dir = /mnt/dietpi_userdata/downloads/complete' /etc/sabnzbd/sabnzbd.ini
G_CONFIG_INJECT 'nzb_backup_dir[[:blank:]]+=' 'nzb_backup_dir = /mnt/dietpi_userdata/downloads/sabnzbd_nzb_backup' /etc/sabnzbd/sabnzbd.ini
G_CONFIG_INJECT 'permissions[[:blank:]]+=' 'permissions = 0775' /etc/sabnzbd/sabnzbd.ini
G_CONFIG_INJECT 'refresh_rate[[:blank:]]+=' 'refresh_rate = 2' /etc/sabnzbd/sabnzbd.ini
systemctl start sabnzbd
Make sure you have one of DietPi’s File Servers installed.
Folders used by SABnzbd:
- Folder accessed via file server:
downloads/complete - Local folder:
/mnt/dietpi_userdata/downloads/complete
Requires compile install, please see: https://sabnzbd.org/wiki/installation/multicore-par2
The steps require a Git client and build tools. You can install these running next command in the terminal:
apt install git build-essential
Although we enable forced encryption on all our BitTorrent clients, if you wish to ensure complete privacy and piece of mind for all your downloaded content, using a VPN is critical. We highly recommend NordVPN as it offers unlimited bandwidth, zero logging and up to 6 devices on a single account. It can be easily setup using our DietPi-VPN tool.![]()
journalctl -u sabnzbd
dietpi-software reinstall 139
Medusa
Automatically download your favorite TV shows, as they become available.
Searches both Bit Torrent and Usenet, has a feature to automatically download and organise the download, with your favorite Bit Torrent app.
A download client is required
Transmission BitTorrent server is recommended to enable automatic downloads

The web interface is accessible via port 8081:
- URL:
http://<your.IP>:8081
Once registered and logged in with Medusa:
- Click the
Showsbutton (top of screen) - Click the
Add Showsoption. - Select the
Add new showoption - Input a TV show to find in the search box, select one of the entries from the search results, then click
Next - Make sure the parent folder is
/mnt/dietpi_userdata/downloads, then clickNext - Finally, click the
Add showbutton
- Click the
Settings“cog” button (the top right hand corner of the screen) - Select
Search providers - Select and tick the BitTorrent sites you would like enable. When Medusa searches for a TV show, these sites will then be searched for the available torrent.
- Finally click
Save changes(bottom of the page)
To use this feature, you will need a supported BitTorrent server installed. All of the BitTorrent servers available in dietpi-software are supported by Medusa.
- Click the
Settings“cog” button (the top right hand corner of the screen) - Select
Search settings - Select
Torrent searchtab. - Make sure the entry enable torrent search providers is enabled (ticked)
- Under the section
Send .torrent files to, select the BitTorrent program you have installed, then enter the details. - Use the
Test connectionbutton at the bottom of the page to ensure Medusa can connect to your BitTorrent server. - Finally click
Save changes(bottom of the page)
Although we enable forced encryption on all our BitTorrent clients, if you wish to ensure complete privacy and piece of mind for all your downloaded content, using a VPN is critical. We highly recommend NordVPN as it offers unlimited bandwidth, zero logging and up to 6 devices on a single account. It can be easily setup using our DietPi-VPN tool.![]()
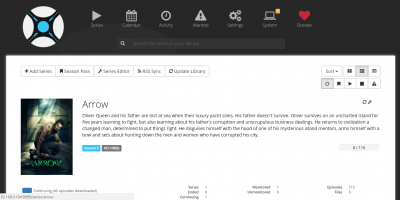
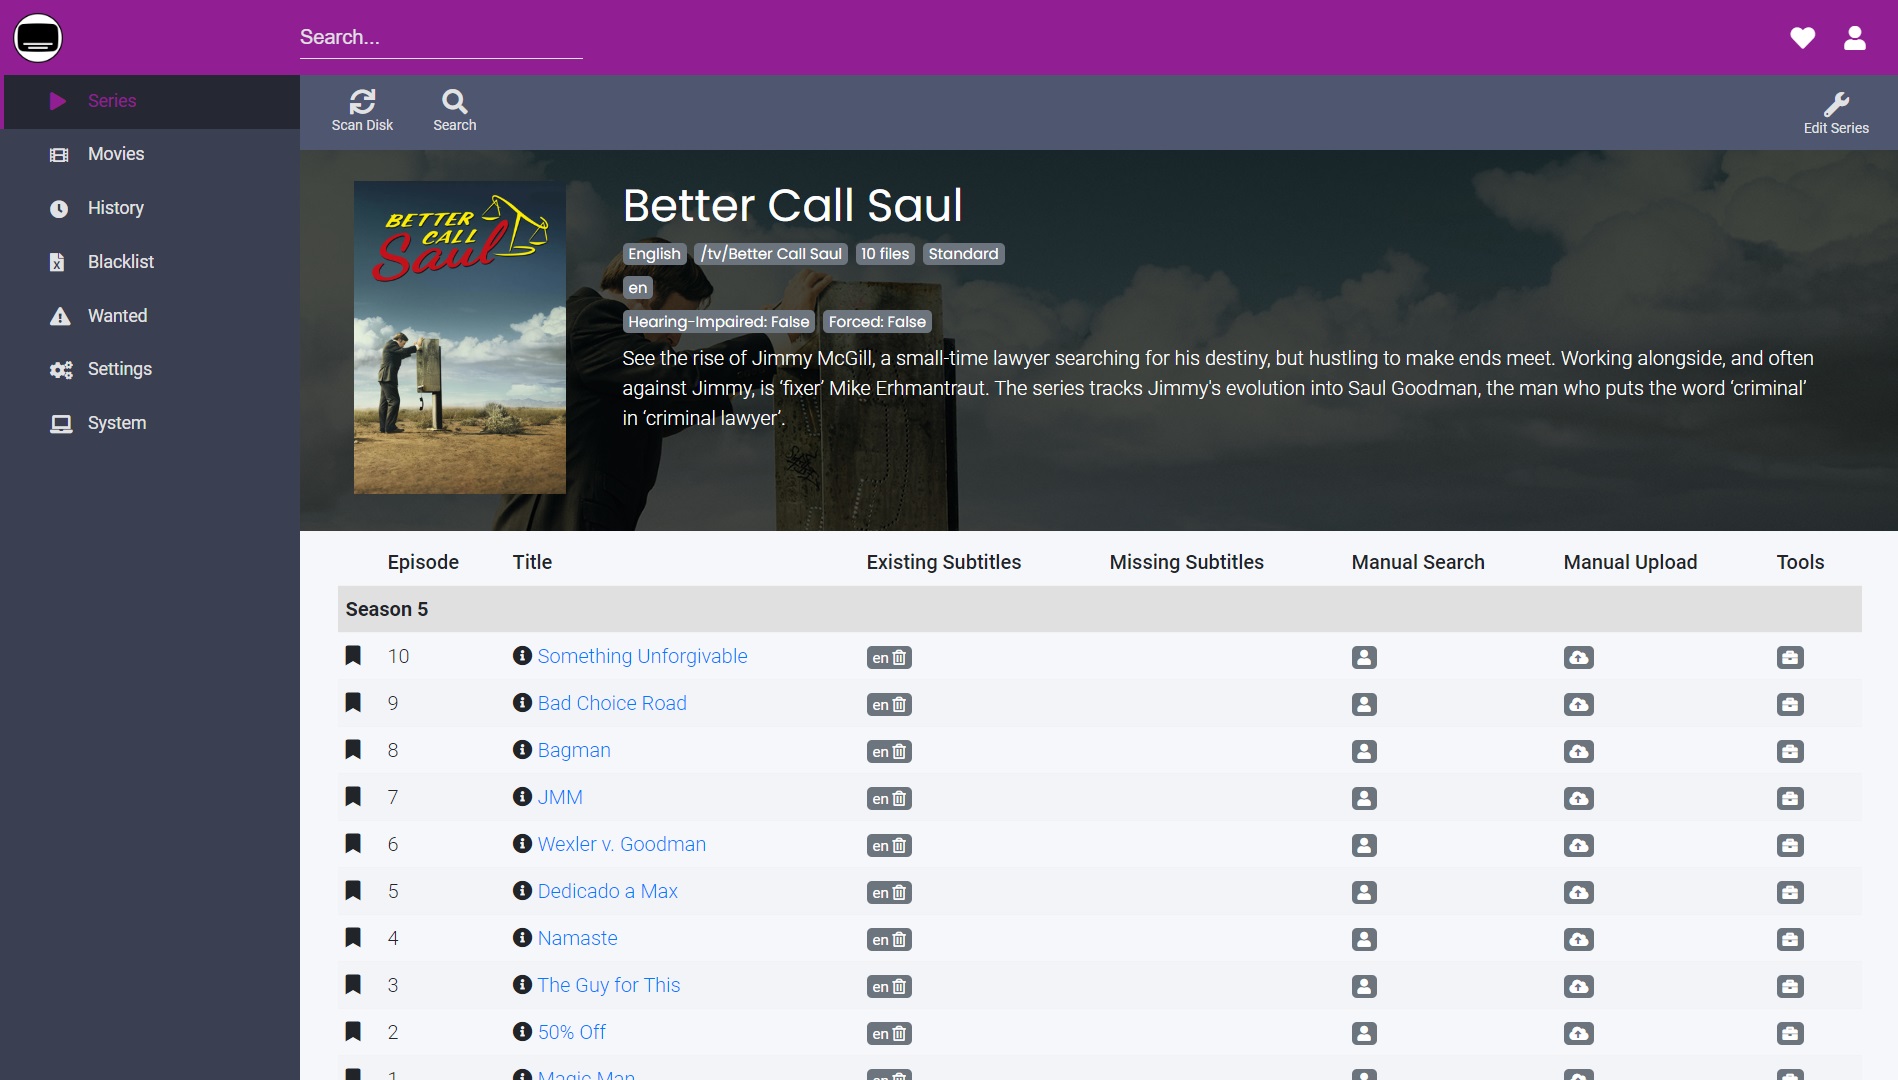
Sonarr
Automatically download your favorite TV shows, as they become available.
A download client is required
Transmission BitTorrent server is recommended to enable automatic downloads
The web interface is accessible via port 8989:
- URL:
http://<your.IP>:8989
Before you can add TV shows, you’ll need to select a search indexer to use from the web interface:
- Simply go to
Settings>Indexerthen choose at least one indexer.
Setup your download client:
- Simply go to
Settings>Download Client, select your installed download client and enter required credentials.
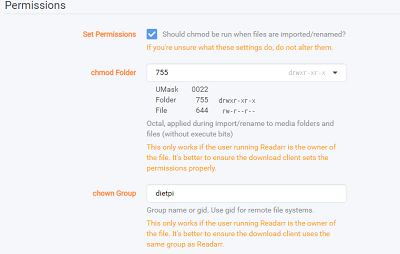
Setup file creation mask:
If you require write access from other applications (e.g. Plex subtitle downloads), you’ll also need to set the file/folder creation mask to allow this.
- In the Sonarr web interface, select
Settings - Toggle to
Advanced settingsslider (enable it) - Under
Media Managementtab, scroll down to the bottom of the page under Permissions, set the following values:
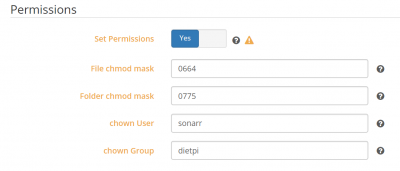
- Save changes
- Simply select
Series>Add TV Show - Type a name of the show you wish to find
- Once found, under path use the following location
/mnt/dietpi_userdata/downloads - Change any further options (such as video quality) if needed, then select
+
By default Sonarr has strict permissions to only access download and media directories inside /mnt/. If you need to use a different location, please do the following:
- Run
dietpi-servicesfrom console - Select
sonarr - Select
Edit - Uncomment (remove leading
#) the line, starting withReadWritePaths= - Add your custom path to the end of this line, separated by one space
- Press Ctrl+O buttons to save and Ctrl+X to exit
Link the Sonarr info/settings database to RAM to increase access performance, reduce disk I/O and avoid constant external HDD spinning due to the very regular access to these files: https://dietpi.com/forum/t/dietpi-arr-to-ram-link-sonarr-radarr-lidarr-database-files-to-ram/3120
Although we enable forced encryption on all our BitTorrent clients, if you wish to ensure complete privacy and piece of mind for all your downloaded content, using a VPN is critical. We highly recommend NordVPN as it offers unlimited bandwidth, zero logging and up to 6 devices on a single account. It can be easily setup using our DietPi-VPN tool.![]()
- Service:
journalctl -u sonarr - Daemon:
/var/log/bazarr/sonarr.log
- Use the internal web based updater
YouTube video tutorial: How to install and configure Sonarr on Raspberry Pi with DietPi
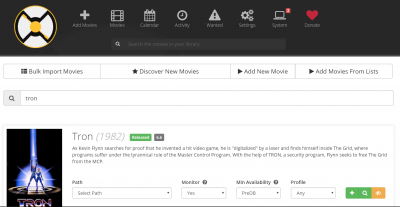
Radarr
Automatically download your favorite movies, as they become available.
A download client is required
Transmission BitTorrent server is recommended to enable automatic downloads
The web interface is accessible via port 7878:
- URL:
http://<your.IP>:7878
Before you can add movies, you’ll need to select a search indexer to use from the web interface:
- Simply go to
Settings>Indexerthen choose at least one indexer.
Setup your download client:
- Simply go to
Settings>Download Client, select your installed download client and enter required credentials.
Setup file creation mask:
If you require write access from other applications (e.g. Plex subtitle downloads), you’ll also need to set the file/folder creation mask to allow this.
- In the Radarr web interface, select
Settings - Toggle to
Advanced settings(enable it) - Under
Media Managementtab, scroll down to the bottom of the page under Permissions, set the following values:
- Save changes
- Simply select
Add New Movies - Type a name of the movie you wish to find
- Once found, under
pathuse the following location/mnt/dietpi_userdata/downloads - Change any further options (such as video quality) if needed, then select
+
By default Radarr has strict permissions to only access download and media directories inside /mnt/. If you need to use a different location, please do the following:
- Run
dietpi-servicesfrom console - Select
radarr - Select
Edit - Uncomment (remove leading
#) the line, starting withReadWritePaths= - Add your custom path to the end of this line, separated by one space
- Press Ctrl+O buttons to save and Ctrl+X to exit
Link the Radarr info/settings database to RAM to increase access performance, reduce disk I/O and avoid constant external HDD spinning due to the very regular access to these files: https://dietpi.com/forum/t/dietpi-arr-to-ram-link-sonarr-radarr-lidarr-database-files-to-ram/3120
Although we enable forced encryption on all our BitTorrent clients, if you wish to ensure complete privacy and piece of mind for all your downloaded content, using a VPN is critical. We highly recommend NordVPN as it offers unlimited bandwidth, zero logging and up to 6 devices on a single account. It can be easily setup using our DietPi-VPN tool.![]()
- Service:
journalctl -u radarr - Daemon:
/var/log/bazarr/radarr.log
- Use the internal web based updater
YouTube video tutorial: How to install and configure Radarr on Raspberry Pi with DietPi
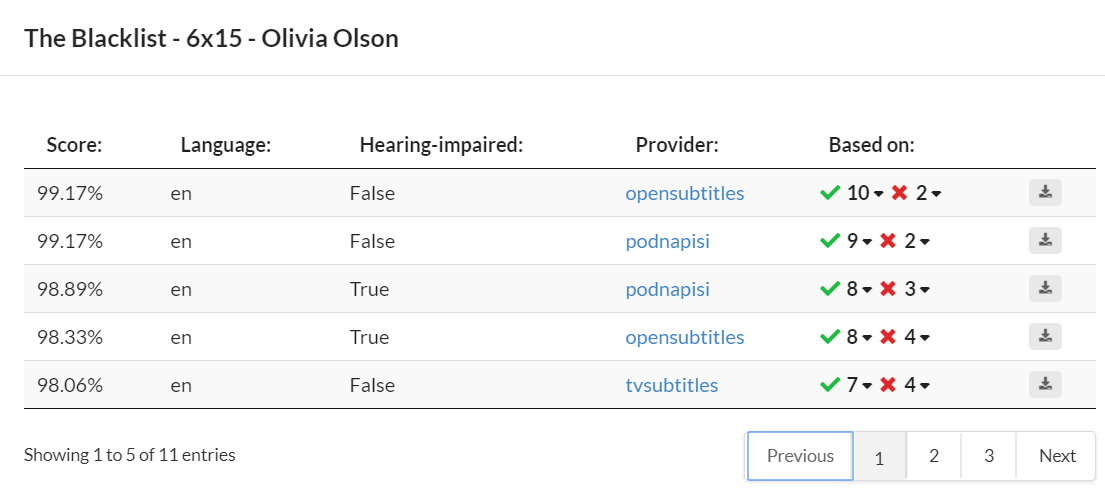
Bazarr
Bazarr is a companion application to Sonarr and Radarr that manages and downloads subtitles based on your requirements.
Key features:
- Automatic search Search automatically for missing subtitles and download them as soon as they become available in your desired language.
- Manual search Find all the matching subtitles, choose the one you want and download it to your media directory with the proper name to be used by your media player.
- Subtitles upgrade Search for matching subtitles on a regular basis and upgrade the one you previously downloaded if a better one is found.
The web interface is accessible via port 6767:
- URL:
http://<your.IP>:6767
- Install directory:
/opt/bazarr - Data directory:
/mnt/dietpi_userdata/bazarr - Bazarr configuration file:
/mnt/dietpi_userdata/bazarr/config/config.ini
- Service:
journalctl -u bazarr - Daemon:
/var/log/bazarr/bazarr.log
- Use the internal web based updater
Official documentation: https://github.com/morpheus65535/bazarr/wiki
Source code: morpheus65535/bazarr
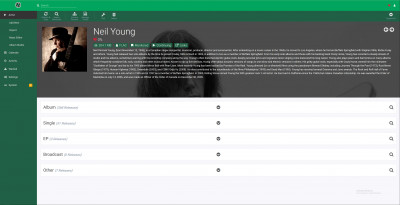
Lidarr
Automatically download your favorite music.
A download client is required
Transmission BitTorrent server is recommended to enable automatic downloads
The web interface is accessible via port 8686:
- URL:
http://<your.IP>:8686
Before you can music, you’ll need to select a search indexer to use from the web interface:
- Simply go to
Settings>Indexerthen choose at least one indexer.
Setup your download client:
- Simply go to
Settings>Download Client, select your installed download client and enter required credentials.
Setup file creation mask:
If you require write access from other applications (e.g. Plex subtitle downloads), you’ll also need to set the file/folder creation mask to allow this.
- In the Sonarr web interface, select
Settings - Toggle to
Advanced settingsslider (enable it) Under
Media Managementtab, scroll down to the bottom of the page under Permissions, set the following values:
Save changes
- Simply select
Artist>Add New - Type a name of the artist you wish to find
- Once found, under root folder, use the following location
/mnt/dietpi_userdata/downloads - Change any other settings as required, then select
Add
By default Lidarr has strict permissions to only access download and media directories inside /mnt/. If you need to use a different location, please do the following:
- Run
dietpi-servicesfrom console - Select
lidarr - Select
Edit - Uncomment (remove leading
#) the line, starting withReadWritePaths= - Add your custom path to the end of this line, separated by one space
- Press Ctrl+O buttons to save and Ctrl+X to exit
Link the Lidarr info/settings database to RAM to increase access performance, reduce disk I/O and avoid constant external HDD spinning due to the very regular access to these files: https://dietpi.com/forum/t/dietpi-arr-to-ram-link-sonarr-radarr-lidarr-database-files-to-ram/3120
Although we enable forced encryption on all our BitTorrent clients, if you wish to ensure complete privacy and piece of mind for all your downloaded content, using a VPN is critical. We highly recommend NordVPN as it offers unlimited bandwidth, zero logging and up to 6 devices on a single account. It can be easily setup using our DietPi-VPN tool.![]()
- Service:
journalctl -u lidarr - Daemon:
/var/log/bazarr/lidarr.log
- Use the internal web based updater
Readarr
Automatically download your favorite ebook, as they become available.
A download client is required
Transmission BitTorrent server is recommended to enable automatic downloads
The web interface is accessible via port 8787:
- URL:
http://<your.IP>:8787
Before you can add ebooks, you’ll need to select a search indexer to use from the web interface:
- Simply go to
Settings>Indexerthen choose at least one indexer.
Setup your download client:
- Simply go to
Settings>Download Client, select your installed download client and enter required credentials.
Setup folder creation mask:
If you require write access from other applications, you’ll also need to set the folder creation mask to allow this.
- In the Readarr web interface, select
Settings - Toggle to
Advanced settings(enable it) - Under
Media Managementtab, scroll down to the bottom of the page under Permissions, set the following values:
- Save changes
- Simply select
Add New Author - Type a name of the ebook or author you wish to find
- Once found, under
pathuse the following location/mnt/dietpi_userdata/downloads - Change any further options if needed, then select
Add
By default Readarr has strict permissions to only access download and media directories inside /mnt/. If you need to use a different location, please do the following:
- Run
dietpi-servicesfrom console - Select
readarr - Select
Edit - Uncomment (remove leading
#) the line, starting withReadWritePaths= - Add your custom path to the end of this line, separated by one space
- Press Ctrl+O buttons to save and Ctrl+X to exit
The install, config and data directory is located at:
- Install directory:
/opt/readarr - Data directory:
/mnt/dietpi_userdata/readarr - Readarr configuration file:
/mnt/dietpi_userdata/readarr/config.xml
Since Readarr runs as systemd service, it can be controlled with the following commands:
systemctl status readarr
systemctl start readarr
systemctl stop readarr
systemctl restart readarr
- Service:
journalctl -u readarr - Daemon:
/var/log/readarr/Readarr.txt
- Use the internal web based updater
Although we enable forced encryption on all our BitTorrent clients, if you wish to ensure complete privacy and piece of mind for all your downloaded content, using a VPN is critical. We highly recommend NordVPN as it offers unlimited bandwidth, zero logging and up to 6 devices on a single account. It can be easily setup using our DietPi-VPN tool.![]()
Official website: https://readarr.com/
Official documentation: https://wiki.servarr.com/readarr
Source code: Readarr/Readarr
License: GPLv3
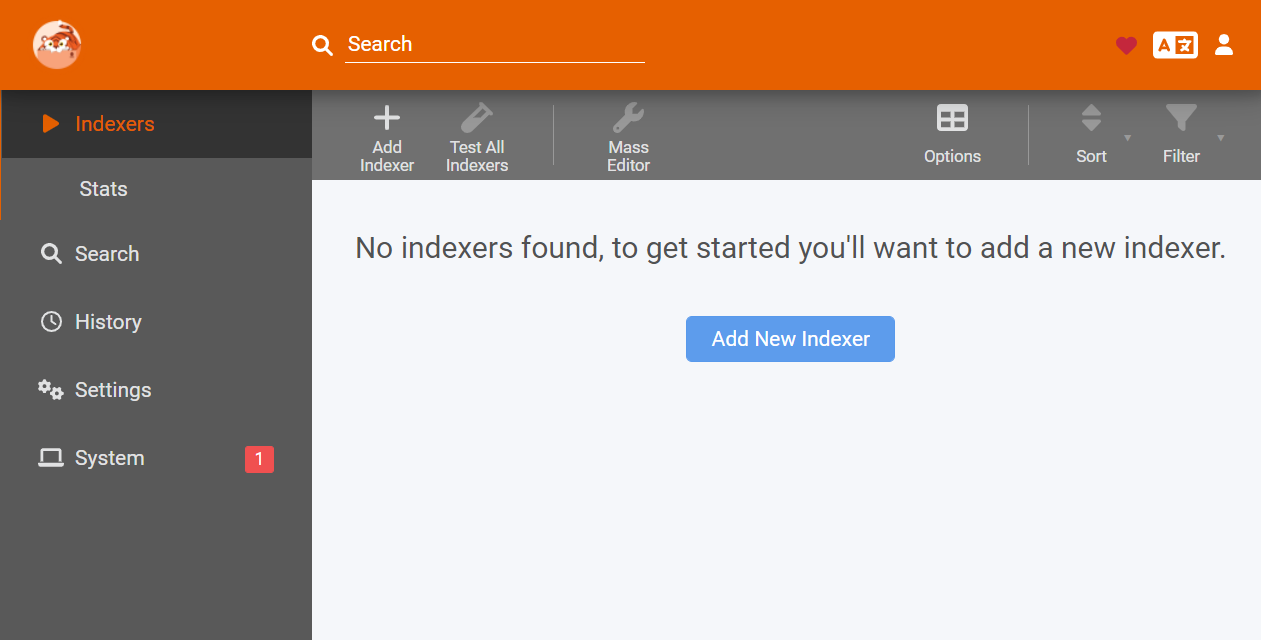
Prowlarr
Prowlarr is an indexer manager/proxy built on the popular *arr .net/reactjs base stack to integrate with your various PVR apps. Prowlarr supports management of both Torrent Trackers and Usenet Indexers. It integrates seamlessly with Lidarr, Mylar3, Radarr, Readarr, and Sonarr offering complete management of your indexers.
The web interface is accessible via port 9696:
- URL:
http://<your.IP>:9696
Although we enable forced encryption on all our BitTorrent clients, if you wish to ensure complete privacy and piece of mind for all your downloaded content, using a VPN is critical. We highly recommend NordVPN as it offers unlimited bandwidth, zero logging and up to 6 devices on a single account. It can be easily setup using our DietPi-VPN tool.![]()
Official website: https://prowlarr.com/
Official documentation: https://wiki.servarr.com/prowlarr
Source code: Prowlarr/Prowlarr
License: GPLv3
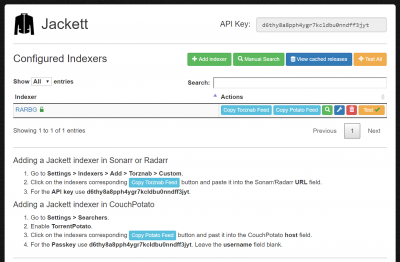
Jackett
Jackett works as a proxy server: it translates queries from apps (Sonarr, Radarr, Lidarr, Medusa) into tracker-site-specific HTTP queries, parses the HTML response, then sends results back to the requesting software. This allows for getting recent uploads (like RSS) and performing searches.
The web interface is accessible via port 9117:
- URL:
http://<your.IP>:9117
Although we enable forced encryption on all our BitTorrent clients, if you wish to ensure complete privacy and piece of mind for all your downloaded content, using a VPN is critical. We highly recommend NordVPN as it offers unlimited bandwidth, zero logging and up to 6 devices on a single account. It can be easily setup using our DietPi-VPN tool.![]()
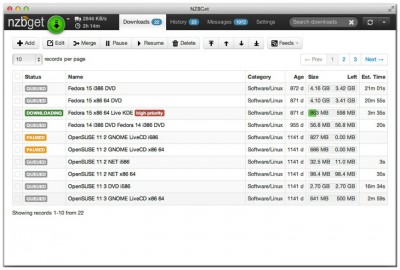
NZBGet
Extremely efficient and fast NZB download manager with web interface. Coded in C++.
The web interface is accessible via port 6789:
- URL:
http://<your.IP>:6789 - Username:
admin - Password:
<your global password>
Make sure you have one of DietPi’s File Servers installed.
Folders used by Transmission:
- Folder accessed via file server:
downloads/complete - Local folder:
/mnt/dietpi_userdata/downloads/complete
NZBGet service logs can be viewed with the following command:
journalctl -u nzbget
dietpi-software reinstall 149
Although we enable forced encryption on all our BitTorrent clients, if you wish to ensure complete privacy and piece of mind for all your downloaded content, using a VPN is critical. We highly recommend NordVPN as it offers unlimited bandwidth, zero logging and up to 6 devices on a single account. It can be easily setup using our DietPi-VPN tool.![]()
HTPC Manager
HTPC Manager combines all your favourite software into one slick interface.
Do all your HTPC tasks without using 5 different interfaces!
The web interface is accessible via port 8085:
- URL:
http://<your.IP>:8085
dietpi-software reinstall 155
youtube-dl
youtube-dl is a command-line program to download videos from YouTube.com and many more sites. See here the full list of supported websites: https://ytdl-org.github.io/youtube-dl/supportedsites.html
This tool could be accessed from the command line
youtube-dl [OPTIONS] URL [URL...]
Read the documentation for more details on the options used: ytdl-org/youtube-dl#options
Website: https://ytdl-org.github.io/youtube-dl/
Documentation: https://github.com/ytdl-org/youtube-dl/blob/master/README.md